You know those projects that just hang out in your head for months and years? You just never pull the trigger?
This is one of those projects.
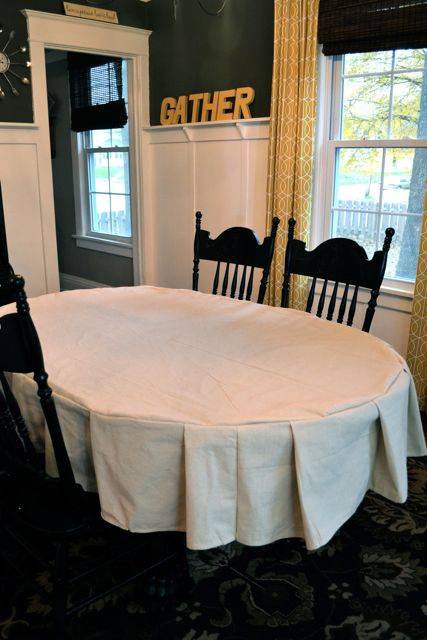
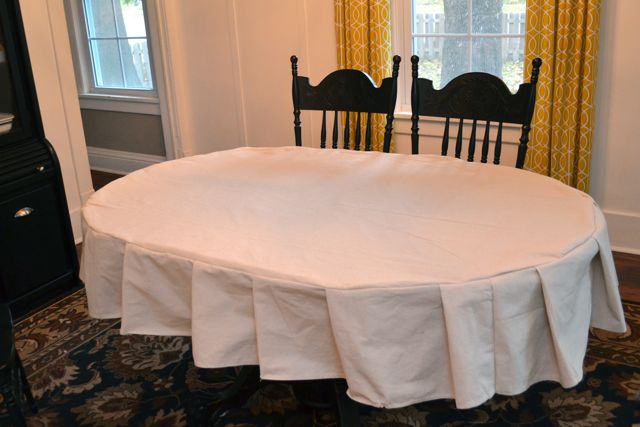
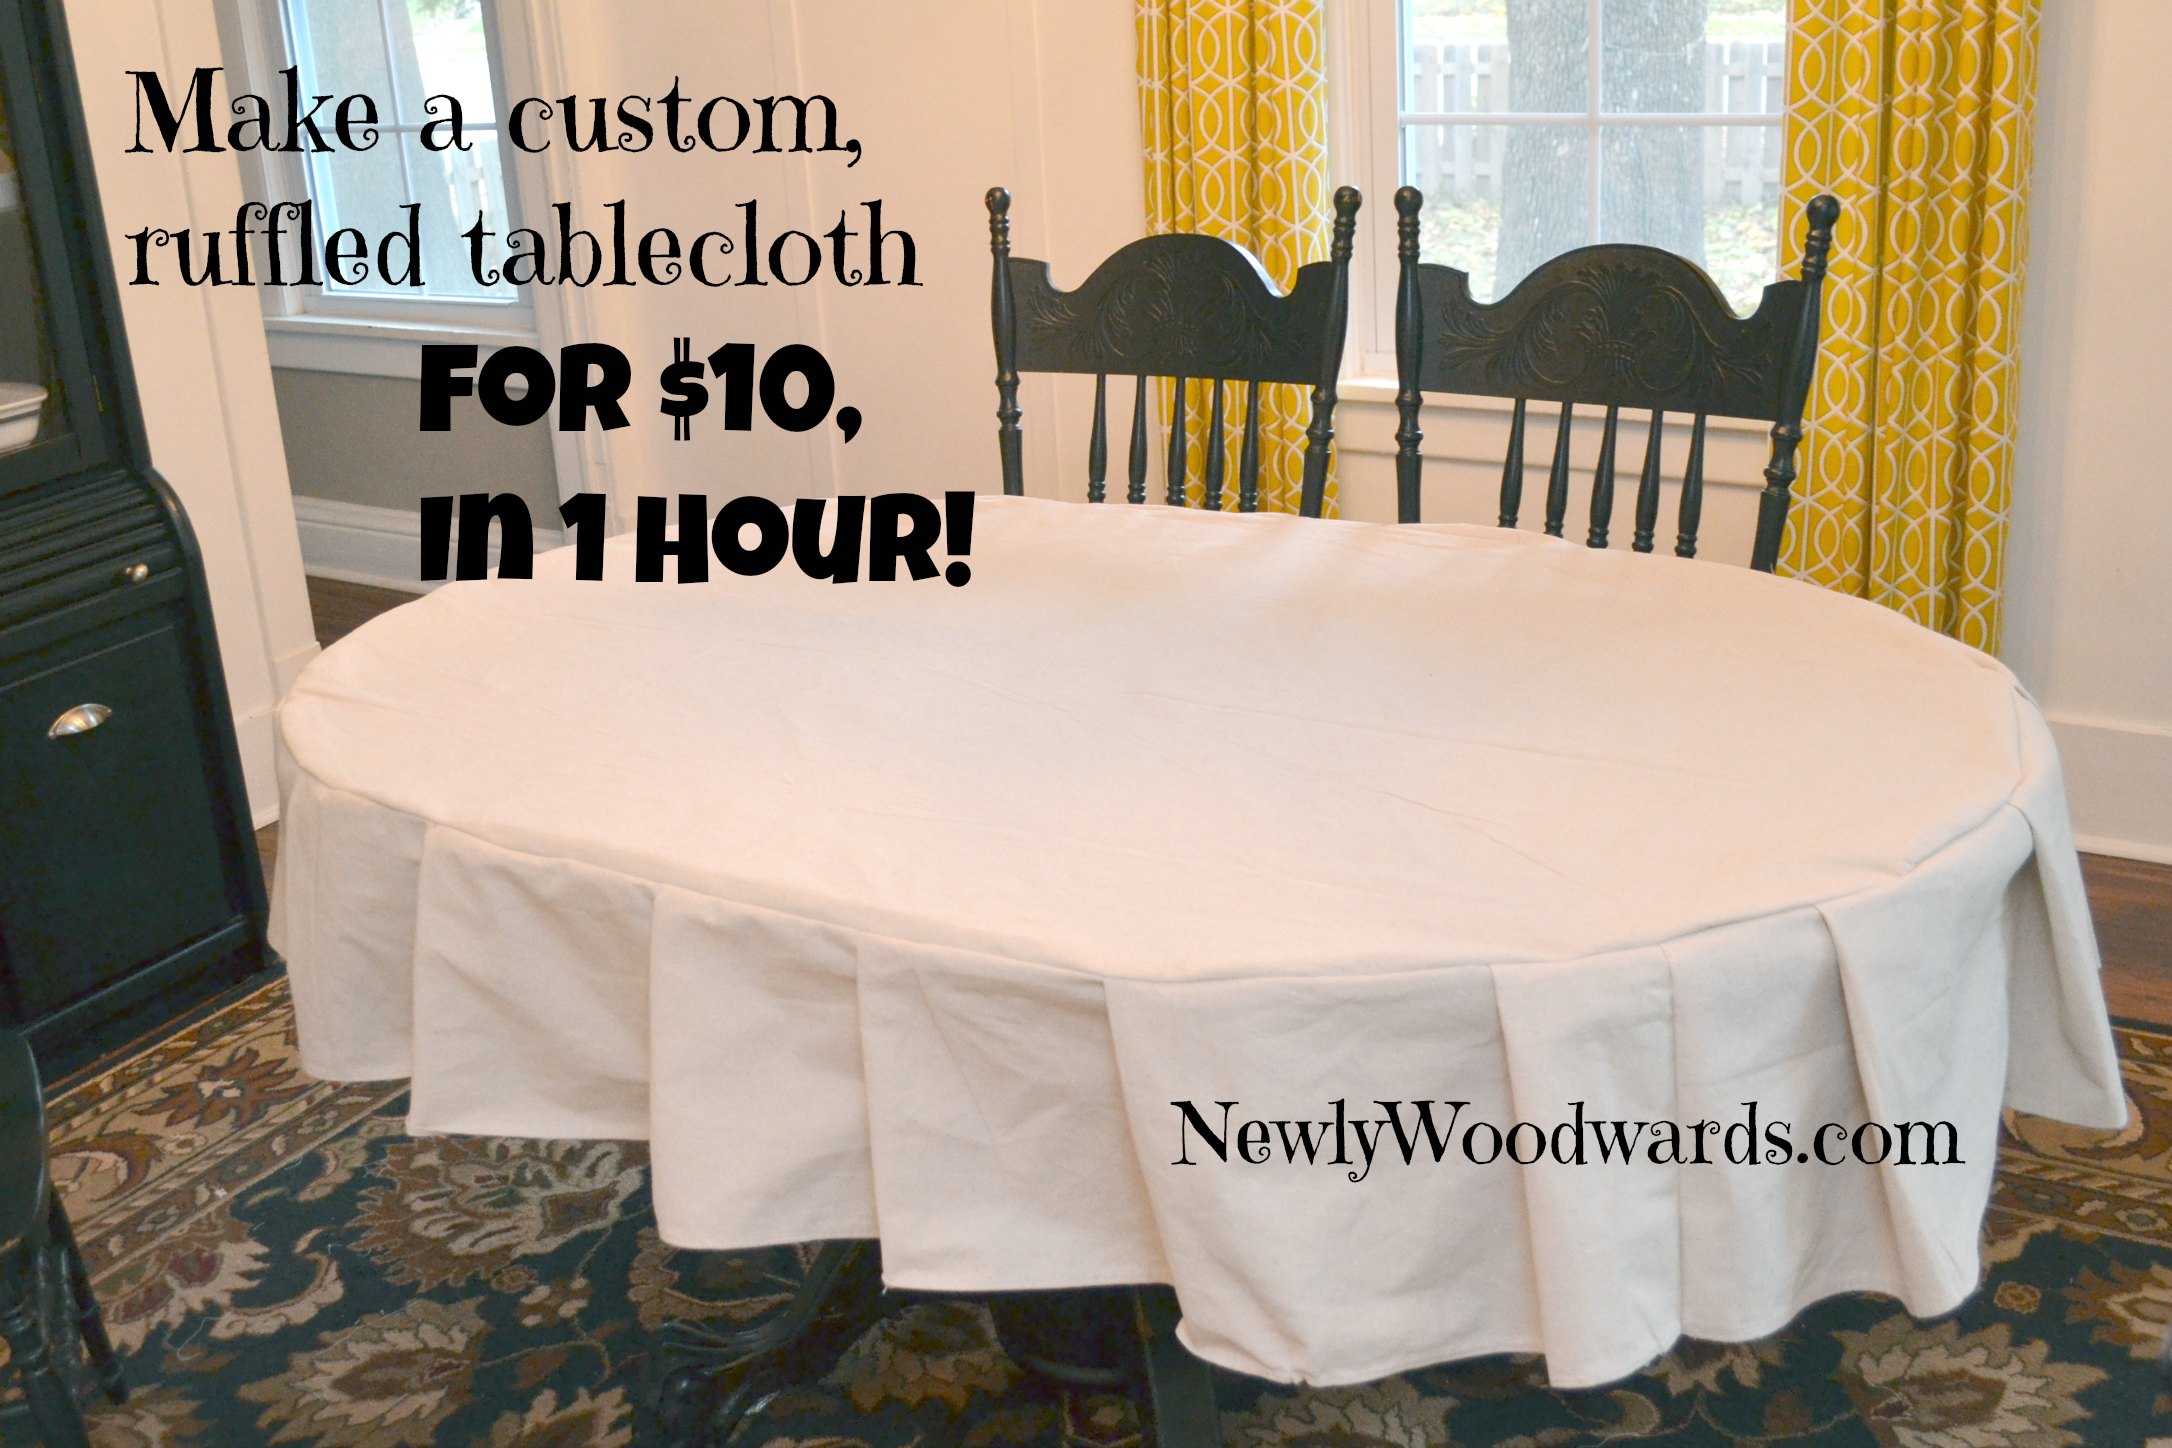
A fitted tablecloth for our dining room table – made from a $10 drop cloth from Home Depot.
This project idea was born because of my more frequent craft nights and parties. I thought it would be fun to make a drop cloth tablecloth that actually looks good. It would cover the table, look nice, and provide a space to craft without worrying about paint drips or other crafting messes.
The best part was that this project only took an hour – it was completed finished and cleaned up before Henry woke up from his standard 90-minute nap. WINNING!
I want to make 100 more.
The key is using a drop cloth that already has hemmed edges. This means you don’t have to sew any hems. Can I get a HURRAY?
So, here are the quick steps to make your own. I’m not going to shared most dimensions.
A. Because I only had an hour and I didn’t measure anything.
B. Because you’ll want to make it with your own table dimensions to make it fit your table perfectly.
ALL OF THE ABOVE!
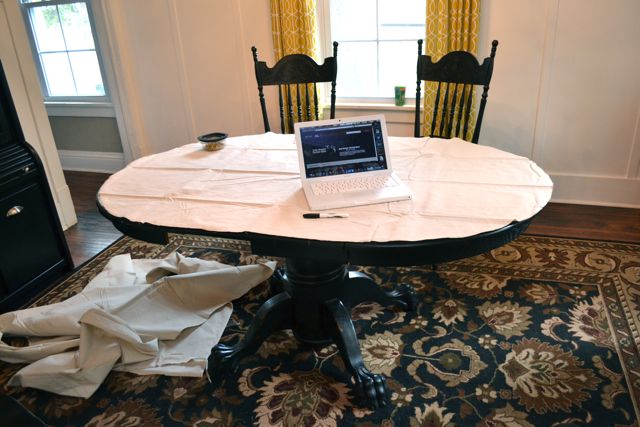
I started with a 6×9 foot drop cloth from Home Depot. (This is a oblong table with two leaves. Purchase a big enough drop cloth for your table. You should have quite a bit of excess.) When I brought it home, I draped it over the table in the (approximate) center.
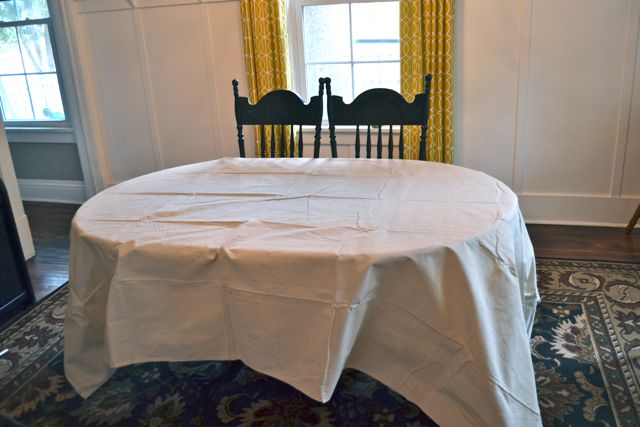
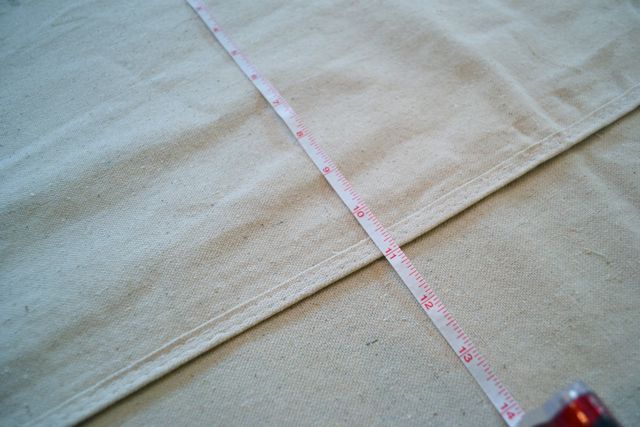
Then, I used a fabric marker (a pencil, pen or Sharpie would also work) to trace the edges of my table, which is oblong. This could also be simple for any shape table.

Then, I used fabric scissors to cut right inside the marker and I ended up with a top for my tablecloth.
Next up – I took the leftover drop cloth, which was the four HEMMED edges. I cut off an 11 inch section from each side. (You could go longer or shorter based on how long you want the skirt to be.)
Then, I sewed the strips together to be one, long strip for the skirt.

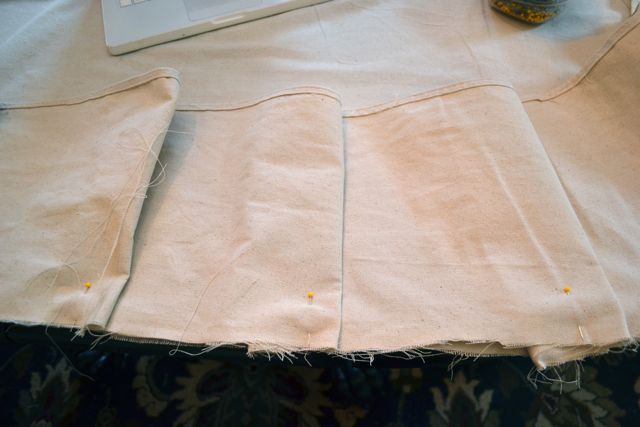
I began pinning the skirt on the top piece, adding small tucks as I went. (Yes. I just eyeballed this. No. It doesn’t have to be perfect.)
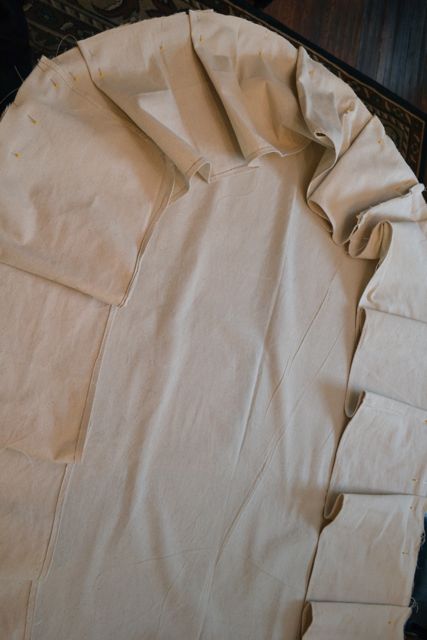
This was a little time consuming, but simple. Don’t overthink it.

As I worked my way around, I just eyeballed it so that I had just enough fabric to get around. (Basically creating more or less tucks based on how much fabric was left.)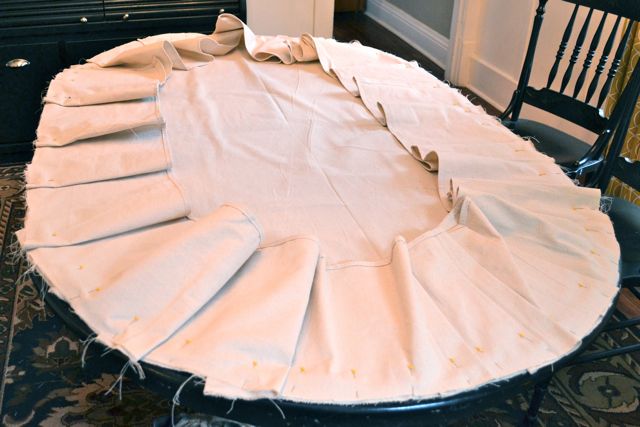
(Reminder: Consider how LONG your table is when you are purchasing a drop cloth. The 6×9 foot drop cloth was perfect for my medium-sized dining table with two leaves.)
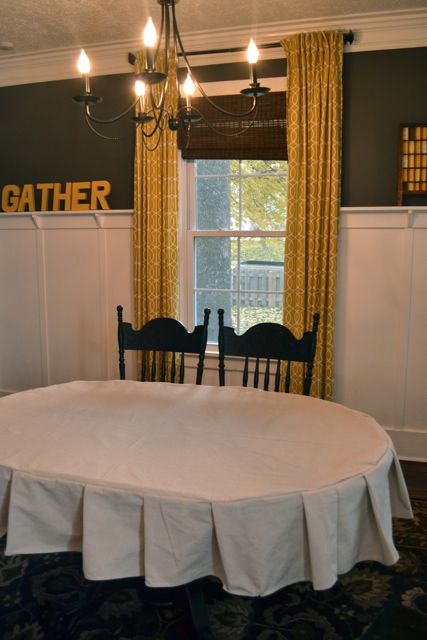

What do you think of our new custom tablecloth?
I would love to pay to have this done…is there anyone you can recommend? Thank you
Thank you for this wonderful tutorial. You are right, I was able to finish this project in an hour with imperfect cutting and just eyeballing the pleating and it still looks amazing. I washed and dried the drop cloth ahead of time to soften it, and I love the wrinkled look.
This is so awesome! Thanks for sharing and for trying. I wish I would have pre-washed, that’s a great tip.
P.S My apologies for getting off-topic but I had to ask!|
This is so great! This would be great for a birthday party!
Such a cute idea. Love the pleats!
Dang that looks so much harder than it is, awesome job. Maybe one day I’ll get around to making one.
How perfect is this?! I’ve been wanting to make a table cloth out of a drop cloth, and then put a sharpie on everyone’s plate on Thanksgiving, and have everyone write things they are thankful for… and use it every Thanksgiving until it’s all filled up. Then start over! I’ve wanted to do it forever, but have never gotten around to it. I think I could follow this tutorial to make it 🙂 You are the queen seamstress. Can we please be neighbors and hang out? I’m so jealous of you and Michelle. Utah blows… I have no blog neighbors. All my IRL neighbors just think I’m crazy. They don’t understand.
It was very lovely in person. I know. I loved spilling glitter all over this thing! For reals.
This is wonderful. Your directions are quite clear!! What a good idea 🙂
What a great way to elevate a craft table. I love this – I don’t really craft regularly, but damn I feel the need to start doing so so I can justify the hour to make one. Well done, friend.
nice! is there anything drop cloths can’t do?! LOL at how you don’t want to drip paint on it….you need a drop cloth for your drop cloth 😉
This is absolutely fabulous. I love that it has a pleated skirt all the way around. Way to craft in style 🙂
You are a genius!!! I love this!!!! 🙂
Love it!!!!
Looks fantastic! Love it Kim!! love 🙂
your drop cloth was only $1!!! sweetness! think it would be amazing with a big monogrammed W in the center. Or any pattern really. Yes. Looks awesome!
Yeah – that was a mistake. That’s what I get for making the title images when I’m exhausted at night. The drop cloth was only $10. Still a steal!
I think you should sell these on Sew Midwestern!!
I LOVE this! I have two grandkids who LOVE arts and crafts and our house is so small there is really no place to do them. This would solve the problem. Genius! Thank you.
Such a great idea for grandkid crafts. Let me know if you make one!
Ummmmm yes, totally winning with this one! I love it- I can’t believe it’s from a drop cloth. I totally want to make one- although I suspect it will take me longer than an hour, because I am a sewing sloth 🙂
I love it. It looks awesome and is a great idea. AND it sounds easy and cheap to make. I would definitely say WINNING!
I really love how “unplanned” the tucks look. I think it adds a lot of charm and simplicity. I am totally going to try this! Thanks for the inspiration. 😉
Thanks so much! You have to let me know if you make one!
Wow, I really like it! I’m not usually one for tablecloths, but with a little one who may soon be into the making of messy crafts, this might be one to file away. Especially for such a nice price! 🙂
that looks awesome! love the pleats/ruffles and love the price!
Thanks, Cassie! Pleats is a much better description, but I couldn’t think of that word when I was writing this post last night. 😉