Unfortunately, real life home projects don’t always progress like those you see on t.v. Or, at least, home projects at the Woodwards’ aren’t made for television. (Seriously – how do they finish projects so fast? Oh right. Paid professionals and lots of money.)
So while we’ve been making slow and steady progress on the basement family room, it’s not anywhere close to being done. (Although, it IS closer than it was when we started. So there’s that.)
The shiplap walls are coming together beautifully, thanks to the flooring (used on the walls and ceilings) from Lumber Liquidators. The space already looks a million times better. Lest you think we’ve just abandoned the project entirely (which wouldn’t be unheard of around these parts), I’m back with an update on the progress. And so you can tell me how amazing it looks.
Because I need constant words of affirmation. That’s the point of having a blog, am I right?
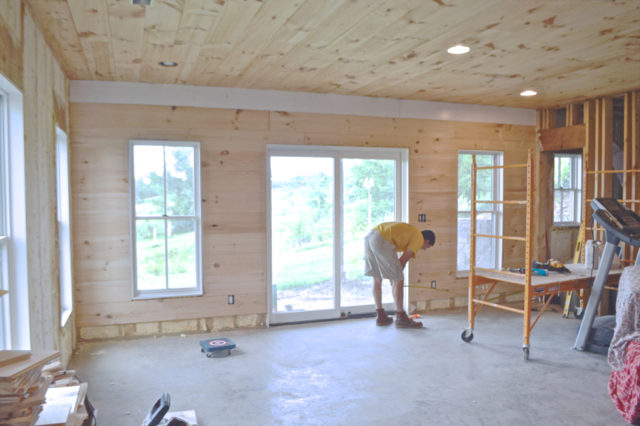
Here’s where we’re at today …
Before I dive into the steps, I want to share a few of our favorite tools.
This post may include affiliate links. That means if you click through and make a purchase I will get a commission (at no additional cost to you). Read my full disclosure policy for more details.
INSTALLING WOOD FLOORING ON WALLS
- New England White Pine – these wood floors are beautiful painted or oiled, and the tongue and groove makes it very simple to install with hidden nail holes (pssst: very few nail holes to fill)
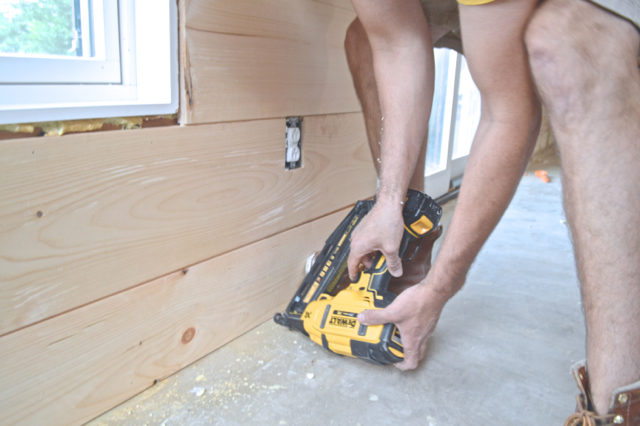
- Dewalt 20v finish nailer – if you buy one tool, this is the tool Ryan recommends. This is what he uses to attach the boards to the wall. We have gotten so much use out of this, it works beautifully, and it’s convenient. No cords, no loud air compressor, no fuss.
- Scaffolding – perfect for ceilings and tall walls, we’ve gotten lots of use
- Craftsman 10 inch single bevel compound miter saw – this is what he used
- Ridgid XRR4513 amp 10 inch portable table saw with mobile stand – ripping boards
- Dewalt jig saw – used for smaller cuts, around outlets, lights, etc.
- Basic tools – Aluminum square, Stanley tape measure, carpenter’s pencil
- 100% pure tung oil – our favorite finishing for wood tones, we used tung oil on the ceilings for a more natural look
- White paint – we decided to use semi-gloss paint for durability and wipeability
- Roller, brush and roller tray for painting
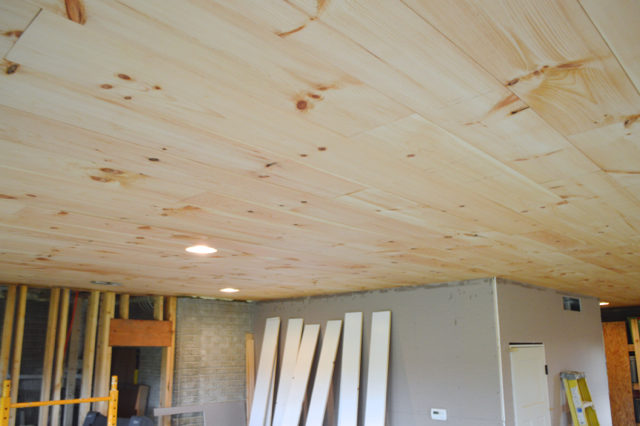
Step 1: Installing the ceiling
Ryan started with the ceiling, which is, in many ways the most labor-intensive part of the project. Working above your head is always more exhausting, and he also needed to cut around all the light fixtures and vents.
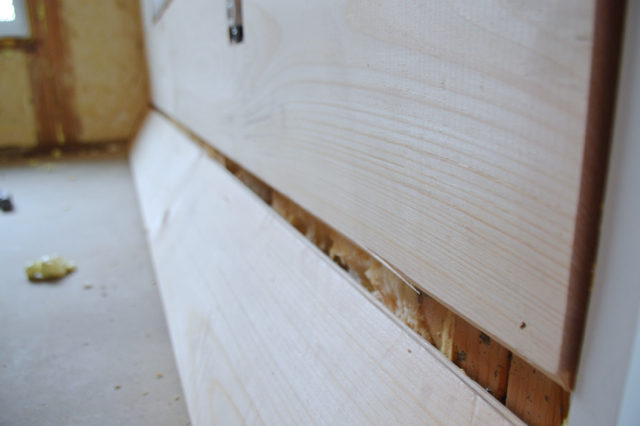
We wanted to install the boards to have a noticeable gap between. This gives it a true “shiplap” look. So, Ryan left the spacing of approximately a quarter width. (He eyeballed this and measured periodically to ensure everything was still square.)
The boards are installed perpendicular to the trusses, which gave him plenty of solid spots to nail the boards to. (Remember: the wood floors are tongue and groove, which means the nails can be hidden in the grooves. Here’s a little peek at how the boards go together. They slide right together like buttah.)
Step 2: Oiling the ceiling
Before moving to wall installation, we wanted the ceiling to be finished. This just makes it much easier to get a clean finish everywhere.
Instead of painting everything, we chose to oil the ceiling with pure tung oil for a little contrast. (We use and love Pure Tung Oil by Real Milk Paint.) The oil provides a nice protected finish, and also brings out the beautiful wood tones.
Ryan rolled two coats of tung oil on the ceiling, which provided plenty of coverage. Unlike poly, the oil penetrates the wood. And it really highlights the colors and knots in the wood. It also does darken a bit over time.
Interested in tung oil? Check out these posts:
- Finishing yellow pine floors with tung oil
- Tung oil on a cedar porch
- Tung oil: our favorite food-safe wood finish
Step 3: Pre-painting the top boards of the walls.
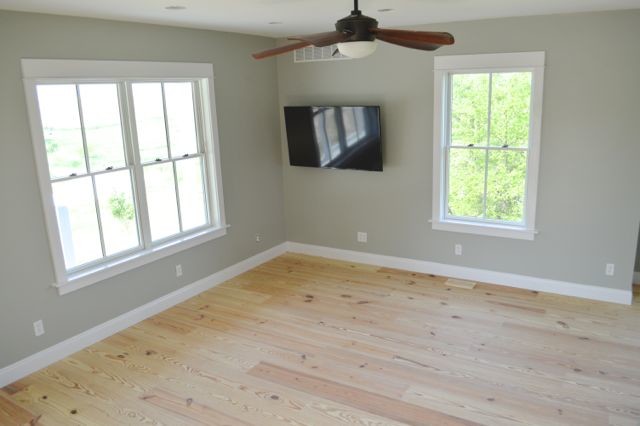
To contrast with the beautiful wood-tone ceiling, we are going to paint the walls white. A crisp backdrop for the big windows and all the other details in the room.
But before installing, we started with a little painting, Instead of worrying about cutting in along the ceiling, we painted the top boards white first. This means that we can roll all the walls, instead of cutting in at the ceiling – time saver!
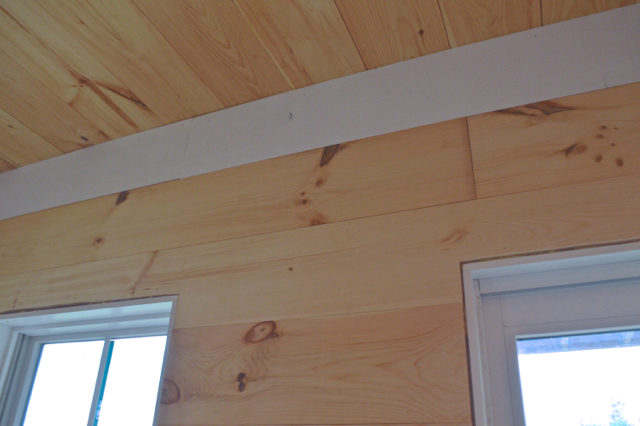
Each board got a coat of primer and a coat of Behr Marquee Ultra Pure White in Semi Gloss. One coat was plenty of paint for even coverage but still left some hint of the knots and wood below.
We didn’t worry about pre-painting every board. We will eventually roll everything. But this gives us a great start and should be a big time saver later by providing a 9 inch buffer to the ceiling.
Step 4: Installing the shiplap walls
Finally, Ryan worked on installing the shiplap walls.
This is still a work in progress, but it’s going much more quickly than the ceiling did. The process of installation is the same as wood floors or the ceiling. And the Dewalt 20v finish nailer is seriously the top tool for this project. We simply couldn’t have done it without this cordless, air compressor-free tool. Worth it’s weight in gold. (Check out all the tool recommendations below.)
There are lots of ways to get a shiplap look, but using wood floors from Lumber Liquidators has several advantages:
- The wood is really lovely. Flooring-grade boards are smooth and have beautiful grain and color. If you want to whitewash, oil or stain, this is a huge advantage. And if you are painting, the smooth finish is a nice perk and saves some time.
- The tongue and groove floors are a snap to put together. And when you nail them to the studs, almost all the nails are hidden. If you’ve ever spent a week trying to fill and paint nail holes, you know how wonderful this is.
- The installation options are very flexible. If you want larger gaps between boards, you can do that. If you want them closer together, you can do that, too. It’s nice to have options.
Thanks to Lumber Liquidators for providing the shiplap for our basement family room. And thank you for supporting sponsors who make projects like this possible.
MORE FARMHOUSE PROJECTS
Looks great! One warning: beware of the painting. We used Lumber Liquidators flooring as a shiplap ceiling in our guest bathroom. We put on two coats of Kilz Premium primer and two coats of Behr Ultra white paint. Everything looked great for the first 6 months. Then the pitch in the knots started to bleed through. Now it looks awful.
We did shiplap on our great room ceiling a year later and used an extra coat of primer and three coats slightly off-white paint. So far that hasn’t bled at all, and it’ll be 2 years in November. I’m not sure what made the difference, but I’d hate for you to have bleeding walls in that beautiful room!
Thanks so much for sharing! Appreciate your insights – we’ll watch it closely.
So I want to run home and start this project in my own icky basement! What a great idea to use flooring – brilliant!
We did this at our family cottage, but left all of the walls and ceiling wood. It’s definitely a lot of wood, so I am happy to see you’re painting the walls white. Can’t wait for the finished product! 🙂
Courtney
It looks amazing! 😜 But really, it does.
This is so adorable! I wish we had a space to do this to!
I didn’t even think to use wood flooring for shiplap… the smoothness alone would be worth it! Thanks for the tips and tricks Kim!
So far, we’ve been happy with how it looks and comes together. And the smooth-factor is definitely a huge bonus!
This is looking amazing! The contrast between the white walls and ceiling is going to be so lovely – can’t wait for the finished product 🙂
Best,
Kelly
I’m looking forward to it, too! Wish it was as fast as on tv. 😉
SO SMART to prepaint the top wall boards! Sincerely never would have thought of that.
Agreed! It’s those little nuggets of wisdom that make all the difference in future projects. Mentally filing that one away! Looking great as always Kim!
Glad it was helpful! I will take full credit. (But really, it was all Ryan’s idea. He’s a keeper.)
oh, wow–it’s looking so great in there! Love the way the ceiling looks with the natural wood.
Thanks! I’m happy with the contrast. Ryan would have loved everything to be wood, but the white will be a good balance. And keep it from looking too cabin-like, which isn’t really our style.
Can’t wait to see it completed! it’s going to be amazing!
Thanks, Deb! It is fun to see it come together.