Last month, Ryan built a twin bed frame for the nursery to use as an extra bed and hang-out spot.

Instead of painting the entire piece, I decided to upholster the frame. (I was inspired by this upholstered bed at Land of Nod, at the crazy price of $899 with a headboard.) Upholstering the frame would allow me to use more of my favorite Dwell fabric (leftover from the curtains) and would also take the “edge” off the rough corners to keep our little guy from bumping his head when he starts moving around.
Upholstering the frame is a similar process to upholstering a headboard. Since I was on my own, I didn’t take tons of pictures of the process, but I think it’s self-explanatory.
I bought three yards of 1-inch Nu-Foam for less than $20 on sale at Hancock. The Nu-Foam is supposed to be an alternative to foam, particularly that it is flame retardant. I cut the 27-inch width in half and started wrapping the piece around the base board, stapling it in place.

Next, I cut strips of my fabric. Because I’m too cool for measurements, I just eyeballed the pattern to make it match up. When one strip ended, I just matched the next strip to the pattern and kept going. I obviously didn’t waste fabric or foam on the inner part, since that will be covered by the mattress.
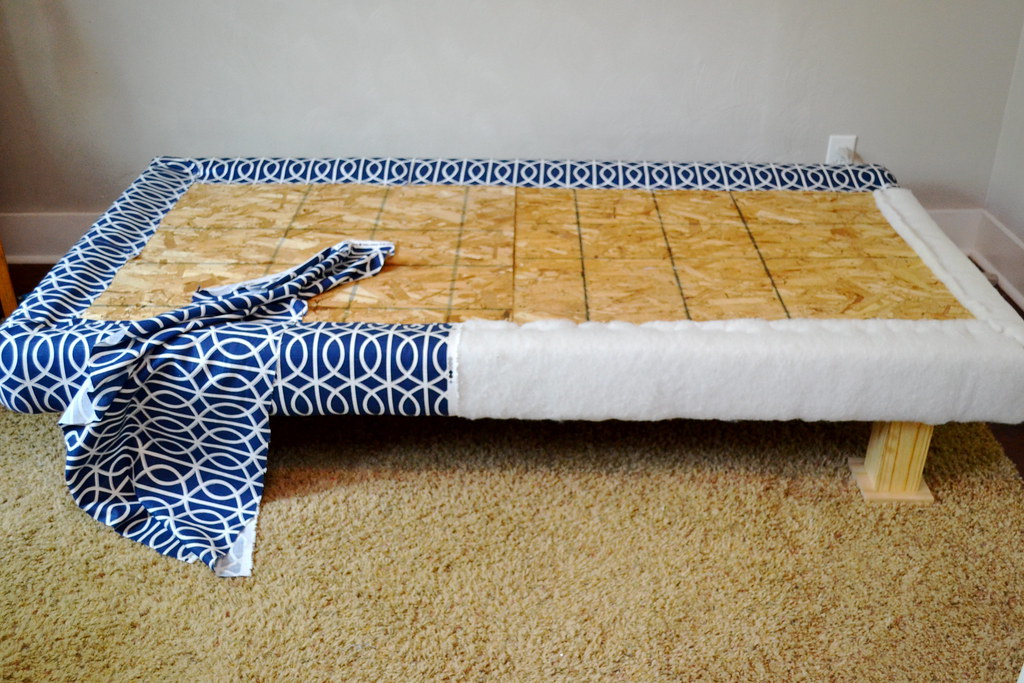
Here’s the edge before. After matching up…
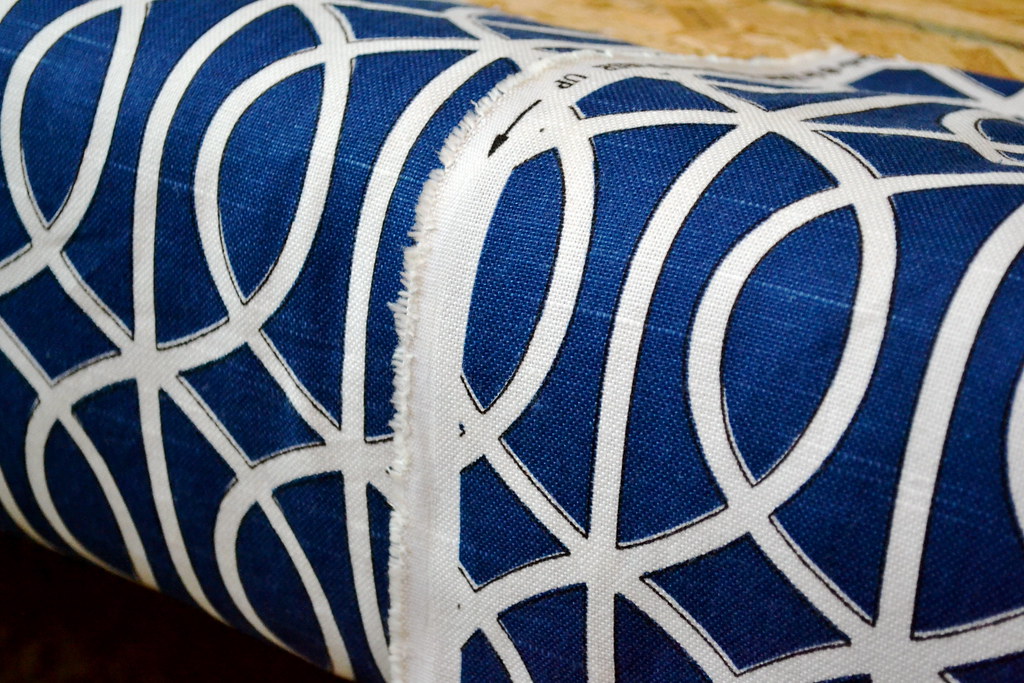
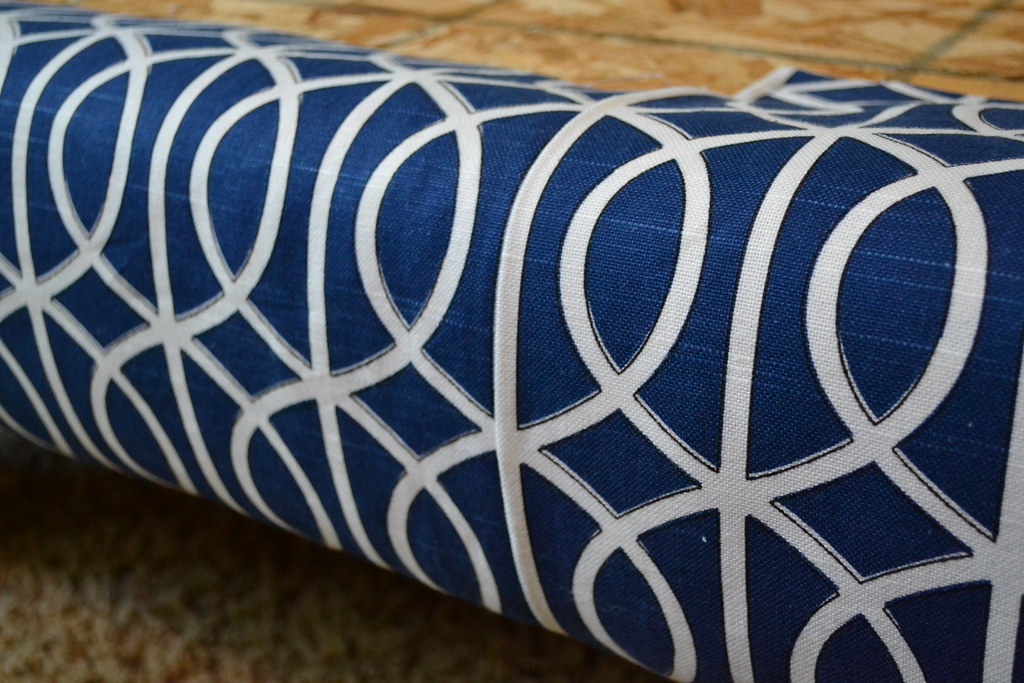
I just folded the border under and kept going. You can only see the seams if you are looking for them.
An hour or so later, I had it all faux-upholstered.
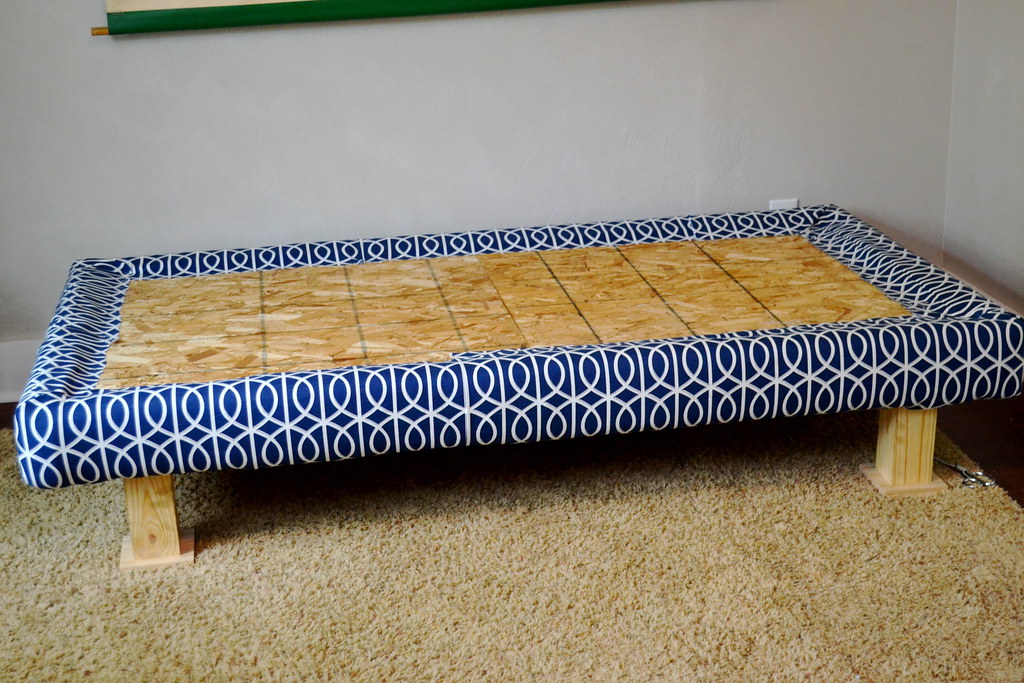
I’m really liking how it turned out. Now, I need to paint the legs and I’ll be all set. I’m thinking I’ll go with white to tie in with the crib and the hutch.
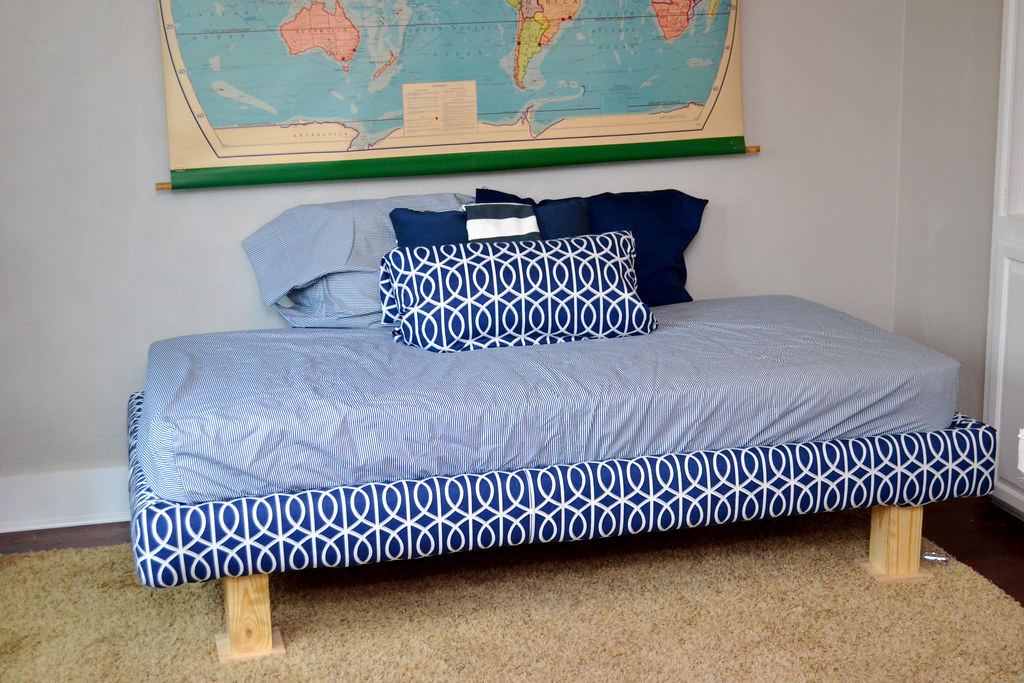
I just threw the sheets and pillows on the bed to see how it looks.
Since I have so much pattern in the room, I ordered this solid navy Seacliff quilt from Pottery Barn Kids. I had hemmed and hawwed about this bedding, but I just don’t have it in me to make a twin sized quilt. Plus, the quilt is quilted with Hs, which is the first letter of our little guy’s name.
I’m also thinking I need to make a long bolster pillow in the Dwell pattern, too. I decided to nix a headboard, since the large map is right behind the bed.

In all, I think we have around $40 in the bed. The wood was free (Ryan used what we already in the garage), the labor was free (you should marry a handyman like I did), the Nu-Foam was $20 and the leftover fabric was around $18 (I ended up using a little over one yard of what I had leftover from curtains).
What do you think?
Wow, that bed is fabulous! I wish we had room for something like that in our wee one’s room. Not that it would look like yours!
i love how well it all ties in – and that extra sleeping space will be so handy! yes, i am very jealous of ryan’s abilities – can he come teach tony a thing or two??
LOVE THIS! And I love how easy it seems, you rock! I can’t wait to see it all put together 🙂
Looks amazing!
It turned out perfectly, Kim! And hmmm…you’ve piqued my curiosity with the name that starts with “H”…the suspense is killing me!
Love it! I love the fabric choice and I love the look.
LOVE!! I definitely want to try this someday, it looks so good! And good call on doing a bolster pillow, that will look awesome. And fun about the Hs on the quilt!
Dude, I had no idea you could do that! I absolutely love the upholstered bed. The nursery is really coming together!!
I love it Kim, I do. But something seems off in little H’s room…Oh, that’s it, it’s the crib. I think it would look even better under the windows. You know, for maximum jumping out the windows and cord-swinging possibilities. Get on that, would ya?
But back to the bed. Another bang-up job by Ryan. His talent with wood is unmatched. And the upholstery is such a good choice, I would have never thought to do that.
LOVE LOVE LOVE! Great job!!
awesome!! you and ryan are such a great team 😀
i pinned that fabric because i LOVE it even more everytime i see it in any of your posts…it’s so purty and looks amazing on that bed! i have never heard of an upholstered bed, but it looks beautiful!
This bed looks amazing and I love the tie in on the quilt with the baby’s name! Also spied that herringbone quilt, can’t wait to see how it turns out.
It looks great! I really love that fabric!
You may have already mentioned this somewhere but where did you get your crib? I’ve seen cribs like these all over the internet and I was just wondering who sells them?
Love it! What a great idea!
PS- I couldn’t find the seam at all!
Awesome! I’m getting ready to reupholster dining room chairs. And by getting ready, I mean it has been on the list for several months and no real reason I haven’t started already. Maybe your post was just the motivation I needed! 🙂
It looks fantastic already! Nice and cushy for little heads. I can’t wait to see how it all comes together with the “H” bedding. I’m really enjoying the mix of navy/white patterns in this room. Especially the houndstooth!
It turned out great, I love it!
Looks great Kim!
Awesome job! I love that pattern. I would totally sleep on this bed.
Looks faboo! Great job you two!
Beautiful! Love the fabric & the bed will definitely come in handy! Glad to see you moved the crib too!!! 🙂
Oh my gosh, it looks amazing, Kim! I LOVE upholstered bed frames, especially in a fun fabric like that. And girrlll, your herringbone quilt is looking FLY on the crib. I love it! How much longer do you have? 10ish weeks?
You clever girl! That looks SO cute. I loved the natural wood, too, but it’s even cuter upholstered. I kind of wish I had married a handyman . . . his repairs usually involve duct tape and hot glue and rubberbands. Send Ryan to my house when you’re done with him 😉
This is completely amazing! Great job!! 🙂
Love the bed. It’s going to get so much use!
Kim, it looks so good!!!!
This is fantastic! I spent a good five minutes looking for the seam and I couldn’t find it. That is pretty fantastic!
You’re so smart with the bed in the room. Way to plan ahead!
I’m drooling over your Houndstooth quilt. Can I come over soon? I promise I won’t slide that quilt in my purse….
Love it. That bed will come in handy some nights 🙂
I think what is neat too is that once little one starts to get ready for a big boy bed that you could probably use this bed too.
I spy I houndstooth quilt top! I see it!!!!!!! I’m dying!!
Any who, love the upholstered bed! And I really, really love that fabric. Navy blue is never the first color that comes to mind when decorating, but you’ve done it so well! Huge fan!
I like the idea of the long bloster pillow too. I think that will really finish things off. I think it would be really cute to have a wall sconce on either side of the map too! Add some lighting for your guests without taking up floor space. But then the wires may be an issue for little woodward??
Either way. I’m loving it. And if that map ever goes missing, just know it found a happy home in PA. 🙂
You’re so flippin’ awesome! You’ve got a seriously magic touch. Come do my house!!
Wow!! It looks amazing already, Kim! 🙂 Great job.