I don’t care what that silly groundhog says … spring is on its way.
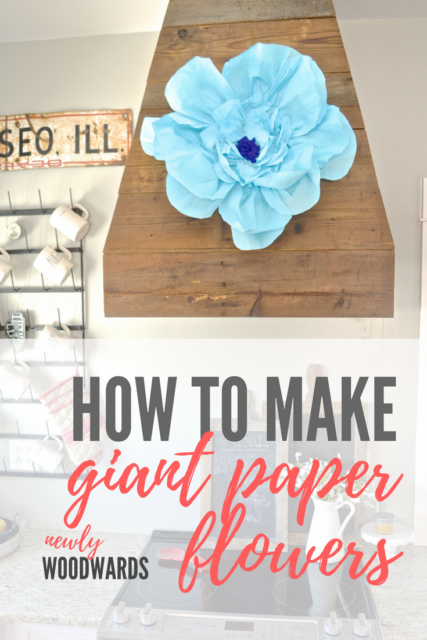
I’ve been slowly creating a springtime feel at home – and I’m excited to be sharing a fun tutorial to make these simple giant paper flowers for your spring home. These are great for spring and summer, but they also make a beautiful statement all year – in nurseries, bedrooms, playrooms and for PARTIES.
I’m sharing this tutorial as part of the Seasonal Simplicity DIY/Craft Blog Hop in with a gaggle of incredibly talented bloggers to share a craft or DIY project for spring. (Check out all the amazing projects at the bottom of this post. They will make you even more ready for spring to arrive.)
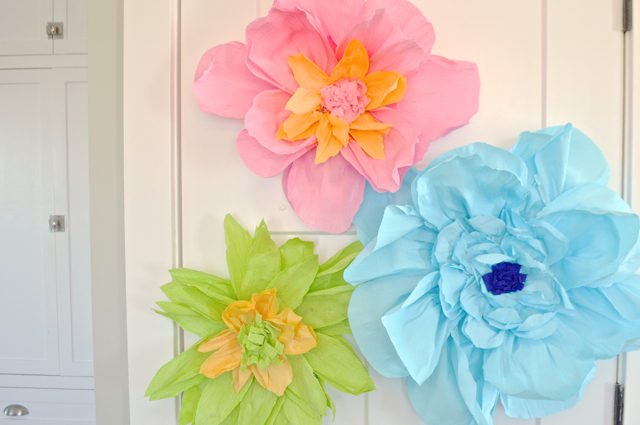
These giant paper flower bring a heavy dose of spring colors into our home, which is welcome. And while my versions are pretty vibrant, they’d also be lovely in white or more muted colors. They can truly be customized to suit your space.
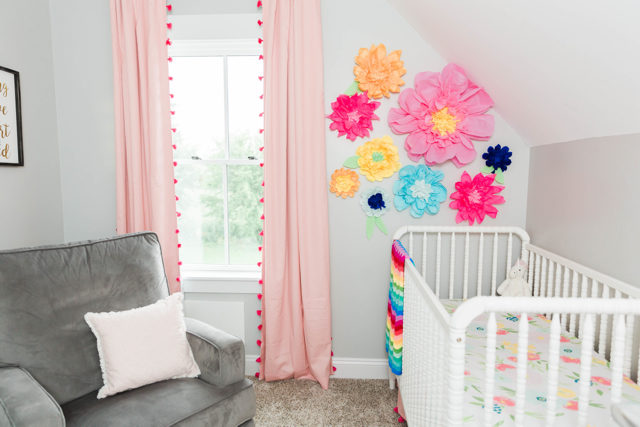
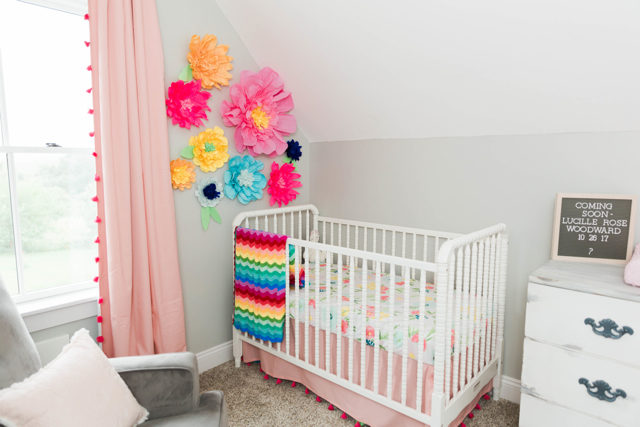
You may remember that these are the same giant paper flowers I created for Lucille’s modern floral nursery – the large size makes them really stand out. As a bonus, they were fairly quick and inexpensive to pull together. My 5-year-old helped me make the ones we put in Lucy’s room in an evening.
So, now for the tutorial. I’m sharing the way to make two different styles of flowers – rounded petals (similar to peonies) and pointed petals (similar to sunflowers). These can be customized and made in a variety of sizes to fit your space.
How to make DIY giant paper flowers – 2 ways
 |
 |
This post includes affiliate links, meaning, if you click through and make a purchase I may get a commission (at no additional cost to you). Read more about our policies here.
Supplies:
- Premium Italian colored crepe paper (There are many choices for Italian crepe paper and prices change often, so it’s worth shopping around. I purchased the Just Artifacts rolls of Italian crepe paper in a variety of colors. At just under $3 plus shipping, it’s a good value. Each roll is 20 inches by 8 feet and can easily make 1-3 flowers per roll, depending on the size of the flower. There are also a few similar options with Prime shipping with coordinating colors.)
- Thick paper plates – I used square plates in pale pink that were leftover from a bridal shower I hosted. They were in packs of 12 from the Dollar Tree in the small and large sizes. You can always cut the plate to size if they are too large.
- Hot glue gun and glue sticks
- Scissors
Directions to make a large (26 inch) pink flower with rounded petals:
1. For each of 8 large petals around the outside, cut a strip of crepe paper along the grain, approximately 7 inches x 20 inches.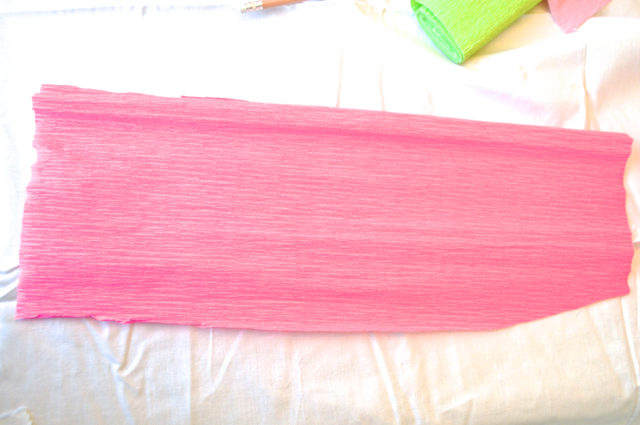 |
2. Fold in half (two halves are 7 inches x 20 inches) and cut into a rounded petal shape (leaving the fold at the bottom).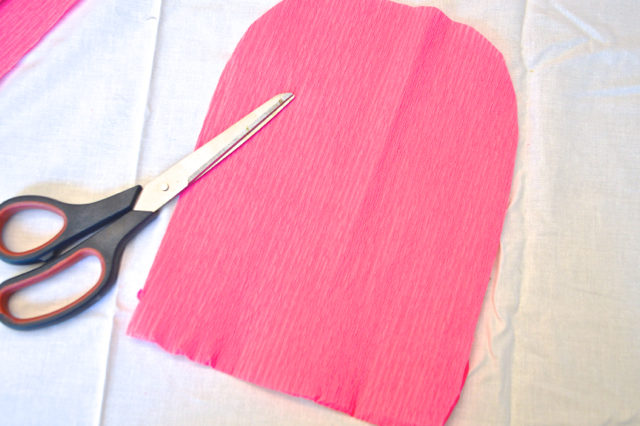 |
3. Stretch the petal gently to make it larger. (Henry liked this part.)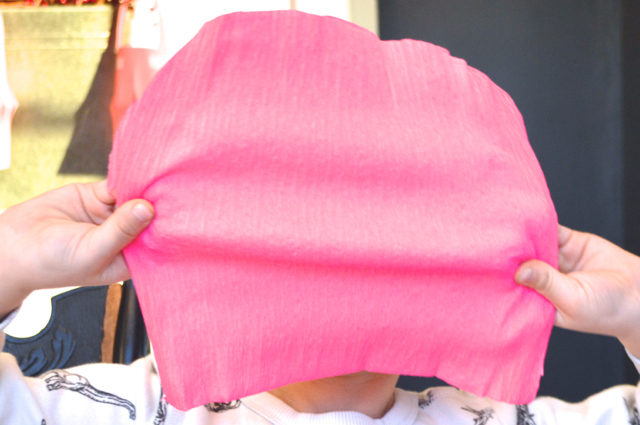 |
4. Scrunch together the folded side (to resemble a petal) and hot glue the folded side to the corner of the plate.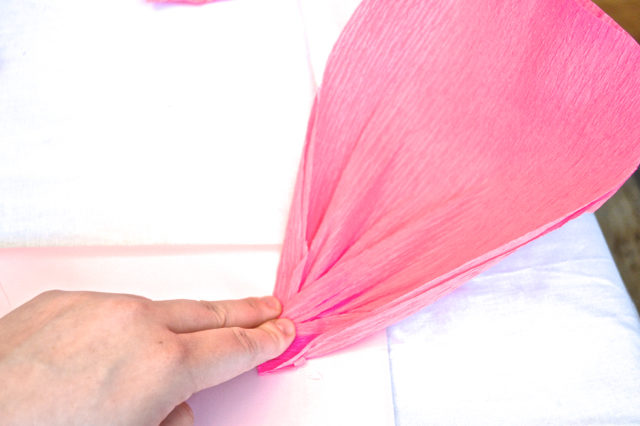 |
5. Continue gluing the petals around the edges, as shown. Attempt to cover the edge of the plate.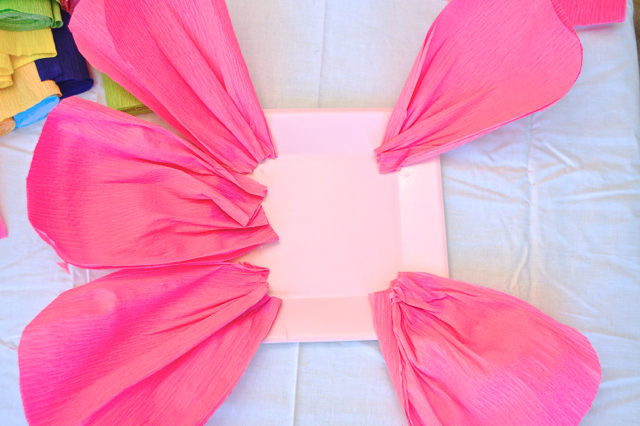 |
6. A total of eight large petals should be around the edges, overlapping a bit. |
7. Once all large petals are placed, pull apart the two pieces and shape into a bit of a bowl shape. |
8. For the next layer, cut crepe paper (along the grain), approximately 3 inches x 10 inches. 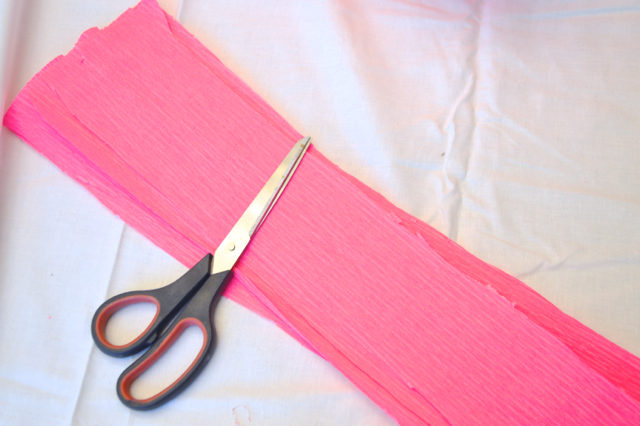 |
9. Fold each petal in half (each fold should be approximately 3×5 inches). Cut the top in a similar rounded petal shape. |
10. Hot glue the next layer of petals in the same way, overlapping a bit and pulling the folded side together a bit to resemble a petal. 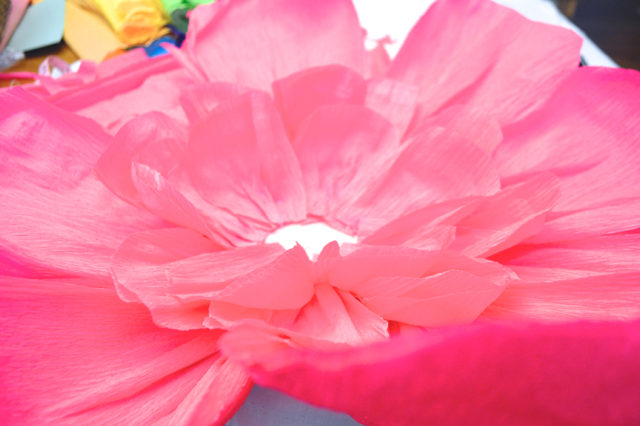 |
11. Continue gluing until all plate is covered by petals. Pull apart each pair of folded petals to make the flower fuller. (Add a center or display as is.)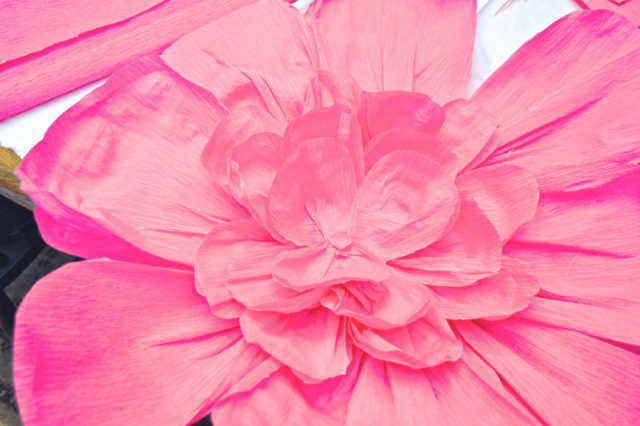 |
Directions for the green center:
1. Cut a strip of crepe paper (with the grain) approximately 3 inches wide by 20 inches long.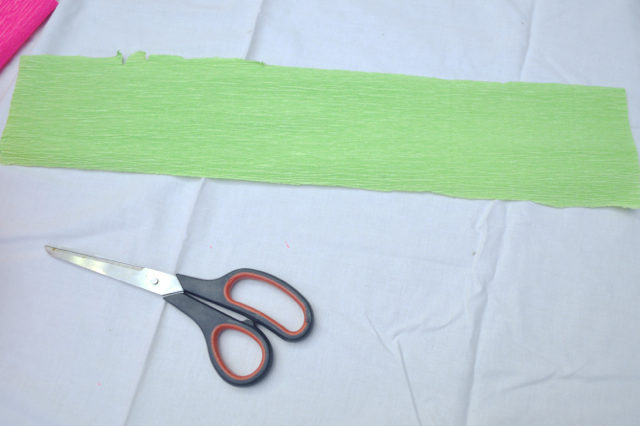 |
2. Fold in half long-wise and cut fringe on the edge.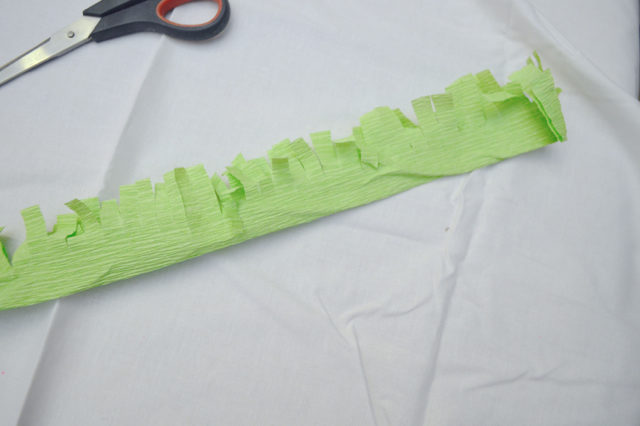 |
3. Roll up the paper, fringe side on the top. Glue together.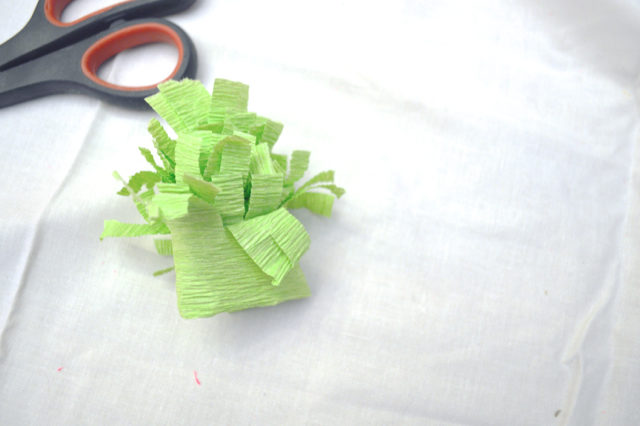 |
4. Glue fringe into the center of the flower to finish. |
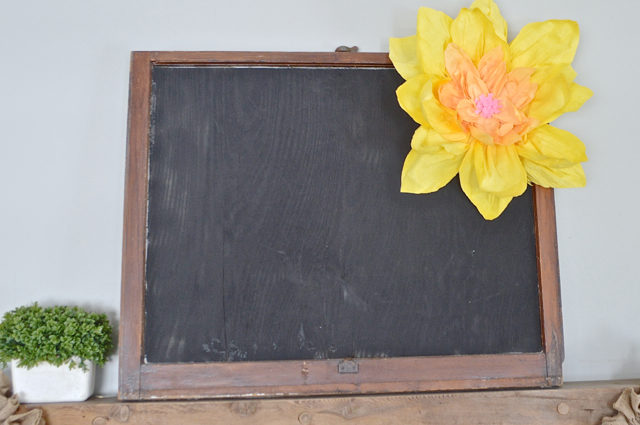
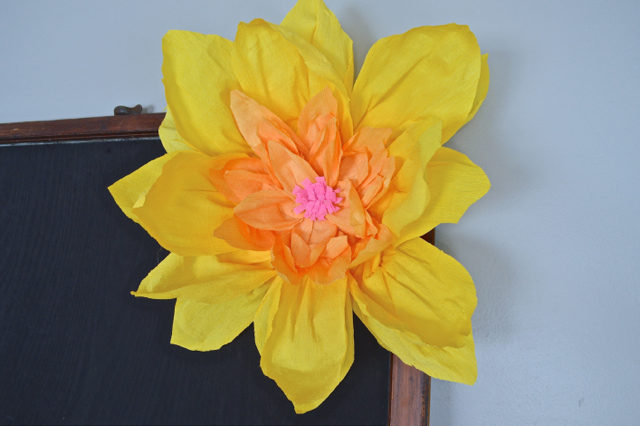
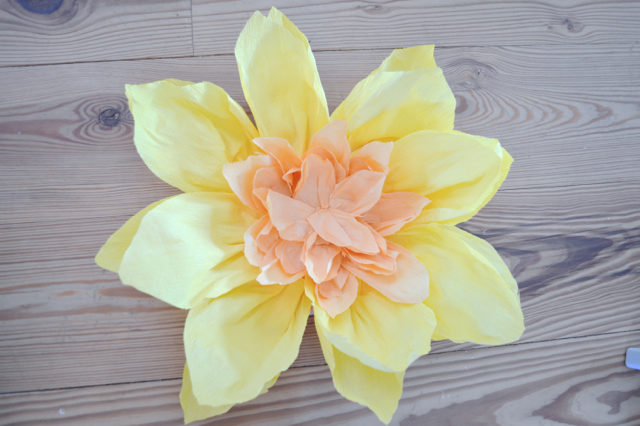
Directions to make a smaller (20 inch) yellow flower with pointed petals:
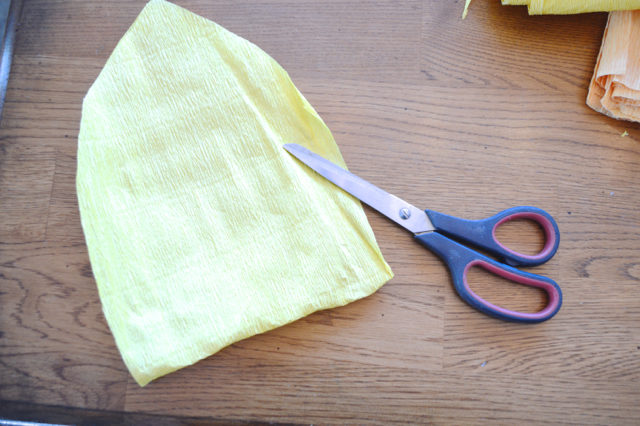
1. For each of 8 large petals, cut a strip of crepe paper along the grain, approximately 5 inches x 20 inches. Fold in half (two halves are 5 inches x 20 inches).  |
2. Cut into a pointed petal shape (leaving the fold at the bottom). Stretch apart gently to make it wider.
|
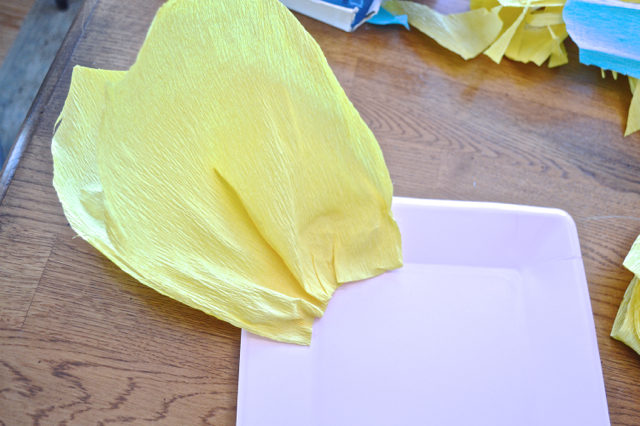
| 3. Pull together the folded side (to resemble a petal) and hot glue to the corner of the plate. (This is a smaller size luncheon plate.) Continue gluing the petals around the edges, as shown.
|
4. A total of eight large petals should be around the edges, overlapping a bit to cover the plate. Once all large petals are placed, pull apart the two pieces and shape into a bit of a bowl shape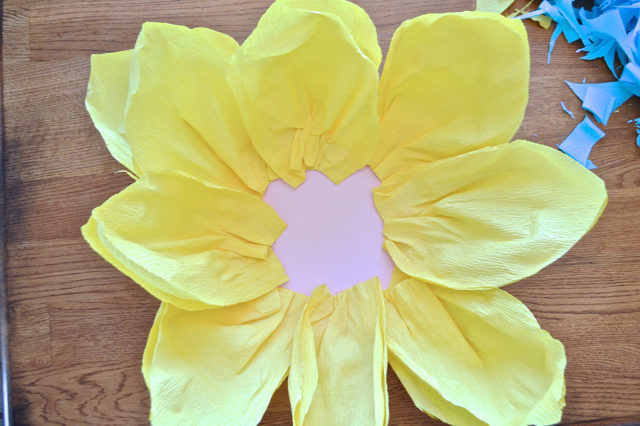 |
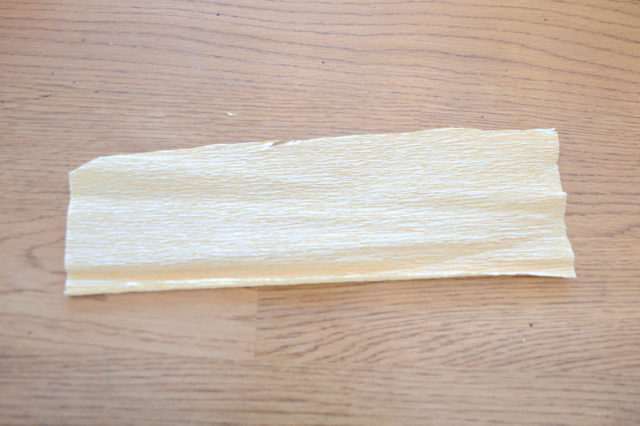
| 5. For the next layer, cut crepe paper (with the grain), approximately 3 inches x 10 inches and fold in half.
|
6. Cut with the same pointed petal shape and apply with glue to the plate, overlapping a bit. (See pink flower for more details.)
When all petals are placed, take time to pull apart the petals, shape into bowls and fluff.
|
Once you complete a few flowers, they go fairly fast and you will get comfortable changing up the size of the flower or petals for a different look. I’ve been adding them around the house for a pop of color.
On the really small flowers (like the yellow and blue in the bottom left coner), the petals are nice and compact, making the flower appear extra full. (The smallest flowers only have 3 inch wide petals.)
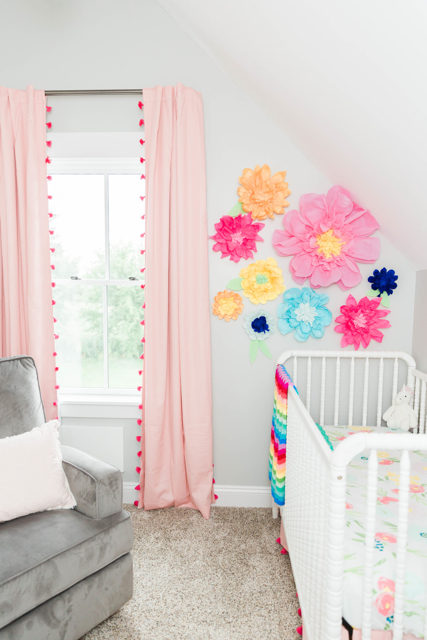
With the larger blooms, you can always add more petals to get the same full look, too. And using different colors is a fun way to change up the look.
This blue number is probably my favorite – it’s a fun and quirky addition on the barnwood range hood.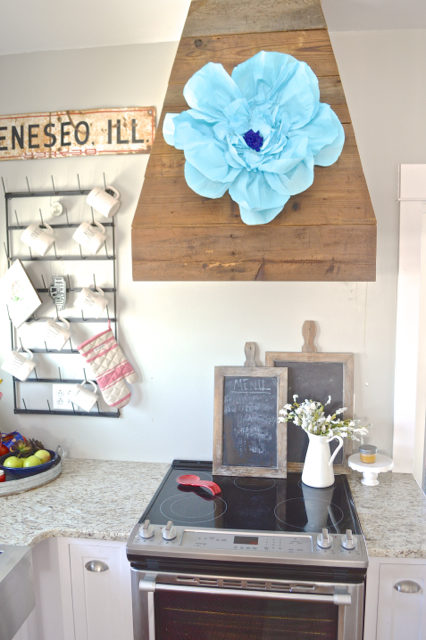
Once the flowers are assembled, they are fairly light, and I’ve been just using Command strips to hang them up.

I may end up adding more to Lucy’s room after springtime. Because if there’s one thing I know, it’s that there can never be enough flowers in this nursery.

Do you want more inspiration for spring? Some of my friends are sharing their beautiful and inspiring spring DIY & Craft ideas! Head over to see what they have in store…
DIY Moss Letters at The Happy Housie
DIY Spring Floral Bird’s Nest Centrepiece at Duke Manor Farm
Spring Botanical Gallery Wall Printabls at Bless’er House
Easy Painted Planters at Place of My Taste
Spring Floral Arrangement at Town & Country Living
DIY Spring Plate Charger and Candle Ring at Zevy Joy
DIY Wood Bunny Napkin Rings at The House of Wood
Crepe Paper Tulip Surprise at Craftberry Bush
5 Minute Simple Spring Ribbon Project at Shabbyfufu
Decorative Tissue Paper Tea Cups at Paint Me Pink
$1 Bandana Easter Basket Liner at Heathered Nest
How to Make Giant Paper Flowers at Newly Woodwards
DIY Thrifted Garland Makeover at Amber Tysl
Like it? Pin it.
Such a fun project! I can see how you could get addicted to making these….next spring I’m envisioning every surface of your house covered in flowers 😉
These are so adorable! I made some similar ones a few years back for my friend’s daughters bedroom makeover but your style is even cuter! Thanks for joining in on this spring hop!
Love this, Kim! So bright and cheery – perfect for Spring!