I’ve been planning to make a barn quilt since we first took down the old barn to rebuild on our property (in 2012).
What can I say? It takes a long time to see some of my plans come to fruition.
But oh … I think it was worth the wait.
Come ON? I’m doing a happy dance just looking at pictures. It’s like that little barn quilt was meant to live on our barn. I want to make 100 more.
I started doing research on barn quilts late last year. Since I’m a (novice) quilter, I love the idea of hanging a quilt square on our barn. It feels very rural Americana and I love that you can choose a square that tells a story. (Read more about the history of barn quilts at Barn Quilt Info. And check out the interactive barn quilt tour map.)
To decide on the quilt square to use, I checked out a few books on barn quilts from the library last fall. Ryan and I narrowed the options down of quilt patterns and finally settled on the Ohio Star. (This photo is from Lewis Mountain Herb, as shown in the book Barn Quilts and the American Quilt Trail Movement.)
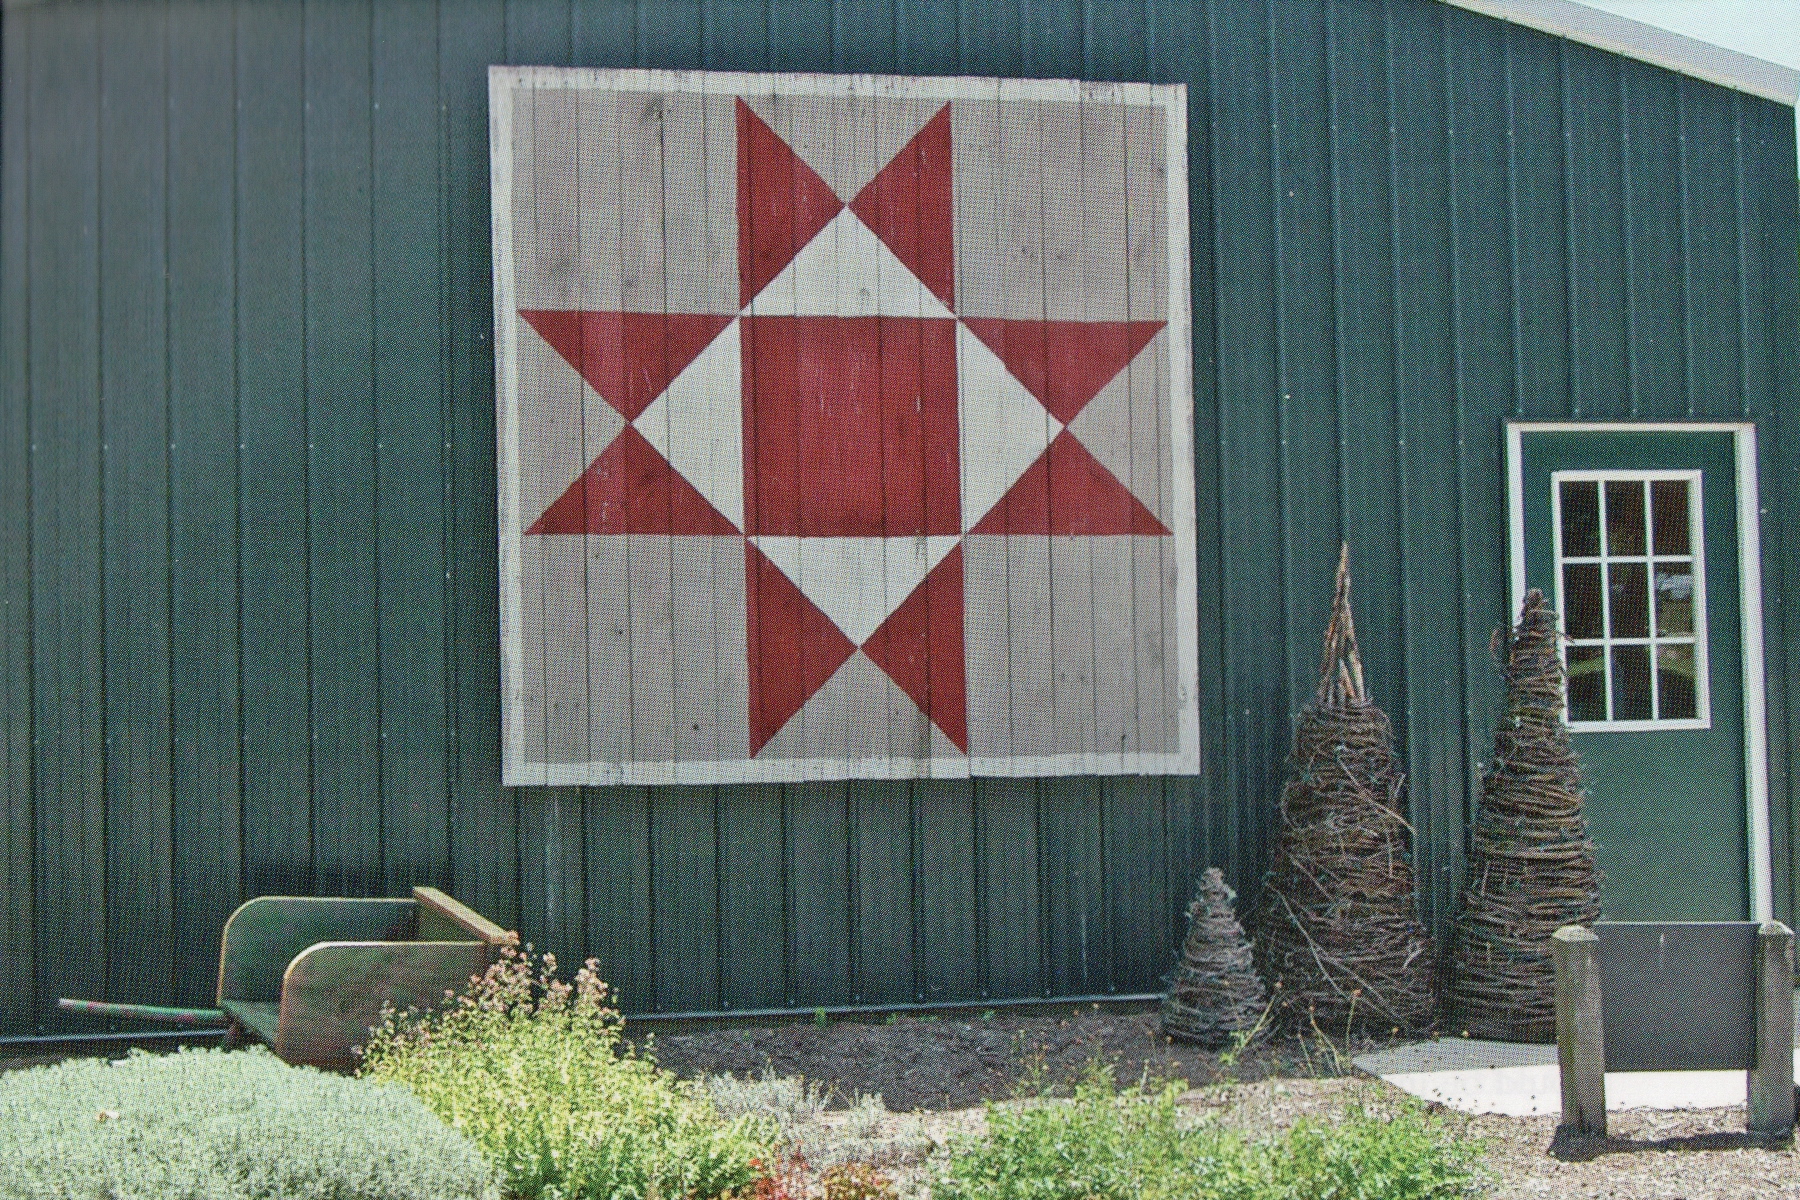
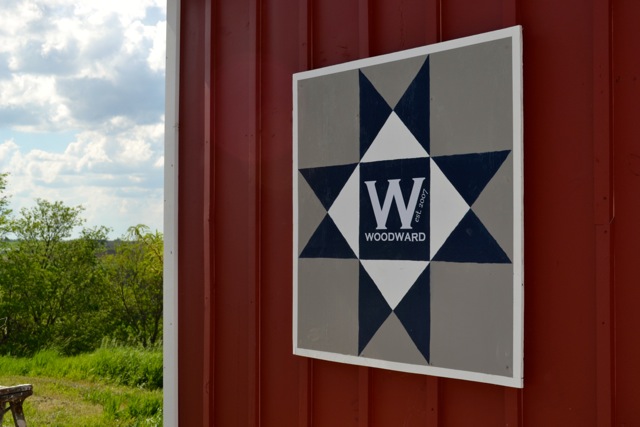
We liked the classic look of this square. I choice navy, grey and white to play off the red barn.
Here’s how I made our version:
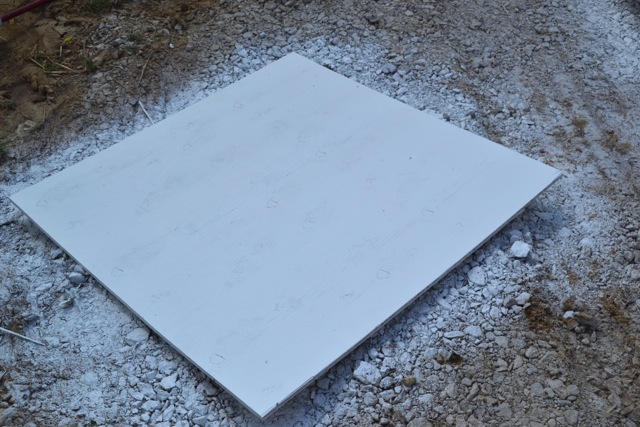
- Ryan cut a piece of plywood to about 38″x38″. (In my barn quilt research, I found that the standard size is a 8 ft. square. But you can choose any size that works for your space. The world according to Kim.) I painted the square with exterior Behr Premium Plus Ultra in Ultra Pure White as a base. (This is the color I use on all exterior white trim so I had plenty on hand.)
2. I wanted to have a frame of white along the edges, so I taped off the sides at about 1 inch with painters tape. (I found it easiest to use a quilter’s ruler for this.)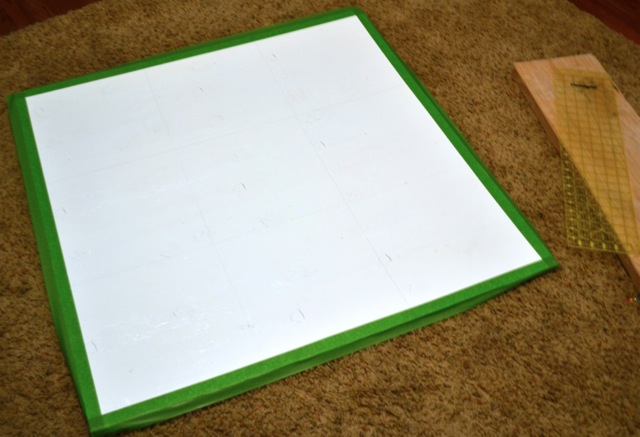
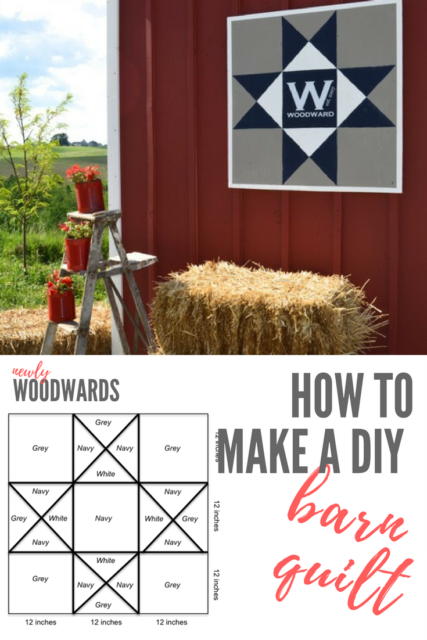
3. Then I used a pencil and ruler to split the board into thirds. (Each third was about 12 inches wide.) Using the inspiration photo above as a guide, I created the design. (The Ohio Star is really simple. Big bonus.)
I created this super fancy, totally to-scale outline of the block with the colors. I know you are probably thinking I should be a graphic designer. Not.

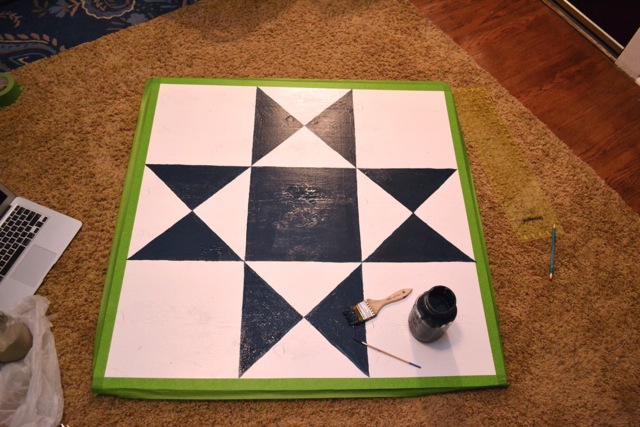
4. Now it’s just like paint by numbers. I started with the blue – Behr Starless Night. (Instead of bothering with painter’s tape, I just used a detail brush for edges and a larger brush for the center.)
5. Then I added the grey – Behr Elephant Skin. After all the painting was done, I just pulled off the painter’s tape around the edges to show the white.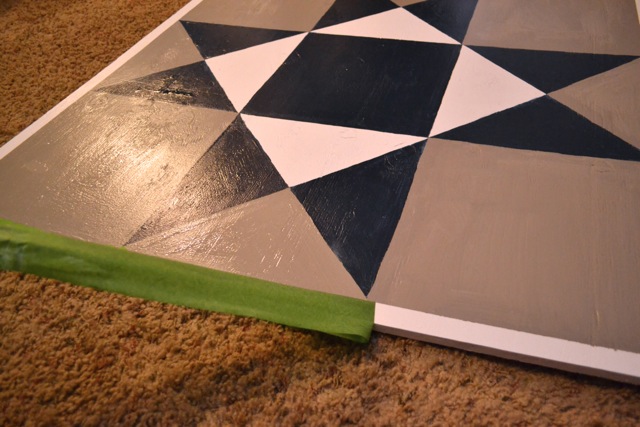
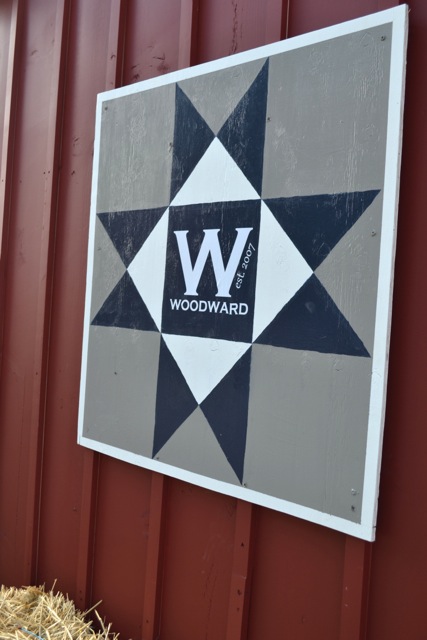
I thought it would be fun to add our name to the star, since we’re going to make this barn our home soon. I cut it from white vinyl on my Silhouette and applied with transfer tape. Ryan wasn’t sure about adding the vinyl – he thought it wasn’t traditional enough. But, in the end, we both liked the addition.
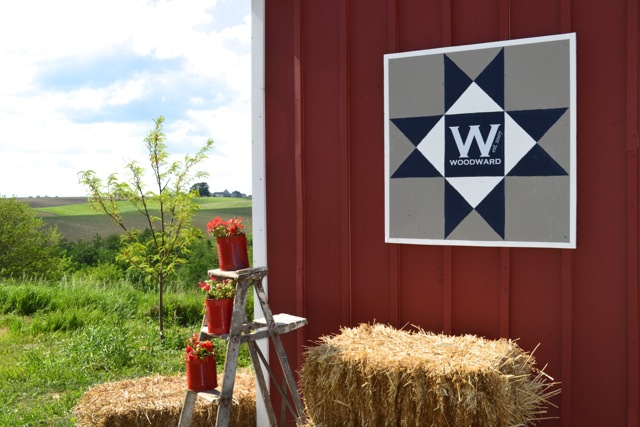
After installing the barn quilt, I brought out this old ladder that belonged to Ryan’s grandpa to display near the barn quilt. It’s covered in paint and old and chippy and I adore it. Just the way it is. 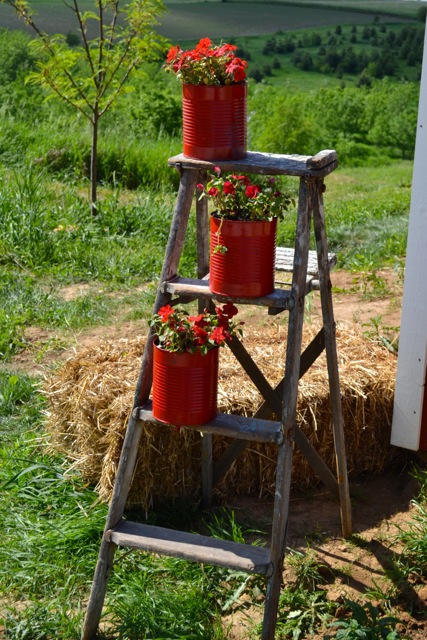
The planters are made from cans I upcycled from the DQ. 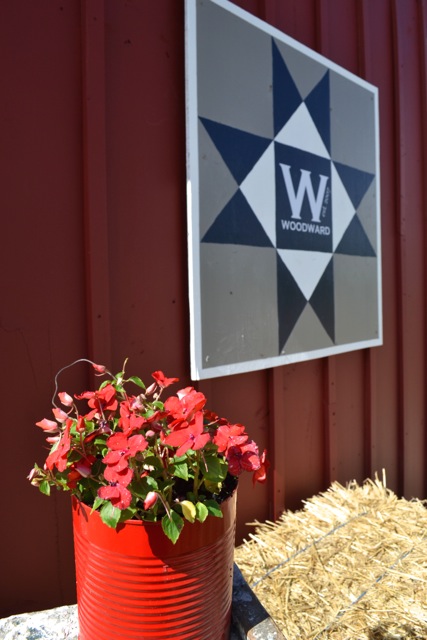
In the end, the quilt square feels at home on our 100-year-old barn. And it’s modernized and Woodwardized with our monogram.
Like it? Put a pin on it.
Can’t wait to try it! Sounds fun
Are you using a flat, semi gloss or high gloss paint
I just used what I have – I think these were satin.
Are you using a flat semi gloss or gloss paint
How many coats of paint did you use? Some sites say 4 coats of base primer and 4 of each color for exterior use. That’s a lot of paint. Since yours has held up, I would like to know how many coats you used.
I just did one base primer coat and a few coats of paint. I figured I could always touch up later since it’s not high. If it was going higher, I may have done more coats and finished with a poly, just because getting up on a ladder to touch up sounds like a nightmare. Best of luck!
But how do you attach it to a barn?!
We just used a screw and drilled right through it into the barn boards behind it. I painted over the screws to blend in.
Hi Kim,
I love the addition of the vinyl letters. Are they weather resistant? How do they not fall off after a rain?
Great job.
Ann
I used permanent outdoor vinyl and it’s held up well for the two years I added it. And we live in a windy, harsh weather area (just part of being out in the middle of nowhere.) So I’d say if they work here, they’d work anywhere.
Thanks for the comment!
This is gorgeous Kim…pinned!
Thank you so much, Annie.
This is such a cool idea! LOVE IT. I don’t have a barn or anywhere to hang one if I did make it….maybe I should consider moving….or building a barn. 🙂 It was wonderful being part of the Elements of Summer tour with you ~ have a fabulous week.
I love your barn quilt! I always love seeing them when driving through farmland! They’re so fun to see! 🙂
Thanks so much, Allison! It’s fun to be part of a bit of a Midwestern Tradition. I’m having to contain myself from making a hundred of them. Too fun.
You learn something new everyday, until today (as I was catching up on my blog reading!!!) I had never heard of a barn quilt. Love it! Well done. And I think the personalization adds such a great touch.
I’m so surprised that this is new to so many people. I think it may be a Midwestern thing. According to the Internet (which must be true), it started in Ohio.
This is AWESOME! I’ve never heard of a barn quilt, but what a lovely idea! You chose just the right colors to go with your red barn. You’ve got yourself a wonderful slice of Americana now!
Thanks so much, Richella. I’m so happy with how it turned out.
BEAUTIFUL, Kim! LOVE it! Ok… so funny story… my dad’s assistant gave him a barn quilt for their barn for Christmas. My mom was telling me this story and I assuming it was a real quilt that people hung on their barn. (Ummmm can you say #dumbblonde) So I ask my mom, “Geez, that’s neat… but what do you do when it rains?” And she looked at me oddly. Then I realized that all these neat wooden squares with the designs were called barn quilts. LIGHTBULB moment! 🙂
Love that ladder, too!
LOL this is hilarious. You crack me up.
What a great addition to the barn! Wonderful job!!
I had never heard of barn quilts (I’m a city gal) but yours looks just wonderful! And the chippy ladder from your grandfather is the perfect addition!
🙂 Linda
I think it may be a midwestern thing, but I’m glad it’s something new to you. =) Thanks for commenting.
I love this project! What a great idea … and I’m totally envious of your barn!!
Thanks, Jennifer! It’s been a labor of love.
Kim , what kind of sealer did u use as a final coat
Just a poly!
It’s absolutely brilliant, Kim. I will make time this weekend to stop by some of those projects!
I just recently started following barn quilts too. Your “W” and the est. date are wonderful additions. I’m sure it will be loved for generations to come!!
Thanks, Donna! I seriously want to make more. I think I could put them in a few more spots without being crazy overboard. 😉
Very pretty! love it!
This looks perfect on your barn! I wasn’t sure what I was going to see when I read you title…I was expecting an actual quilt!
Oh so AMAZING!!!!!! Thanks so much for the tutorial!! I will try and make one for my Dad’s birthday! He’s going to love it!
This is so cool Kim! I love how you are embracing the barn and doing something super traditional and Americana with it! 🙂
That looks AMAZING! Really …what a great idea. Perfect on your gorgeous barn- home! xo
I have never heard of a barn quilt before. What a fun idea! It turned out beautifully!
Good gracious, Kim! That’s incredible. Hope this post hits a homerun for you! Thanks for joining us on the tour!
Such a great idea! It’s traditional but it’s really graphic too which makes it feel so modern to me! I like the addition of the vinyl too. Bravo to you!
Oh, my gosh… I love this! And I’d never even heard of a barn quilt before today!! Pinning!
This is awesome Kim. I love those colors together. Looks fab!
LOVE this! It turned out amazing!!
Hi Kim. You are so smart! I just love it. I’ve never seen one of these before, so I learned something new today!
Love that- what a neat idea!
I grew up on a farm and love the barn quilt that you made! It’s perfect on your red barn!
So fantastic, Kim! You are a star (<–see what I did there?).
Hardee har har. You are hilarious. 😉
Thanks!
Oh this is so awesome. Makes me think of the Pennsylvania dutch hex signs on barns. They would look cool on your barn too.
Love your barn quilt, the ladder, flowers…..everything! That mathematical thing looks way too complicated for me, lol.
How fun it looks fabulous and great tutorial too.
What an absolutely delightful idea! We live in the heart of Amish country and I am used to seeing barn signs! I’ll have to make one for our farmhouse too! Thanks for the summer inspiration!!! xo
I am absolutely in love with this. It looks great, can’t wait to see it in person.
a favorite project! i adore it!
Wow- this is such a fun project!! I love it- nice work. I think the vinyl is such a fun addition too. I know many quilters (and non-quilters) who would love this!! 🙂
What a wonderful idea. So creative and beautiful. Hugs P.S. I invite you to share at my hop tomorrow.
oh my…I just absolutely love this idea. I have a side of our barn/shop where I would love to do something like this. Perfect.