NewlyWoodwards

an unconventional home

  • House Projects
    • Building
    • DIY
    • Renovation
  • Crafting
    • Crafting
  • Decor
    • Decorating
    • Gardening & Outdoor Spaces
  • Holiday Decor & DIY
    • Christmas
    • Fall and Halloween
    • Patriotic
    • Spring
    • Valentine’s Day
  • Cleaning & Simplifying
    • Cleaning
    • Minimalism
    • Organization
  • Budget & Money
    • Budget & Money
  • About
  • Contact
  • Disclosures and Privacy Policy
  • Shop our favorites
    • Shop our home
    • Shop our favorite books
    • Shop our favorite kids items
    • Shop our favorite DIY and tools

My (untraditional) wall tree for our (untraditional) space

December 15, 2014 by Kim Woodward

It’s the last week of Dare to DIY – which means it’s time to share our DIY holiday decor projects. This is my favorite week, which is why I’m thrilled to be hosting.

Make sure to link up all your DIY holiday decor projects at the bottom of this post.

Before I get to my project this week, I want to thank my friends who co-hosted Dare to DIY this year! These are three of my very favorite bloggers, and I hope you have a time to stop by and say ‘hi.’ It takes work and time to participate, and they make this really fun!

dare to deck the halls

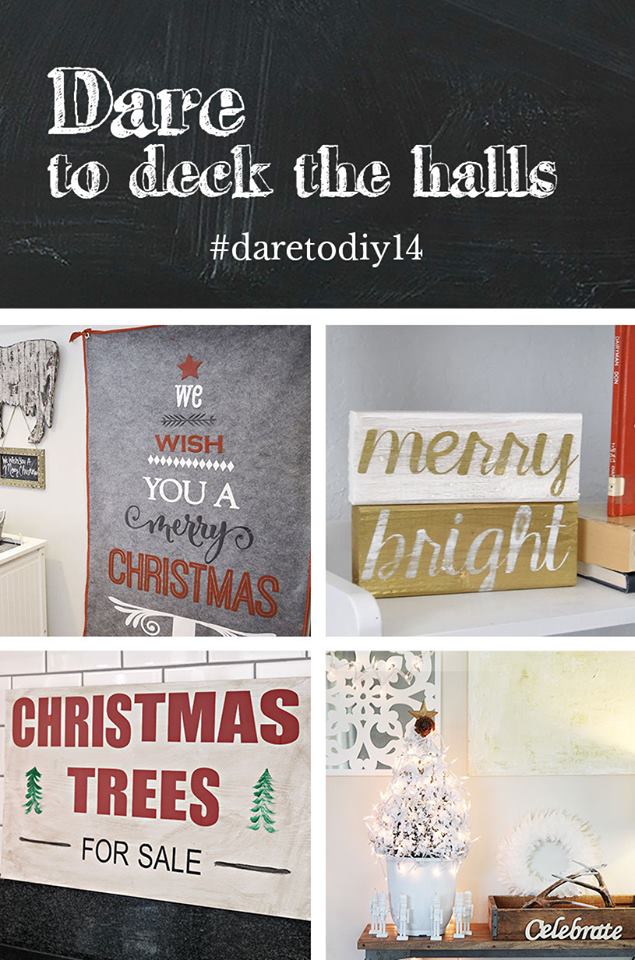
Merry and bright blocks by Rachel at Maybe Matilda
Christmas tree sign by Michelle at Decor and the Dog
DIY mini Christmas tree by Katja at Shift Ctrl ART

My project this week was a wall-hung Christmas tree. There wasn’t any way a tree was going to fit (comfortably) in the barn apartment. It hasn’t really bothered me, but I did want to do a project that focused on the Christmas tree.

Here’s what I came up with.

Vinyl wall hung Christmas Tree decor6

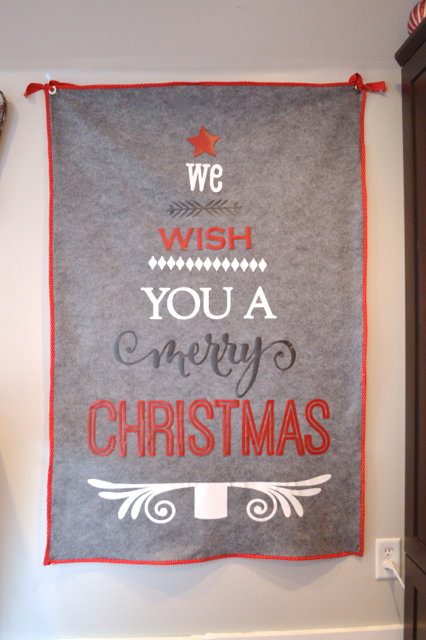
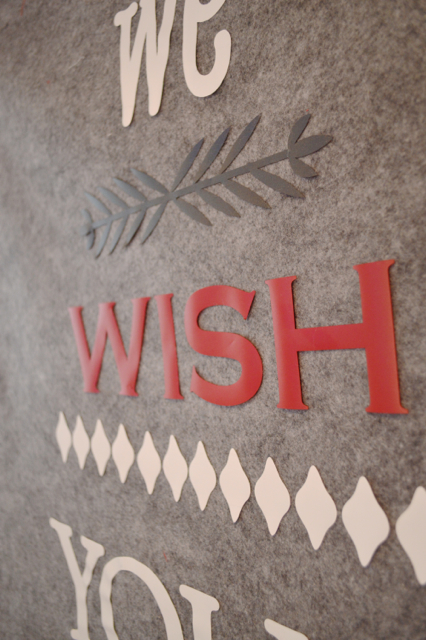
I was planning to use a roll of canvas, but fell in love with this cute felt (that almost feels like wool). I brought home one yard and then cut vinyl to fit it (I had space on my wall for a 36×60 inch hanging).Vinyl wall hung Christmas Tree decor3 To cut the vinyl this large on my 9 inch wide Silhouette Portrait, I simply made sure that no individual word was higher than 8 inches tall. Then, I scaled everything in Silhouette Studio to fit on a 36×60 inch canvas. Then I decided which words would be which color vinyl and I cut.

I promise that it’s pretty simple if you are focused. Took me about 30 minutes to cut everything and weed out the words.

I used transfer paper to put the vinyl on the felt. Henry was obviously a HUGE help.

Henry helping wall hanging1

It’s not perfect – the felt isn’t super great to adhere. But it has stayed on – so far, so good. When you get close up, you can see that it’s not a super clean adhesion.

Vinyl wall hung Christmas Tree decor5

Once the tree was on, I used a cute red and white dot cotton fabric to bind the edges. It makes the hanging look much more finished and a little like a quilt. (This would make an ADORABLE quilt, methinks.)

Vinyl wall hung Christmas Tree decor4
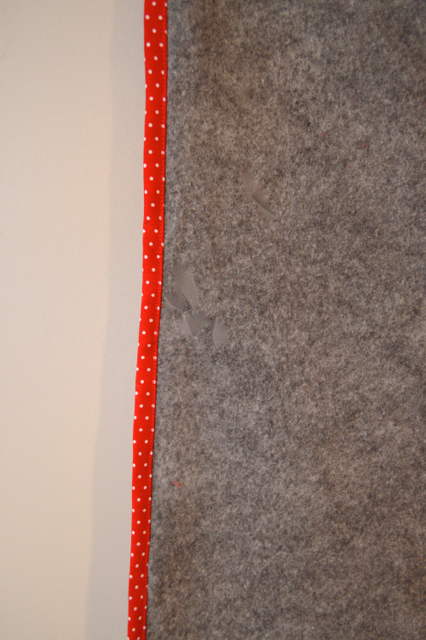
I tried to add some grommets to the edge for hanging, but I bought the wrong grommets and it was too thin of a material to work well. But I still used the fronts and it looks fine.Vinyl wall hung Christmas Tree decor6


It’s a fun little (untraditional) holiday accent for our (untraditional) tiny home.


Share this:

  • Click to share on Facebook (Opens in new window)
  • Click to share on Reddit (Opens in new window)
  • Click to share on Twitter (Opens in new window)
  • Click to share on Tumblr (Opens in new window)
  • Click to share on Pinterest (Opens in new window)
  • Click to email a link to a friend (Opens in new window)

Filed Under: Christmas, Crafting, Holiday Decorating & DIY Tagged With: Christmas, silhouette

Comments

  1. Jess says

    December 18, 2014 at 1:25 PM

    I love this! We have a tree, but would love to have something like this in a tree free room – great idea 🙂

  2. Katrina says

    December 18, 2014 at 11:03 AM

    Such a pretty idea!! I always love seeing your projects!!

  3. Katja | Shift Ctrl Art says

    December 16, 2014 at 4:06 PM

    Kim, I simply adore this wall hanging. And it means you get your tree after all 🙂 I love that felt and the dotted binding is just so perfect. Henry does look like a big helper in that photo 🙂

  4. Melody says

    December 16, 2014 at 12:44 PM

    Oh! I ♥ that you also used “untraditional” color in your banner instead of requisite red/green/gold… What an awesome idea for an entryway.

  5. Gretchen says

    December 16, 2014 at 8:26 AM

    Great solution for a small space! And I love that felt 🙂

  6. Amber @ Wills Casa says

    December 15, 2014 at 11:01 PM

    I love the font pairing. This is such a creative solution for the barn!

  7. Arizona Lainey says

    December 15, 2014 at 10:08 PM

    ABSOLUTELY PERFECT!

  8. Cindy@Made2Style says

    December 15, 2014 at 10:06 PM

    I totally thought the words were embroidered! I love the colors and choice of fonts!

  9. Julia@Cuckoo4Design says

    December 15, 2014 at 7:41 PM

    It is so so so awesome! love it

  10. Ashley@AttemptsAtDomestication says

    December 15, 2014 at 7:36 PM

    Such a clever idea! This looks awesome!

  11. Kenz @ Interiors By Kenz says

    December 15, 2014 at 3:18 PM

    Very cute! I really love the fonts.

  12. Rachel says

    December 15, 2014 at 3:16 PM

    Oh, it’s so big! I was picturing it as a small little wall hanging until the picture of Henry standing with it. How fun! I remember all the fun decorating you did in your house, so I’m glad you could work some Christmas into the barn. I love how this project came out!

  13. Natasha says

    December 15, 2014 at 2:50 PM

    I just happened across the Dare to DIY party today, so I’m a bit late! What a wonderful idea – I’m so happy to have found it, even late. I’m enjoying checking out everyone’s awesome creations!

  14. Antonella @ Love Your Home says

    December 15, 2014 at 2:12 PM

    This is cute. Love the fonts you chose.

  15. Amy C says

    December 15, 2014 at 8:29 AM

    This is awesome! So clever for small spaces and those colors are great! (And I must say, that is the cutest little helper I’ve ever seen!) 🙂

  16. michelle@decorandthedog says

    December 15, 2014 at 8:14 AM

    Super cute! I’m loving the color combo. I’m not believing you that it was super easy because you are a Silhouette wizard.

  17. cassie says

    December 15, 2014 at 7:24 AM

    such a great idea! i love the colors and it is perfect for your space, kim!

  18. Chelc says

    December 15, 2014 at 6:40 AM

    I love, love, LOVE this! It definitely gives me a reason to dig out my Cricut from storage!

Trackbacks

  1. DIY deer head tree topper says:
    December 18, 2014 at 12:42 PM

    […] 11: Gourley Girl and Guy Desert Domicile Life on Virginia Street This That and Life Sharing here: Dare to Deck the Halls « My 2014 Blogger Stylin Christmas Home TourThrift Score Thursday 44: An awesome Vintage […]

  2. Holiday Thrift Store Challenge: Deer Mount Advent Calendar says:
    December 18, 2014 at 12:41 PM

    […] Gallery, Your Designs This Time, Silver Pennies Sunday, Thrifty Decor Chick Before and After Party, Dare to Deck the Halls « Thrift Score Thursday 42Sweet Clover at the Holidays […]

  3. Dare to DIY: Deck the Halls says:
    December 16, 2014 at 10:32 PM

    […] Did you do any DIY projects for the holidays? Today we’re linking up with Newly Woodwards for Dare to DIY 2014. […]

  4. Procrastinators Christmas Home Tour - Attempts at Domestication says:
    December 15, 2014 at 7:42 PM

    […] *Linking up at Newly Woodwards* […]

  5. 2014 Holiday Decor & An Easy, Festive DIY says:
    December 15, 2014 at 7:38 PM

    […] project is linked up over at Newly Woodwards Dare to DIY link-up.  Go check it […]

  6. Holiday DIY Wall Art - The Simply Luxe Life says:
    December 15, 2014 at 3:05 PM

    […] This post has been linked up on the Dare to DIY Party – Week 4 at Newly Woodwards. […]

  7. DIY Ornaments: Mini Wall Hangings | Wills CasaWills Casa says:
    December 15, 2014 at 12:40 PM

    […] Dare to DIY deck the halls link up for more great Christmas inspiration! Thank you a million times Kim, Michelle, Rachel, and Katja for hosting this […]

  8. Dino-Christmas! Make Ornaments from Plastic Animals - says:
    December 15, 2014 at 7:36 AM

    […] linking up with Dare to DIY: Deck the Halls at Newly Woodwards, the very last Dare to DIY of 2014. Sniff, sniff. Head on over and see what everyone else has been […]

Search

Popular Posts

  • Email
  • Facebook
  • Instagram
  • Pinterest
  • RSS
  • Twitter

Copyright © 2026 · Beautiful Pro Theme on Genesis Framework · WordPress · Log in