I love myself a good chalkboard. They are perfect for home decor, parties and everyday fun! I have chalkboards everywhere. If you stand still long enough, I may cover you in chalkboard paint.
But not everyone is a wonderful chalkboard artist. Raising my hand.
Here’s the thing. I have finished some “traditional” chalkboards that I really love – like our giant Thanksgiving word search, Henry’s first birthday and his second birthday, the LOVE recipe and our DIY menu board.
There are a lot of wonderful tutorials out there with tips for using chalk pens, water, templates and more to get lovely chalk art. (Including this one I wrote myself a few years ago.)
But on any given day, all of these things take more patience and time than I can spare. Plus, there’s more room for error.
So I’ve come up with a shortcut to create customized designs on chalkboards with just a bit of vinyl. I love these because I get exactly the look I want (no error when I mess up).
Plus, they don’t wipe off easily or get messy like chalk. (But the vinyl does easily peel off when you are finished with the design.)
Here are a few cute designs I created last week for our home using this method.
First up – a kindness reminder in the kitchen on a Target Dollar Spot chalkboard. This design is so intricate – I never would have been able to replicate it well with chalk.
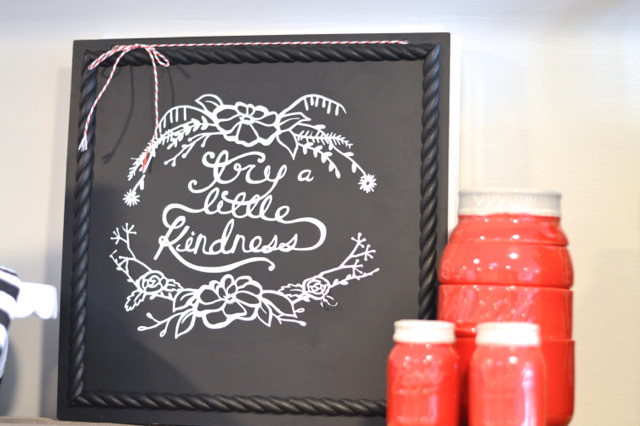
I simply used the pre-existing design from the Silhouette Design Store that I bought for 99 cents. Then I sized it to fit the board and cut it using white vinyl. Once I picked out all the vinyl around the design, I used transfer paper to apply to the front of the chalkboard.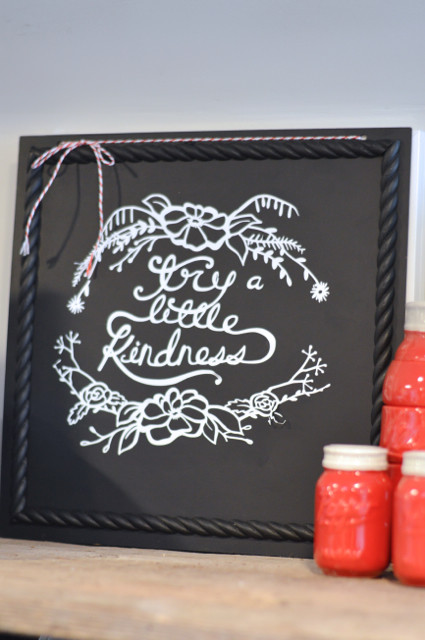
For another take on this idea, I created a cute little “I love you more than” fill-in-the-blank sign. Because I love coffee. But most days, I love my family more.
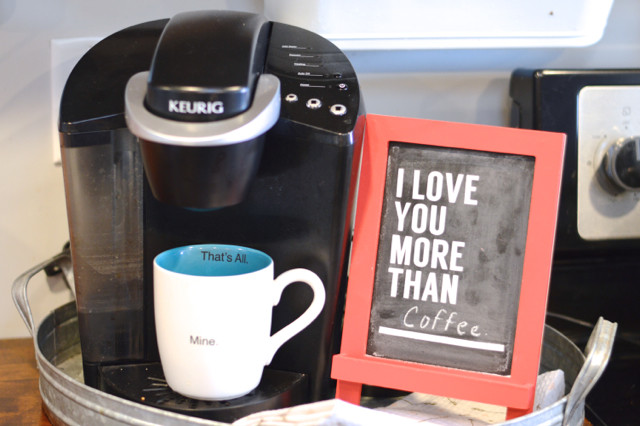
This was created using fonts I have on my computer. Less than 5 minutes of designing and cutting the vinyl got me a look I love. For this one, I rubbed chalk all over the board to make it look a little more legit.
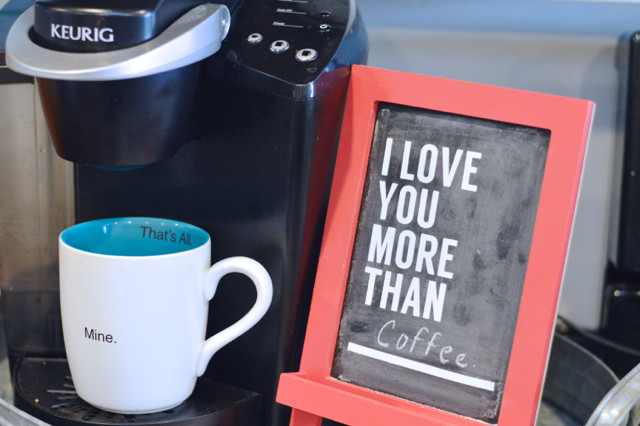
This particular design has been making its way around the kitchen. (This little chalkboard was also in the Dollar Spot, and I’ve seen similar versions at Michaels recently.)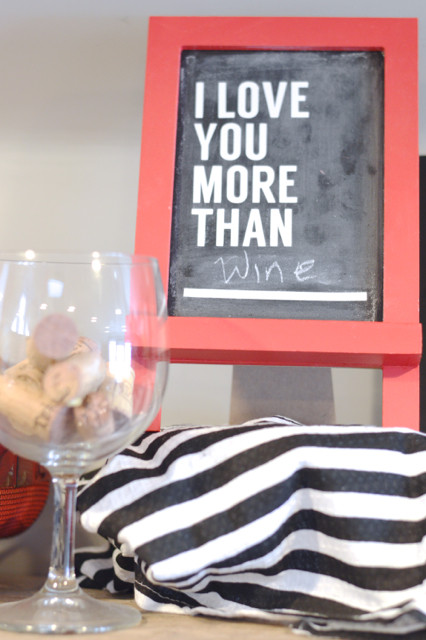
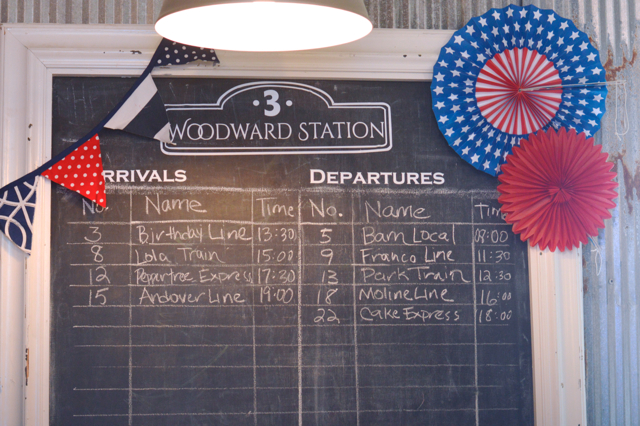
Here’s another example of I used a mix of “real” and “vinyl” chalkboard at Henry’s train birthday party.
Just a little lazy girl craft tip for perfect chalkboards every time – without the muss or fuss.
Hi Kim love what you’re doing and the lines for me is so touching. “I Love You More Than coffee”- it really made my day. Love lots!