I am a bit of a paint hoarder. I like to hang onto used cans of paint, for crafting and paint touchups. We often work on small projects, and I like to have lots of choices available without running to the store.
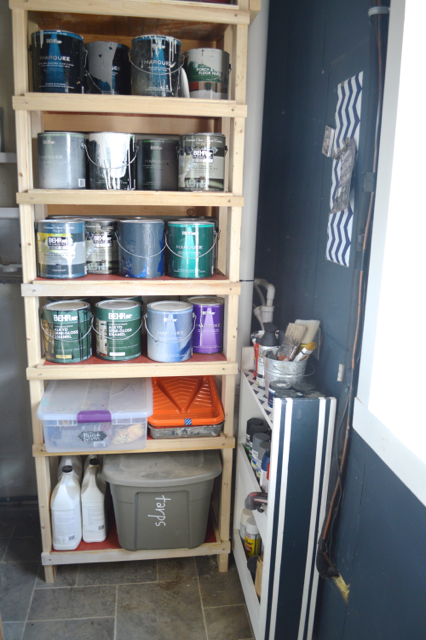
But the dozens and dozens of gallons of paint were starting to overtake the garage shelf assigned to hold them. (Remember the beautiful storage carts my dad built for our barn garage overhaul?)
Full disclosure: This is the photo of the space 16 months ago. Because right now, the poor garage has been a catch-all place for all the junk waiting in limbo until the house is done. It’s not pretty. But the paint supply has more than doubled in the past 16 months, and we were out of room. You can imagine the cray.

In addition to running out of space, keeping paint in the original cans can be impractical and inconvenient for daily use. The cans are a little more cumbersome to open, close and pour from – especially when working on small projects (or art projects with Henry). And I’ve found that after several years, they are prone to rusting around the rim. Nasty.
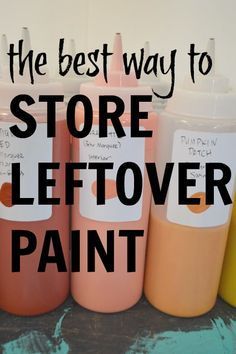
HOW TO STORE LEFTOVER PAINT
So, I set out to find a better solution. I had seen someone on Instagram used ketchup bottles for paint, and I thought that was a brilliant idea. (I can’t remember who I originally stole this idea from. Forgive me?)
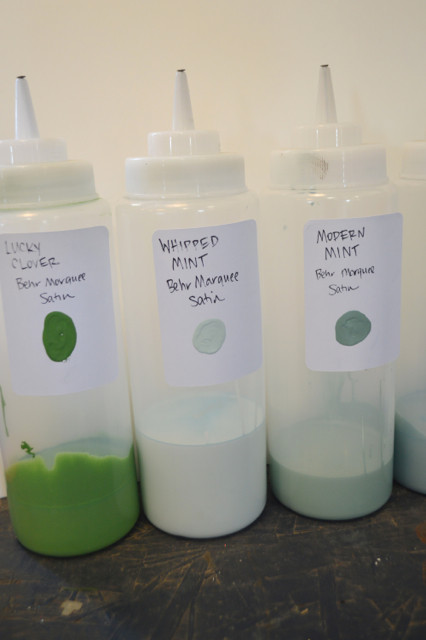
Enter 32-ounce condiment bottles from Amazon (affiliate link). I picked these out because they are big enough to hold a quart of paint, which is really a lot! Plus, they are easy enough to handle with one hand and had good reviews. The only downfall is they don’t come with caps. (But I came up with a solution for that.)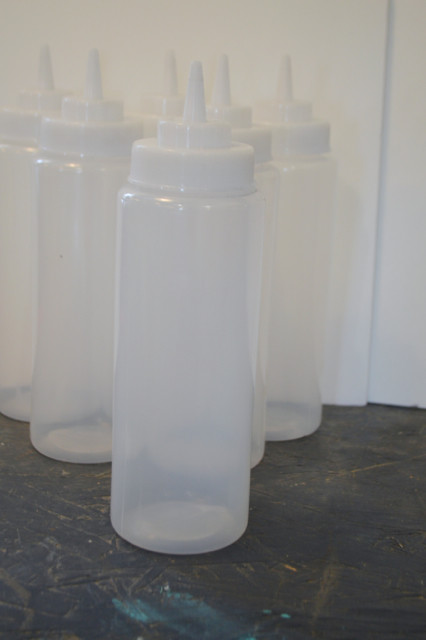
Once I had 24 of these bottles, it was just a matter of going through my paint and pouring them into separate bottles. I planned to use a funnel but it was easier and less messy to just carefully pour the paint into the wide mouth top.
I did keep some of the paint in cans – if there was a full gallon, for example. Or if it’s for a future project at the house.
But most of my paint stash found a new home in a squeeze bottle. I also gave a few gallons of paint to family and will drop off the empty (or almost) cans to the recycling facility. (Many recycling centers will accept paint and other chemicals.)
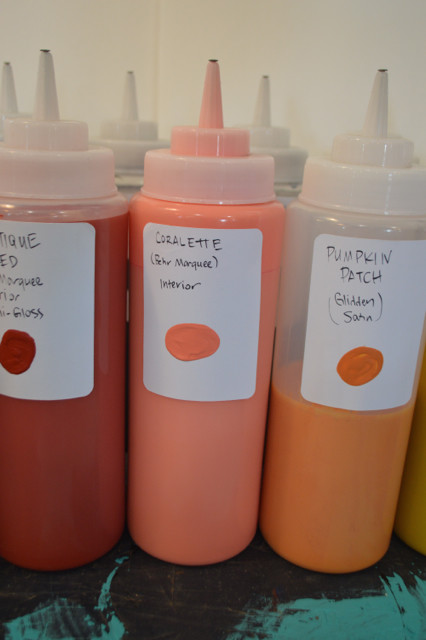
I added super simple white labels to the bottles – just from white sticker paper. I could have been fancy and printed them on my computer, but I don’t have a working printer. So I just hand-wrote the color names, brands, finish and any other info that’s needed (for example, some are exterior paint). Finally, I just added a dot of each color to the bottom of the label. 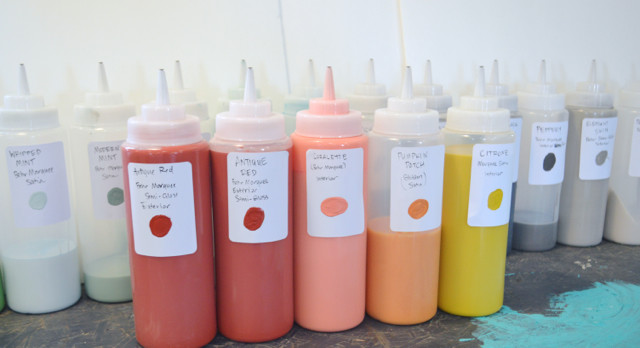
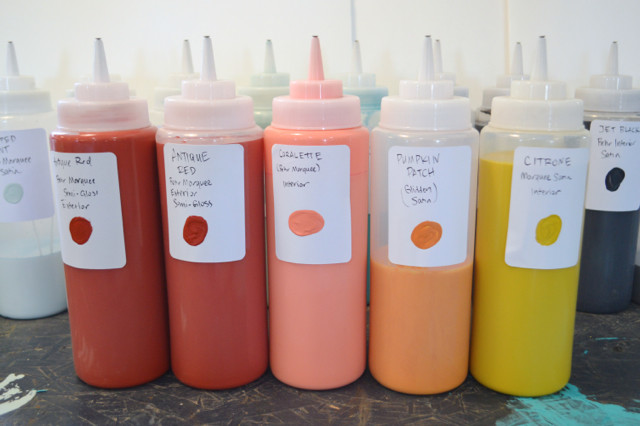
These bottles take up less then 10 percent of the space taken by all the cans on our shelf. And they are much easier to use than the bulky cans – especially for the small projects that pop up.
For now, I just added a nail to the top of each of the squeeze bottles. But I’m waiting on some pencil erasers to give them a try. You do need to make sure the bottles are airtight so the paint doesn’t dry out.
I’ve tried out the bottles and the lid is really secure and the paint comes out easily. I’m not sure if the paint in the squeeze top will ever dry out, but that will be easy enough to clean if it does happen.
And the best part, if I run out of paint, I can clean out the bottle with a bottle brush and refill. I hope this is a good long-term solution for paint storage. I also get a good deal of pleasure out of lining up the paint in color order. ROYGBV for the win.
Do you like this? Then put a pin on it …
MORE PAINTING TIPS
HOUSE PAINTING TIPS FOR BEGINNERS
Genius idea!
Not only is this a great idea for saving space, but it looks pretty too, so it’s the best of both worlds! I love it! I am featuring this as one of my favorites for a roundup I am working on, with one photo and a link back to your post. It may also be included in a collage. If you do not want me to use your image, please contact me and I am happy to remove it. Thanks!
You never mentioned what you used for the tops
Sorry about that! I’ve used several things – a simple nail, a pencil eraser and an electrical twisty. The electrical twisty works best.
What about ticky-tack squeezed in as top to seal it? Good idea. Thanks.
That’s a good idea!
Do you think paint will erode? Plastic bottle?
Someone else asked this as well. I’ll have to watch it over time. So far, I haven’t had any issues.
Since it is now October I would love to know how you are liking the paint storage and are the nails working well as lids?
So far, so good! I have been getting rid of the nails as I used them – adding pencil erasers instead to keep it airtight. I think if I were to do it again, I would find legit caps. But the containers are working great!
I’m trying the same thing but with the plastic bottles that have a screw on lid with a pour cap. I figure if it’s water tight then it’s air tight. but just to add an extra layer I put a piece of plastic wrap over the top of the bottle and screw the cap back on.
That’s a good idea! It’s just a matter of making it work!
Love your idea, and if your looking for a specific color it’s a snap the find! Thank you for sharing, I’m going to try this.
So pretty! You might try glass canning jars though. I suspec the solvents in the paints will leach through the plastic long term and give you gummy paint. Plastic is a surprisingly permeable material.
Thanks so much for the tip – I’ll have to watch it closely. I really wanted something larger with a squeeze top, so mason jars were out. But maybe I could find a way to attached the top to a glass base?
Sorry I just got to the party but capping those bottles is easy with the very small plastic tips you get at the hardware store. They are intended to be used on wire legs & such. Don’t know if your nails will be airtight enough. Excellent storage idea though!
SO SMART! Why didn’t I think of this?
I think you buried the lede there with how PRETTY the paint looks in those bottles ;). Seriously, though–great solution–I definitely need a paint storage solution!
I’m definitely trying this (or to be more accurate, my husband is definitely trying this)!
Sorry, Fran’s husband, for adding more to your to-do list. (Although, not really sorry. ;))
You have some really pretty colors. I’d put those suckers on display!
Love this idea!
AWESOME!!! I love this.
Such a good idea! I have sooo many paint cans, too — taking up space and not very accessible since I shove them under a bench and out of the way. This would be so much more convenient. Putting this on my “summer to do” list!
LOVE this idea! Paint cans are so bulky, especially if they are not completely full. Just taking up space! I like how you can see the paint so easily–no digging around and moving cans to try and find what you’re looking for. 🙂
Awesome idea, Kim – and so cute!