Psssssst: Are you looking for the full organized garage reveal? Check it here …
When you take on a big project (like organizing the most messy garage of all time), you have to bite it off one piece at a time. And in the last week, we have bitten off a giant piece.
And spoiler: one of the best changes this week is the simple and fast way we stored all the garden tools. Also known as some of the worst things ever to store in a garage. They are long and short and heavy and light and there’s no good place to organize them.
- We have tried those flimsy plastic storage organizers you can find at the home store. They are hopeless.
- We have tried just throwing them all in a corner, ignoring them, and hoping for the best. Also hopeless.
But now … a real legit solution.
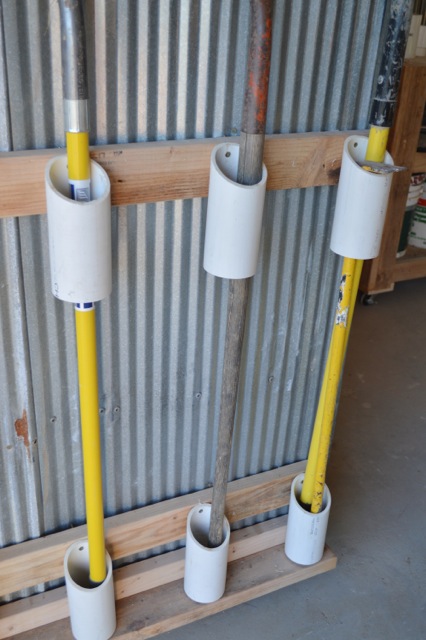
After finding some pieces of PVC, Kyle and Papa Bear created this little wall-o-organization for all the handled tools. (Just like my inspiration from Ashbee Designs.)
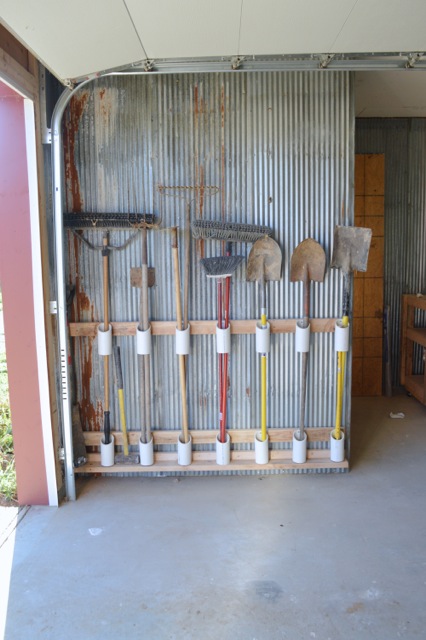
This is already changing my life for the better. (And if you are looking for an update, 2 years later, this storage solution is still going strong.)

This was a very simple DIY project. We used various scrap pieces of PVC and cut them on the angle, to allow space to drill them to a board we secured to the wall. Each tool has two pieces of PVC to hold the top and bottom. The bottom of the tools rest on a board, instead of going to the ground (which would be a dust and dirt collector).
Now, we just need a second layer for the pile of tools still in our garden shed. (Where do they all come from?)

What’s that? You want more?
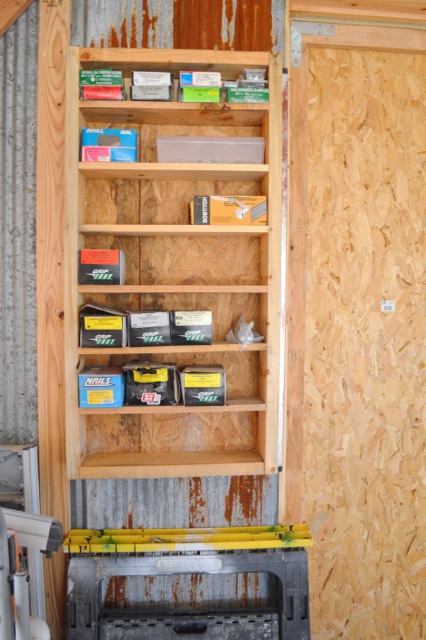
Check out this amazing wall-mounted storage box for all of our nails/screws/hardware. My dad whipped it up. The shelves are made to the same width as the boxes, so they don’t get lost or forgotten. (Novel idea, right?)
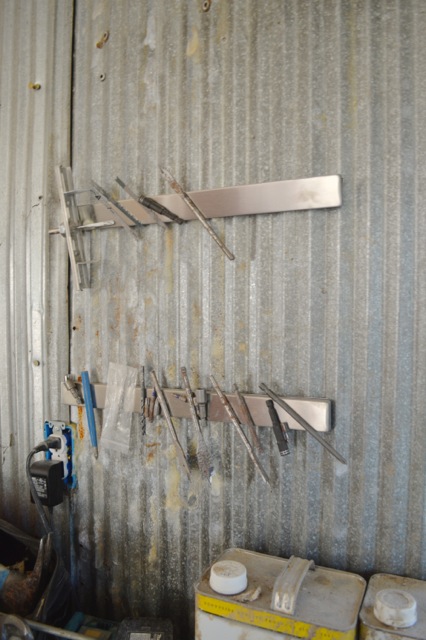
And this magnetic strip is holding all of our loose drill bits and other stuff. (Magnetic knife holder from IKEA)
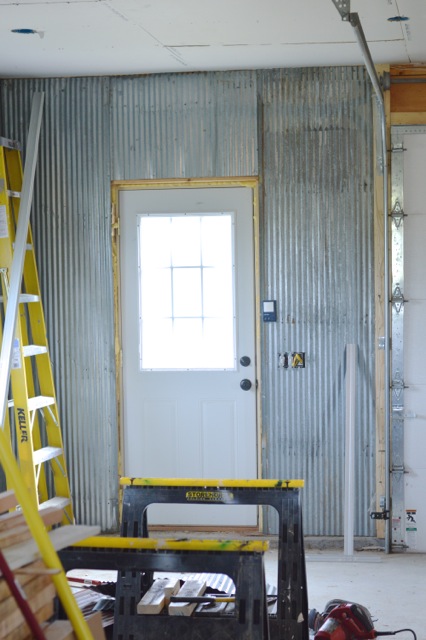
And we can’t forget, the guys also installed metal walls this week. Yes. It’s been a marathon week. The barn garage is looking gooooooooooood. Two weeks ago, it looked like this:
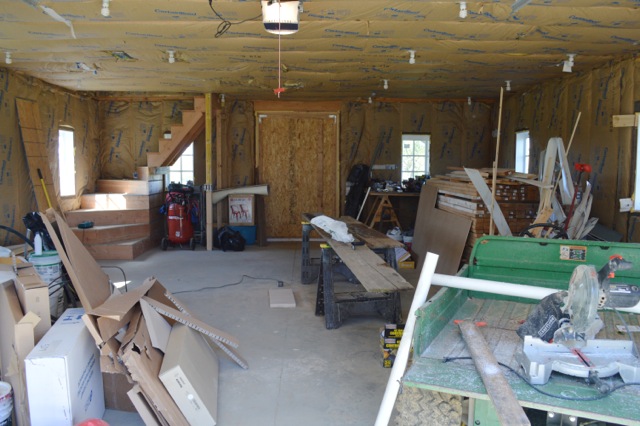
And, I kid you not, this week it looks like this.
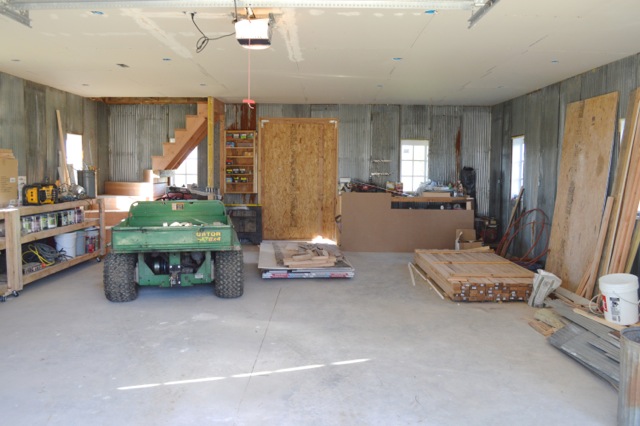
If you don’t see the difference, you need your eyes checked. Stat.
I. AM. OBSESSED.
I’ve been doing so much squealing this week. I just love the space and all the progress is blowing my little mind.
In case you are curious, I’ve done nothing productive to make this space come together. (You aren’t surprised, are you? I revealed my renovation gifts yesterday.)
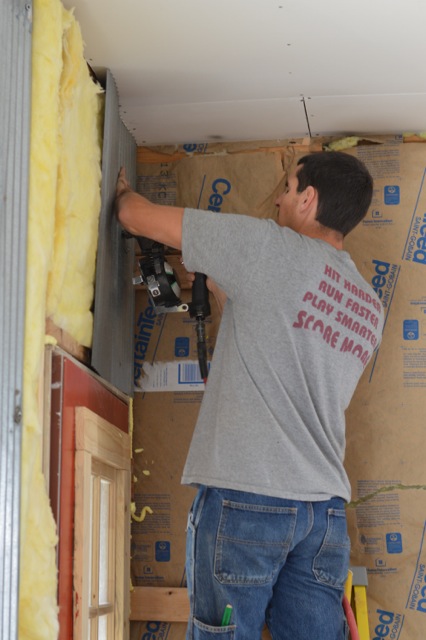
But, other people have been hard at work. Like my husband and brother, Kyle. They installed the drywall on the ceiling. Which is not a fun job. Ryan could barely move after a weekend of installing drywall.
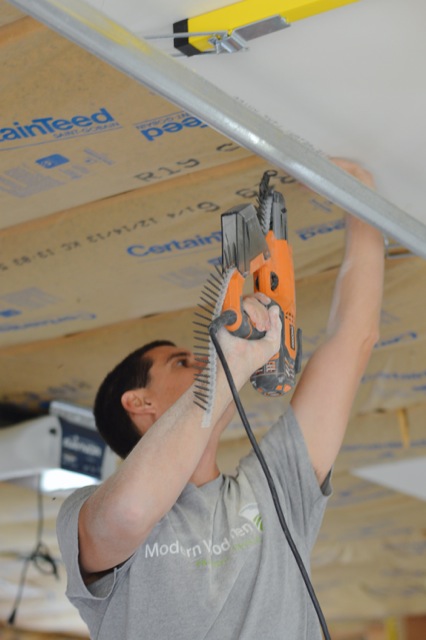
But I think it’s worth it … (don’t tell Ryan I said that)

And my brother has been his partner-in-crime. He couldn’t have done it without Kyle. They are a motley crew, these two. Working on laughs, Subway and a case of Coors Light.
The original plan was to just leave the drywall alone – not worrying about mudding/taping/painting. But then Ryan starting mudding. So, I’m just laying low and trying to figure out what it all means.
And then, as if the ceiling wasn’t enough wowza, Ryan and Kyle immediately got to work installing the metal on the walls.
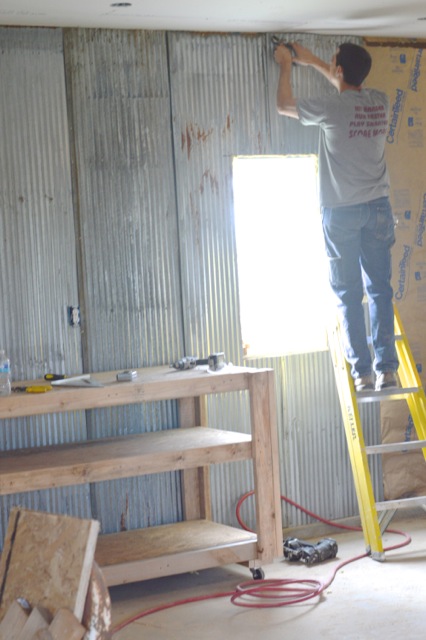
This metal was actually on the roof at this time last year. But when Ryan had to rip it off and install a new roof, this had to find a new life.
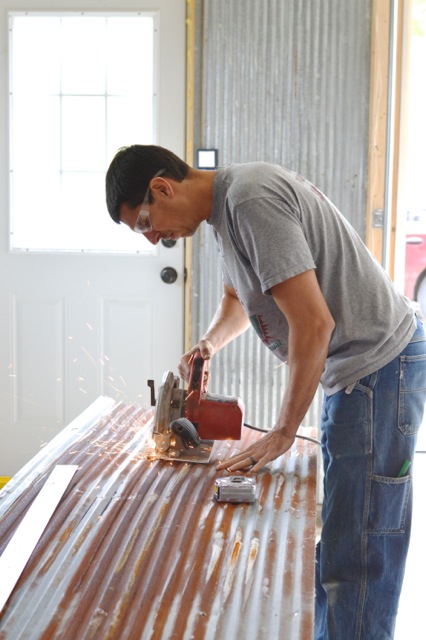
So now those pretty panels live on the wall. Ryan and Kyle installed them one by one, cutting each piece with his favorite Milwaukee circular saw and metal blade they went.
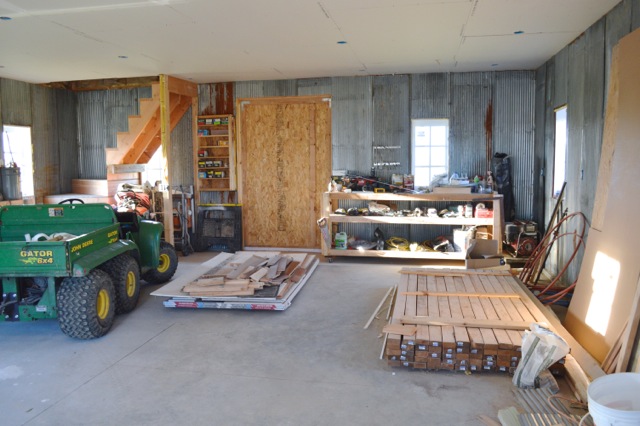
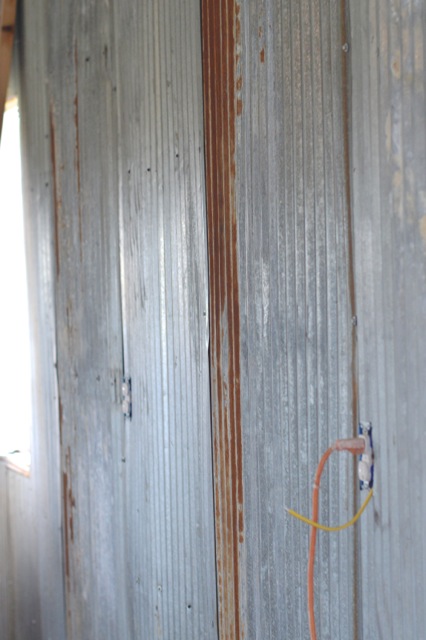
I am obsessed with how great it looks. I love the rust spots. I love the patina. It’s not everyone’s style, but I think it’s just perfectly rustic for a 100-year-old barn.
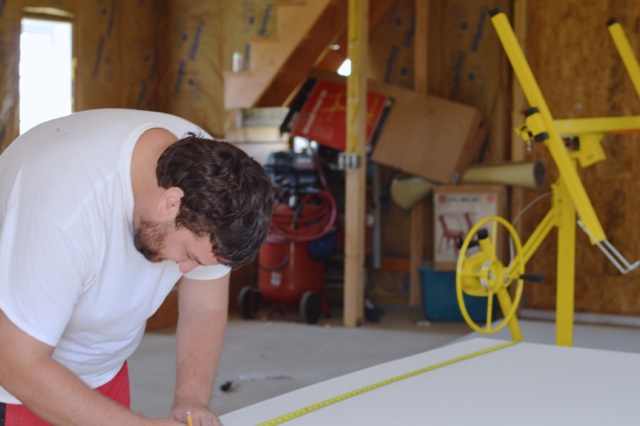
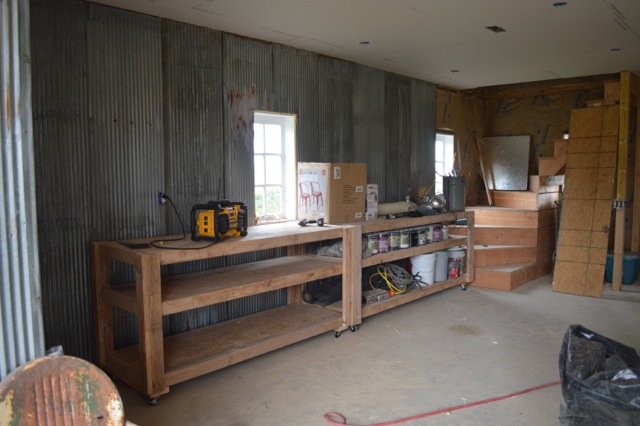
Here are the workbenches my dad built in front of the walls.
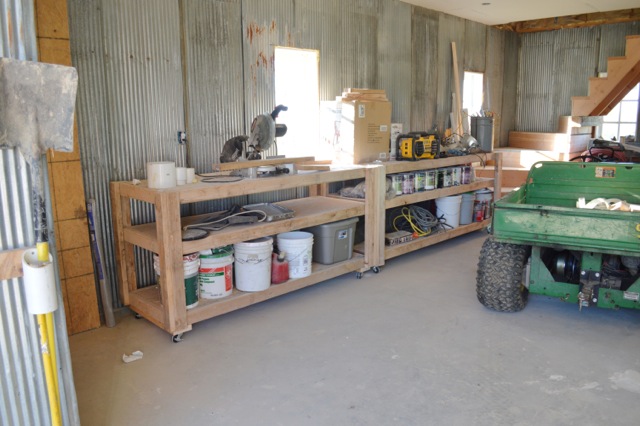
Basically, all of my barn garage dreams are coming true. There is actually floor to be seen. Thanks to my parents and aunt and uncle for clearing it all out for us.
(This post contains affiliate links. For more information, see my disclosures here.)
Do you like this? Then, put a pin on it.
And check out the full garage reveal here …
how do u store tools in the garage and mops etc in the laundry if u rent and cant put holes in walls etc
I just realized something… If you two have kids and raise them there, they will leave doors open wherever they go their whole life long.
Totally. My son is literally being raised in a barn.
Good innovative… Space management…
Hi there! Just love this post! I adore the fact that you put corrugated metal on the walls, such a nice touch. My favorite part is your easy garden tool storage. I’m getting ready to do a post about our backyard dreams early next week and I’d like to include a photo of your storage solution with a link back to this post with your permission. If you have any questions or concerns, feel free to email me at thejohnsonsplusdog at gmail dot com.
Thanks!
Of course – looking forward to seeing your project.
Thanks so much for giving me credit for the PVC tool storage. Your implementation is beautiful. The good news is I set my tools he’d up with the PVC tool collars several years ago and it is one of those storage systems that works. My tool shed is STILL neat!
So glad that it’s still such a great solution – we love it! And I’m going to try to create a similar solution for smaller handled tools and paint brushes. Thank you so much for the inspiration and for stopping by!
Love the small pieces of organization that make a BIG! impact. The shelves for the nail boxes…what you just don’t them ALL into a coffee can? The magnet strips for the loose drill bits. Genius! Going to show my hubby this post when he gets home for some inspiration. The barn is looking great.
I’m cracking up at the coffee can comment. Let’s just say that we have far too many nails for one coffee can. but before this, it was out of control. And my dad is actually making another shelf because this one isn’t close to being big enough.
It’s really coming together! I love the metal on the walls. I wonder if sliding barn door could be made out of them, with maybe some kind of trim on the outer edges since it’s sharp. Hmmm, you’ve got me thinking! Enjoy!
I’m not sure – it’s pretty thin. But I’ve also been crafting with the scrap. It’s so fun.
Yep. Those new work tables need a splash of red! I love the metal walls!
I’m still waffling between navy and red. 😉 Life is hard.
Installing drywall on a ceiling is no joke. He did an awesome job
They really did a great job. It’s all mudded and taped now, and it’s looking like a totally different space. Love it.
The walls look great with the metal sheets! And I love the little pieces of organization you are utilizing and the PVC.
Wow, this looks amazing! So so exciting.
Awesome! What a great idea to re-purpose the metal roof; and it looks awesome on the walls!
Quantum leap if I ever saw one. Wowza!! I can’t believe all you got done in such a short time. Love it all. Those panels look so fab and I love how the work tables look in there too. Great tool and nail storage too. This is one hardworking garage!!
It’s getting there. Honestly, it’s a bit overwhelming. Just so many things to store. And we’ve NEVER done a good job at keeping the chaos under control in the garage. We’re really working hard to get this in line.
Wow! It’s all coming together so beautifully 🙂 I love to see all your garage organization ideas… I’m planning a garage makeover of my own in the near future and will def be putting some of them to use!! 🙂
Thanks, Naomi. It’s so satisfying to see it all come together. Good luck with your project!
I realize that Ryan is fairly attached to life at your house, but does your brother want to move to Colorado and do my house projects for me? B will buy him beer, too. And I could occasionally make a grilled cheese sandwich. Asking too much?
Kim, I really love the walls. You know industrial is my jam. But I love them SO MUCH MORE now that I know they were previously the barn’s roof. So cool. You guys rock.
Well, my brother is pretty certain that he is going to live in the barn after we do. And run a Christmas Tree Farm out of the garage. He’s got a dream.
But if there’s one thing I have learned, cheese and beer get this boy to do whatever you need. Cheese sticks, cheese pizza, mac and cheese – those are his jams. And I’m sure he’d love Denver.
nice. I would definitely do navy for the tables, and the inside of the door. what about the steps to upstairs, what are your plans for those?
My plans for the steps are to paint them (probably white) and then add a carpet runner down them. Ryan’s also planning to build railings. We’ll see how quickly this goes, but it’s important because they are really steep and I’m a bit worried about using them everyday.
those walls are so cool! And all your brilliant storage ideas–so great! Also, you know you’re making the rest of us look bad, right? You guys put up walls and a ceiling while we managed to hang….half a door 😉
Bahahaha….. can I be forgiven if this is ALL we do? I’m worried this house selling may mean we make very little more progress on the garage.
Kim, this is AMAZING!!!! I love the re-use of the roof, those kind of details get me all sappy during home renovations. 🙂
Me, too. I’ve been crying a lot lately over this. So emotional.
it was genius to use those metal panels on the wall- i love them!
Thanks, Cassie! My jaw dropped when I walked in. It’s just perfect for the barn.