Before we install the flooring on the main floor of the house, we wanted to finish the fireplace area – particularly the messy parts (tile and concrete).
If you remember, we decided to go with a concrete raised hearth. The process is quite similar to a DIY concrete countertop, so that’s how Ryan approached the process. (Katie at Bower Power just posted a whole series on concrete countertops, and there is tons of great information there.)
He started by building and mounting a form for the hearth area with 2x4s. Then, he sprayed WD-40 around the form and caulked the area well.
Next, he and his dad mixed and poured concrete in the area. Ryan had read to make the mixture more liquid-y than normal, but that turned out to be a big problem for us. Because the concrete had more water, it took forever to dry and Ryan was up all night waiting for it to be ready.
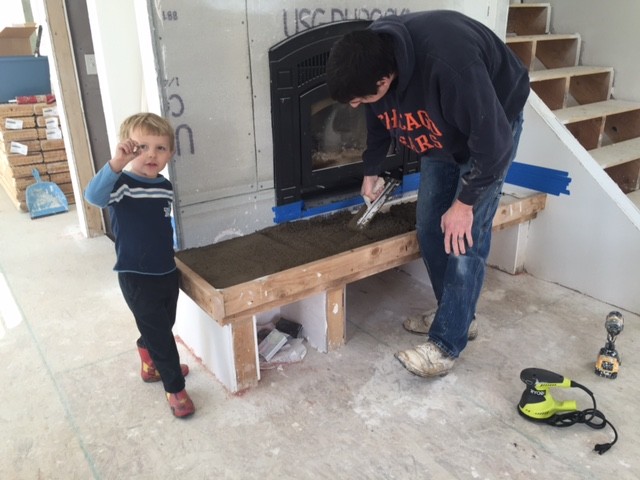
In the end, it dried while Ryan was at work and he wasn’t able to do a final buffing he planned to do. In the end, the concrete still turned out well, and he needs to sand it and touch up areas that need it to get it nice and shiny. Live and learn.
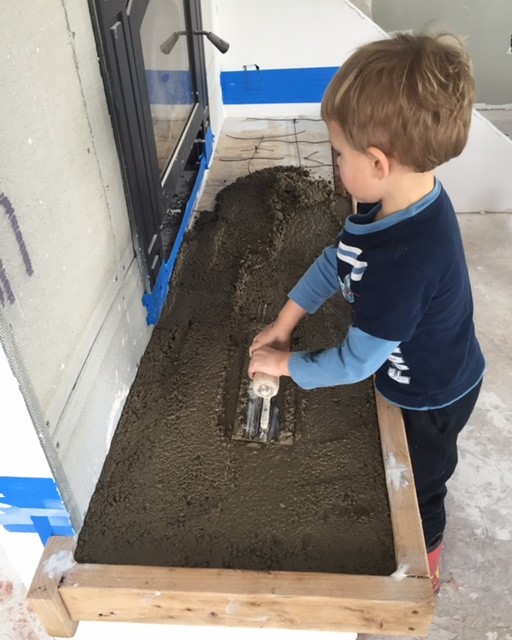
This was the day after pouring the concrete, and it still lightened up a bit after this.

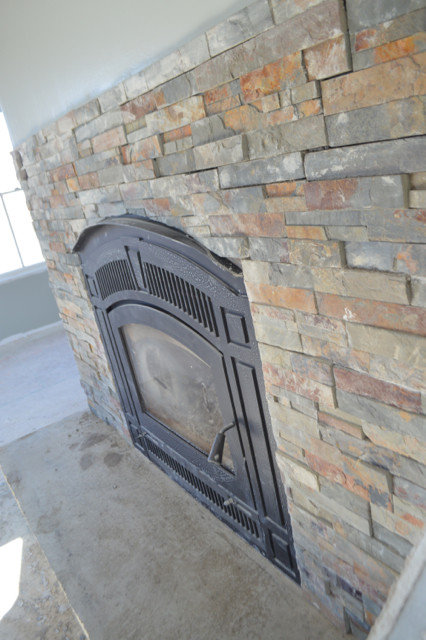
The next day, Ryan set out to install the stacked stone wall tile. We had originally chosen a different quartz tile but we made a last-minute substitution for a darker quartz tile that we liked better in person. 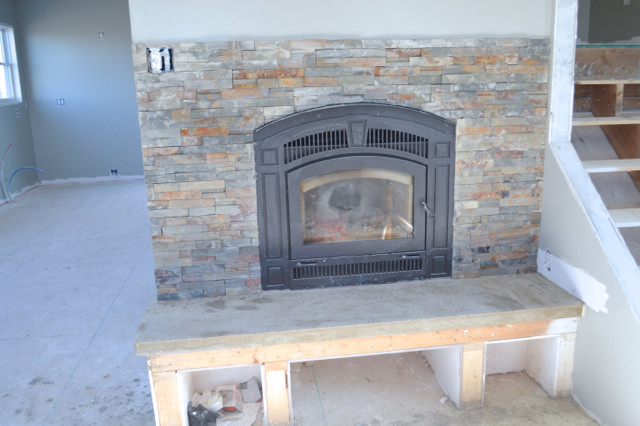
The stone veneer is glued together on a sheet and doesn’t need any grouting – which is a huge time saver. The tile still needs to be cleaned up, but it already looks amazing and so much more finished. And i love the mixture of copper and slate and brown and grey – I think it will be a nice neutral choice for the center of our living room.
Now we just need to seal everything, find the best barn wood beam mantel and trim out below. This area is getting closer and closer.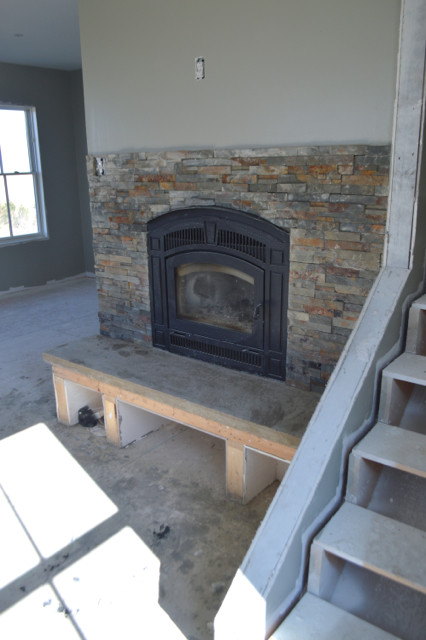
What do you think?
Love the stone around the fireplace! Nice work!
Thank you so much!
Sorry for the influx of comments – I read on my phone and then come back and comment when I have time! This is looking so good! I love the warmth of the stone you chose, cannot wait to see it all together.
Love the height! I always end up sitting on these at parties, etc., and this is a much better height than usual. (Safer too!)
Looks great! We just bought an old house built in 1938 that has two fireplaces — both of which need major updating. Trying to figure out how to tackle those projects, and now you’ve given me inspiration for the stone tile. 🙂
so pretty!
I am so stinking excited to see the progres indoors! Ryan is a MACHINE!
I REALLY like it, good job!
LOVE! Looks amazing!
It’s going to be so awesome when it’s finished.
Thank you! I can’t wait to see it come together.
I totally love it! It looks really good!!
Looks really great! Always love your updates…
this looks awesome! love it!
Thanks, friend! One step at a time.