This is one of those projects that has been on my radar for a while. And now that I’ve finally made my own solar lights from blue jars, I’m kicking myself for waiting so long.
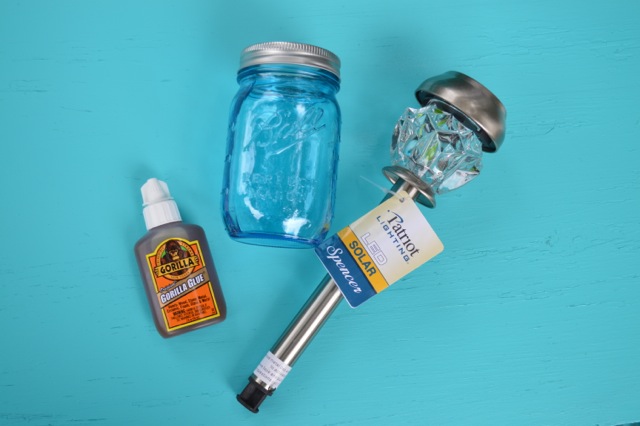
I have collected vintage blue Ball jars for years, but I decided to purchase the new blue jars for this projects. Mostly because I wasn’t sure how the vintage versions would hold up outside. They were around $1.66/jar.
Then, I took the jar to the solar lights section at Menards and checked out my options. I wanted something that was around the same color as the mason jar lids and roughly the same circumference.
I picked a stainless solar light on clearance for $1. The top was almost identical in circumference to the screw lid. This is all you need to make your own.

I simply disassembled all the parts.
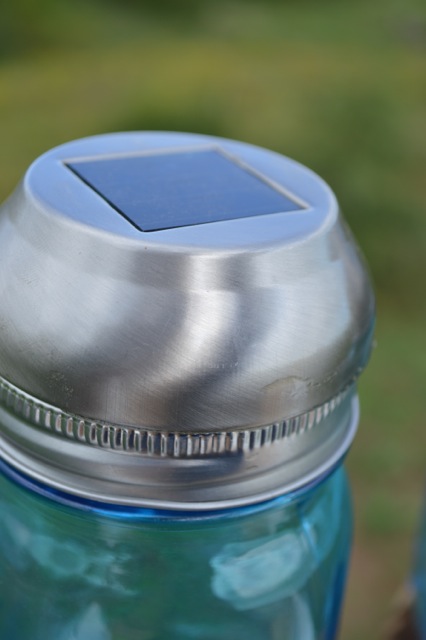
And then I used Gorilla Glue (not sponsored) to attach the bottom of the solar panel portion to the screw lid. (I just glued the edges and then set a book on top for a few hours until it was well attached).
Once I screwed the lids back on top, these little cuties were ready to go.
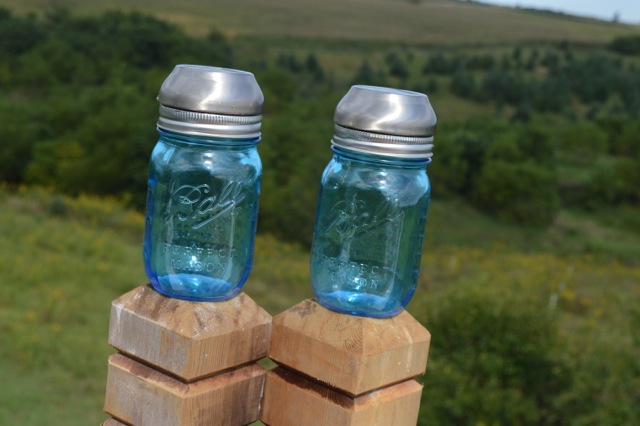
I had a hard time getting a photo at night, but believe me, they let off a nice glow. And they are just as pretty during the day.
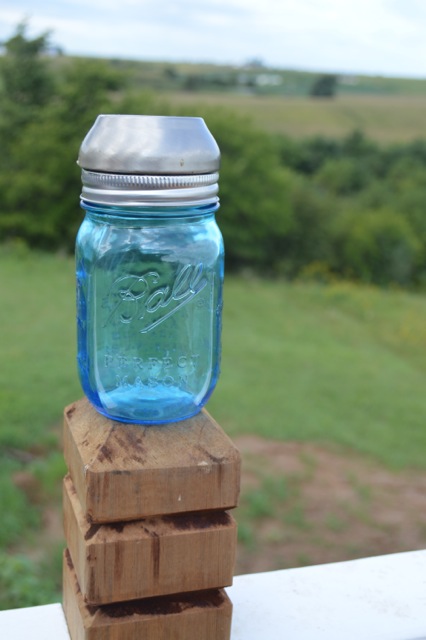
Plus, the jars match the aqua and red on our barn patio. For around $3/each, I think they pack a great punch.
I actually hung onto the original stakes, because I’m thinking about gluing them to the stake eventually and using them for walkway lighting at the barn. But for now, they are just hanging out on the patio. Loving life.
I was inspired by my friend Hillary at The Friendly Home – she made a version of these last year – check out her tutorial for another way to make them.
Do you love my solar lights upgrade?
Where did you get the jars? Also for the barn, you could put horseshoe hangers, for the jars, on old barn wood. I’ve seen the hanger, my husband said we had a couple but doesn’t know where they are. One horseshoe turned up and facing forward, then the other is turned sideways and welded on the bottom of the other. The one sideways should be the right size to slide the jar into it with the large part with lid lapping over to hold it. My husband said mule shoes might work better as the extend out longer….I know this is clear as mud but maybe you will get the idea. Could you email me where you got the jars?
The jars are from Target! Love the idea for the horseshoes – thanks for sharing.
Super cute idea! I love those!
Pretty clever. I’ve been intending to get more solar lights since a bad winter and therefore power failures is predicted. Thanks for writing this up.
Thanks, Mary! Hope you try it!
this is a really cute idea!! Much better then staking them into the ground, where my dog can pull them up and then play a game of keep-away… lol
Thanks, Stephanie! I love the look of them, too!
These are awesome can’t wait to make some.
love them–and walkway lighting would be fabulous!
Brilliant! I may have to steal this one! Enjoy, you clever gal!
such a great idea- these are awesome, kim!
These are so cute and basically scream your name!
Thanks! I was happy with how well they turned out (and how quick and simple they were). Right up m y alley.
oo they would look extra cute glued on the stake!
That’s what I’m thinking, too. And it would be really practical because it’s so dark at the barn.
What a cute idea. Love it.
Thanks, Kelly!