Thank you so much for the kind words about our new deck and railings. To say I’m smitten with the space would be an understatement.
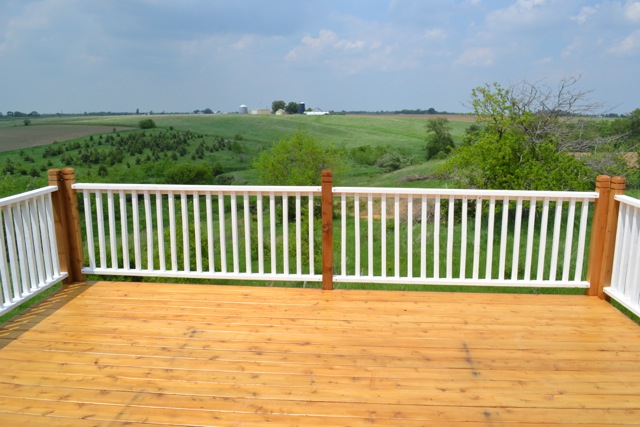
I wanted to share our process for staining the deck and painting the railings, in case you were also taking on this project. We hope that the work we put into this will protect the wood from the elements and keep it looking great for a while. (Although much of what we read says that we’ll need to re stain every year or two, the railings should hold up for longer.)
As you may know, I’ve been lucky enough to work with Behr for the past year as a DIY Expert. I’ve used (and purchased) so much Behr paint in the past five years and am excited to come up with a new painting project each month. (You can see all of my past posts here.)
![]()
Anyhow, our project this month was painting the railings and staining the deck. A big undertaking – but worth the prep and work. In general, our experience is that the preparation of a deck surface takes more time than the actual staining. But if you don’t do the proper prep work, you’ll be sorry. You’ll have more flaking, peeling and general issues. So, do that pre-work.
**Stepping off soapbox**
First up … the staining …
Staining a new deck
- Because the deck was brand new last year, we didn’t have to strip any other finish. Instead, we used the Behr Premium All-in-one Wood Cleaner & Stripper to clean the deck really well. You can see in this photo that the cedar was already turning grey since the fall. The cleaner is designed to help refresh the wood and open up those pores to receive the stain. (I’m sure that’s not the way an expert would describe it, but you get it, right?)

- Ryan used a mop for the cleaner (diluted 1:1) and worked on a small area at a time. It needed to be kept wet for 10 minutes before rinsing.
- Using a brush, scrub the cleaner until it foams. Then, rinse the cleaner completely away and move on to the next section.
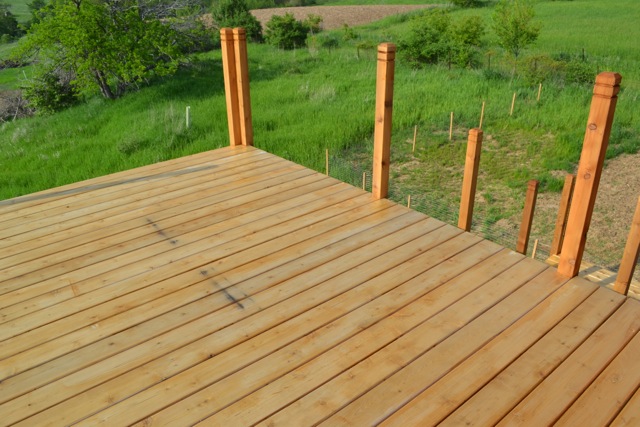
- After the deck is dry, sand out any rough spots that need it and spot clean. The cleaner did a great job of refreshing the wood, which was already turning grey after a year. You can really see the great cedar color coming out after cleaning.
- Now it’s time to stain. We used a simple staining pad on a pole and applied two light coats. We chose to use Behr Transparant Weatherproofing Wood Finish in Cedar Naturaltone. We picked this up at Home Depot because we wanted something that simply enhanced the cedar wood tones of the deck rather than covering it. This did the trick. Our research indicates that the transparent wood finish will not have nearly the longevity of a opaque finish (like what we did for the exterior of our barn), but we love the natural look that it achieved.
Then, it was time to paint the railings …
Painting the railings was a necessity because they are built from standard 2x4s that we already had instead of treated lumber. We need the boards to have all the protection possible to keep them lasting longer in the elements.
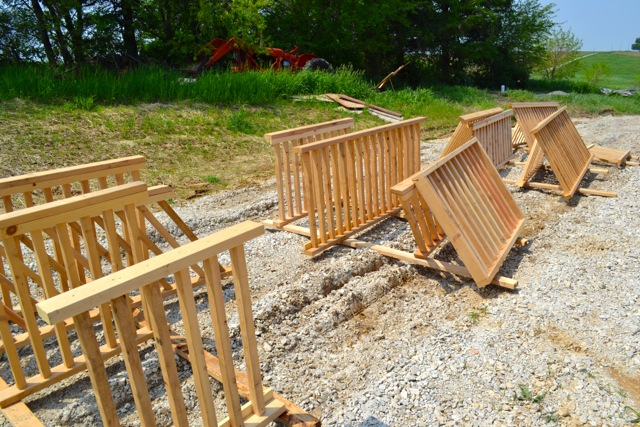
When Papa Bear built the railings, I asked him to hold off on installing them so I could spray all the railings at once before they were put up. This would make my life a lot easier because I wouldn’t have to be careful about overspray or dripping or getting in all the crevices. (And if you didn’t realize this before, it’s all about making my life easier. It’s The Kim Show around here.)
So, Ryan lightly sanded, cleaned, and set up all the railings for me to paint in the driveway on Memorial Day and then we went to lunch. In less than 35 minutes, the clouds rolled in and it rained for about 4 days straight. (I can’t make this up.)
Then, the well guys came to dig the well and had to move all of the railings out of the way. And in the process, they got dirtier than ever.
So, Ryan and I set them up again for painting and I cleaned them all off again. It was way more work than I was expecting. But that’s life, right?
Painting the railings
- Clean off and lightly sand all of the railings. Make sure to get off all dust and dirt.
- Set up railings in a way that allows you to get the most spraying done at once. In this case, I actually stood them up straight or leaned them against each other so I was able to get all sides except the bottom. (Similarly, I propped up the windows when I painted them.)
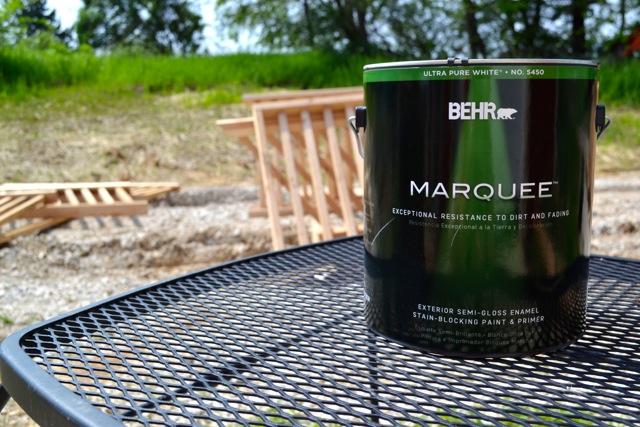
- Stir paint well. I used the new exterior Behr Marquee paint in Ultra Pure White for this project. It is designed to prevent dirt buildup, maintain long-lasting color and reduce mildew. It also provides really great coverage.
- Fill up your paint sprayer (I use a Wagner FLEXiO 590). My sprayer doesn’t require thinning, but yours might. So read your instructions carefully.
- Now it’s time to test your sprayer and adjust. I like to do this on a spare board. Once the pressure and spread is right, I start making my way through the railings.
- Two light coats of the Behr Marquee allowed me to get all the nooks and crannies and provided excellent coverage. (In all honestly, one coat probably would have sufficed, but I missed a few spots so I just did it all twice for good measure.)

The beauty of using a paint sprayer is that I could finish all the railings in about 4 hours. Which is much better than the 14,000 hours it would have taken me with a brush. Plus, the finish is really nice and smooth – no dealing with brush strokes.
The downside of a paint sprayer is that after using it for 4 hours straight (holding a quart of paint the entire time), my entire body hurt and I could hardly move my arm. Small price to pay. Right?
Next step – installation. Which I already shared on Monday, if you missed it.
What do you think? Will you tackle a deck project this summer?
Special thanks to Behr for providing paint for my railings as part of my role as Behr DIY Expert! And thank you for supporting NewlyWoodwards sponsors to help make posts like this possible.
Did you like this post?
We'd love to send you more inspiration and encouragement for your home. When you sign up below, we'll send you our free guide to save thousands on your next home project. Because your home shouldn't own you.
Hello Kim,
How has your railing paint held up over the last few years? I am looking to paint mine within the next couple weeks and I am trying to decide on a paint brand.
Thank you!
Jessica
So far so good, there are a few spots that need touch up, but it looks great overall. We live in the middle of nowhere and get a lot of harsh weather. With this being uncovered, I’m really happy with how it’s held up over several winters.
Yay, I love it so much. Can you imagine hitting all that with a paint brush? You’d have to stab yourself in the eye.
Your, my lady, are a machine. You rock so hard. I really really love your deck. You guys killed it!
Wow, that view! And your porch rails look fantastic. I’m planning on tackling our bannister rails this summer (so you know, by next May), and I think I need to look into a sprayer to make it happen.
yeah – I did our banisters at our house with a brush. It was doable, but it was a BIG project. The sprayer makes it go a lot faster.
Looks awesome! And love that view!
Thanks! I know – the view is dreamy.
And the sprayer was your savior! So many rails!!! Everything looks great! xo
Seriously – that sprayer was a life saver.
Yay, I love it so much. Can you imagine hitting all that with a paint brush? You’d have to stab yourself in the eye.
It never would have gotten painted. Never.
it is GORGEOUS! you must be soooo pleased! i can’t wait to party on the deck all night long! while you and your family try to sleep inside the barn…. ha ha.
This is fantastic. I love how quick it went with the sprayer. I am in love with your new deck.
Looks great, Kim! That is totally our luck that it would rain for 4 days! We were battling the weather trying to get our deck done a few weeks ago when we still had a few cold days. I do like the “Kim Show.” I’ll have to remember that!
I really want a paint sprayer! We don’t have huge projects to spray now, but it would sure make refinishing furniture a breeze!
Your deck really does look great!
Such a great idea to spray the railings first! Take it from someone who painted existing railings with a foam roller… it is not fun.
Thanks! If I had to paint by hand, I probably wouldn’t have done it. 😉