Well, we had a lovely weekend of cooler weather which was the perfect weekend to usher in fall. While I’m not quite ready to fully embrace the change of seasons, I guess it’s okay to do some fall crafting, right?
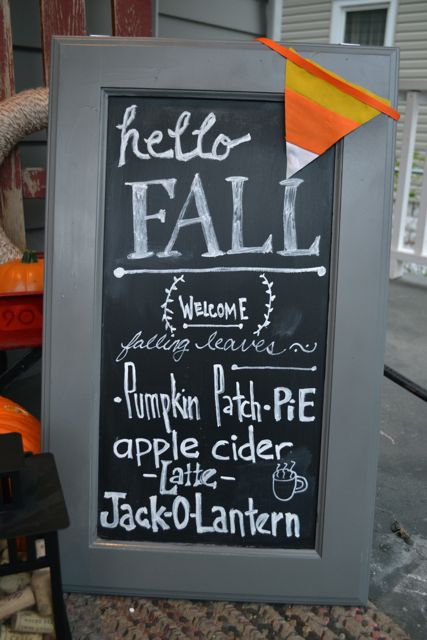
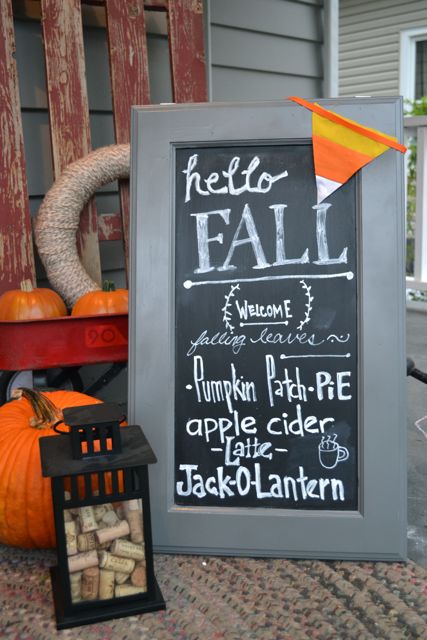
For my fall project, I went with something that I’ve been wanting to do for YEARS. A two-sided menu board. This a-frame sign is perfect for any season, but I finished it off with fun fall chalkboard art inspired by Simply Kierste and Lisset and Company.
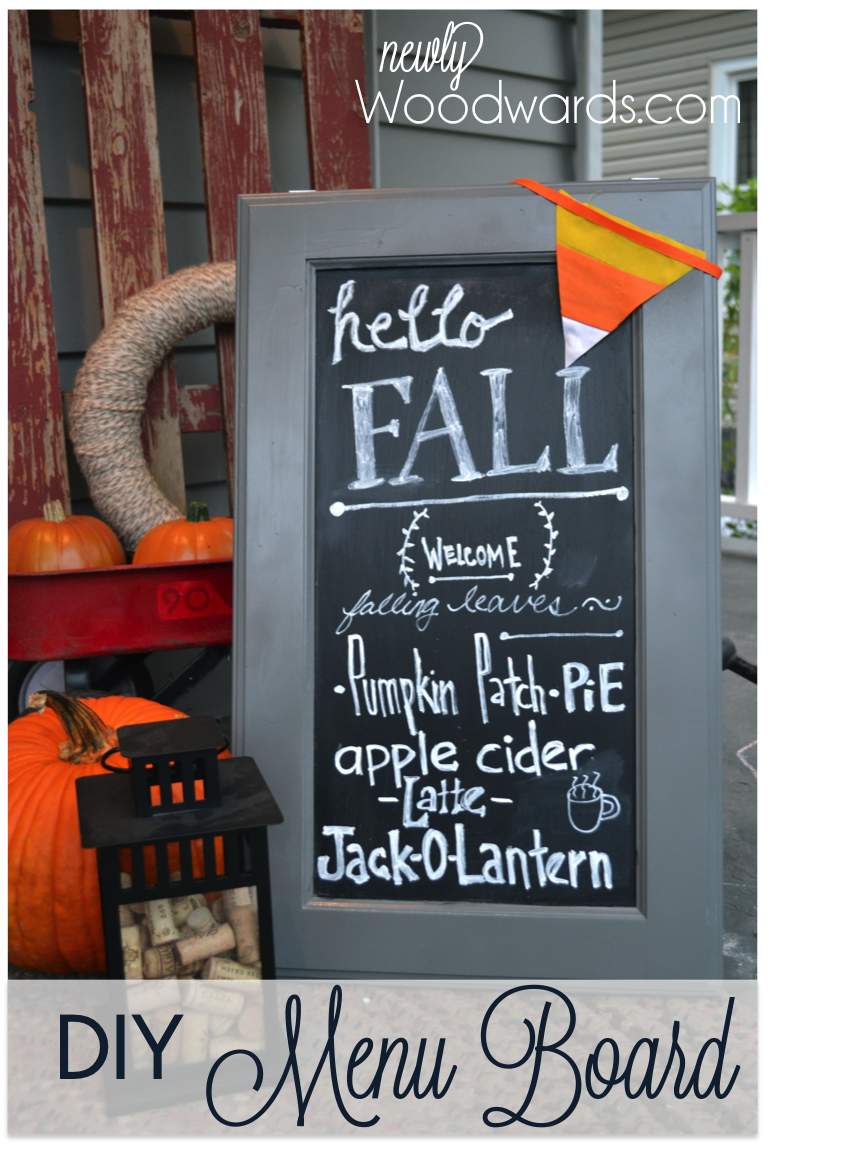
I think a menu board is super handy to have for entertaining. It can serve as a welcome sign, a menu board or even directional sign. Since it stands on it’s own, it’s something you can add anywhere and will fit in with any decor. It would work for just about any holiday. And it’s portable.
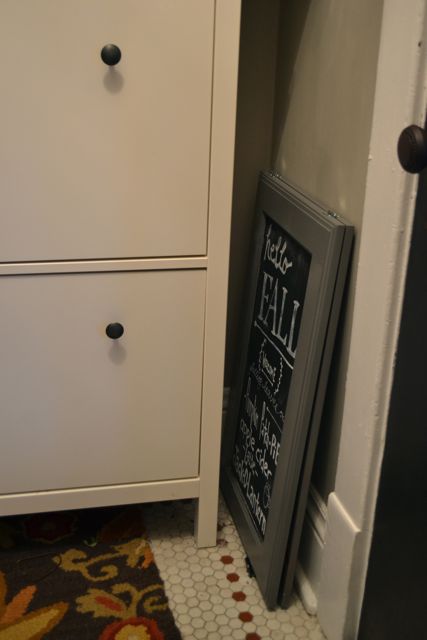
Plus, they store flat. Score.
I want to make ten more of these. At least. Who doesn’t need that many menu boards?
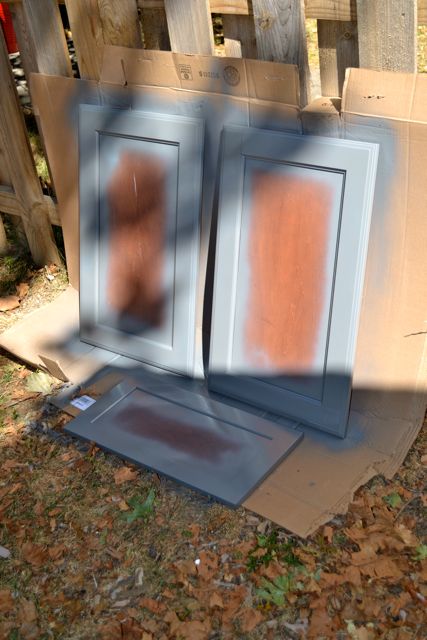
This started with two cabinet doors I’ve had in the garage for FIVE YEARS. I cannot make this up. I bought them because they were solid wood and super nice and I knew I could use them for something. They were a few dollars at a local kitchen and bath store that often sells the old doors from displays. (I bought a lot of them, by the way. Because I’m insane.)
(These menu boards could also be easily made with random upcycled boards.)
After wiping off the inches of dust, I gave them a quick coat of spray paint. I did both sides since the insides would also be visible. (I made another chalkboard while I was at it. And there are still more cabinet doors where that came from.)
Then I practiced patience while the doors dried. (Am I the only one who wants paint to dry faster?) After several coats of chalkboard paint in the middle, I drilled the small hinges on the top of the doors.
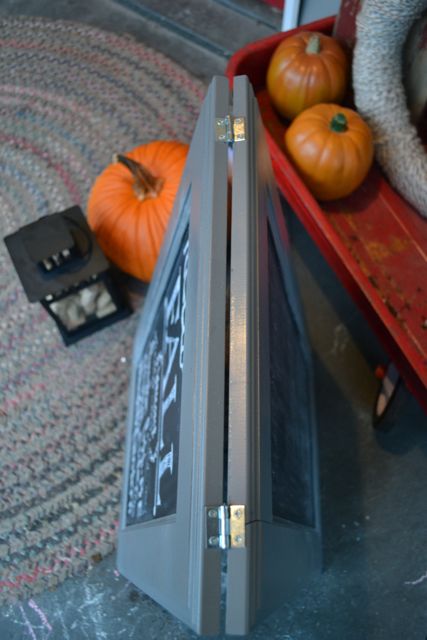
These are the smallest hinges that I saw at Home Depot. They come in a pack for two for $1.97.
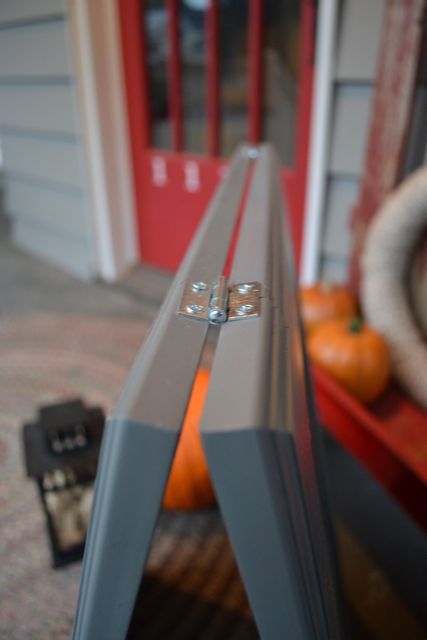
Then, to keep the bottom from collapsing, I added the smallest chain I could find at Home Depot (a few feet was more than enough and was about $1.00.) To keep it attached, I drilled the chain into each side of the door.
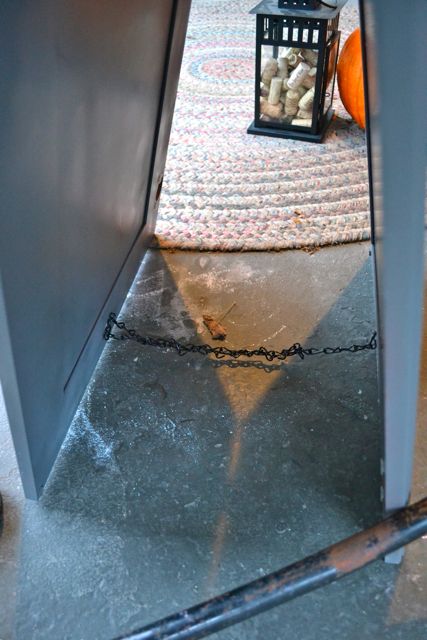
In the end, the menu board ended up being super sturdy and stands up nicely.

For the artwork, I learned a lot from watching my friend Rachel at Emily’s wedding reception setup last week. I looked at the inspiration and started with the larger words. Chalkboard pens are the bomb, too. By the way. (The candy corn bunting is the start of another project that I plan to complete before Halloween. Stay tuned.)
What do you think of my first little crafty project for fall?
For some other inspiration for the season, check out the talented crew who were asked to complete a fall craft with a gift card to Home Depot or Amazon. You are going to want to check out their projects. For serious.

Kenz – Interiors By Kenz
Emma – Broke Ass Home
Gretchen – Boxy Colonial
Anu – Nalle’s House
Ainhoa – A Little Bite of Everything
Kim – Newly Woodwards
Disclosure: I was compensated for this post with a gift card from Coupons.com. But, as always, all opinions are my own.
I is a wonderful ideas to use something you are obviously not going to use any more. Great idea.
I love these! I’ve been wanting to make these for years and I just saw my friend posted cabinets for free on FB. I’m going to snatch up and make these.
Question. What color did you use? Also, how did you do the chalkboard paint? Was it a spray or a paint on? Did you tape off the door or how did you do this so well? Please advise.
Thank you!
Well, I don’t actually know what the color is – it was a spray paint that I had in the garage. I brushed on the chalkboard paint, being careful to cut in. You could also use painter’s tape if you are worried about the lines.
Good luck!
Love this idea!! What a great project… wish I had some cabinet doors laying around to do this!! 🙂
I love this! I noticed we have some old cabinet doors my hoarder-husband has been making me save for five years. And now I know what I’m using them for!
Very resourceful! Love it.
I love this! That is so cute! And I love the little fall vignette you made around it!
i love this!! i definitely pinned it for future inspiration! now i just have to find some old doors……
Looks great!! I want to do one of these one day
That’s super cute, Kim. I love the gray!
OK I had to do a double take when you said it was a cabinet door. GENIUS! Looks great!
How did you get the writing so perfect? It’s incredible. When I own a pie shop, I’m going to commission you to make me one of these! And then to come write the pies because I’m pretty sure I can’t make it look that nice. 🙂
I can make that happen. I’m practicing my chalkboard writing skills a lot lately.
Also – pie shop? I like this idea.
This is such a wonderful project. Love how you re-used cabinet doors for this. Love the handwriting on the boards too. And flat storage… well you know I already love IKEA, so flat storage and me – we are already buddies 🙂
Ha! There’s something so satisfying about being able to store things flat. Maybe it’s the fact that all Henry’s baby junk is taking up all the space in my basement right now. I just want everything to store flat.
Turned out great! Your chalkboard writing is a sight to behold 🙂
Thank you. I’m thinking of chalkboard artist as a second career.
Love this! Your chalkboard writing skills are amazing. Please teach me your tricks!
Yikes! I was worried it wasn’t very good. Thanks for the kind words.
I think that using chalk markers, having an inspiration image to replicate and taking your time are my top “tricks.” Taking my time is the one that is the hardest.
Super cute!!
I’m already your fan on FB, so there’s my entry. 😉
How friggin’ adorable is this?!?! I love it, Kim!!
Love how you used cabinet doors! The grey is also such a great colour for fall. I may have to make one for my fall party. Thanks for the inspiration. 🙂
This is so cool. We could use one for our beer tasting party! Have to show the hubby.
Okay. I am OBSESSED with this. I want one. I NEED one. I HAVE TO HAVE ONE! You rocked this, lady. Rad-action job!
Very cool! A great idea for entertaining! xo Kristin
hooray for 2 sided projects! this came out great 🙂
I LOVE it. And you’re right, it’s perfect for entertaining!
wow–that turned out beautifully! I never would have guessed those were cabinet doors. good job planning five years ahead 🙂
Always thinking ahead. 😉
I need 10. Seriously, I need these in my arsenal. Yours is super adorable and once again I question how you manage to get so much crap done in a day.
I drink heavily.
Wow! I thought these were way harder to make. It’s so cute!
I had no clue these were so easy to make. I want one. Work on that.
Your chalkboard skills are impressive. And I had thought about candy corn bunting but was too lazy to make it. So again, make me that too.
That’s cool – I’ll make those for you and you can give me all your hand-me-down hardware.
Like the saying goes, necessity knows no bounds’ When you need something and you are of course low on funds. You will be amazed on how creative you can be