There are a lot of things you can do to make your house look great from the outside. But none of them entail doing nothing.
And that, my friends, is exactly what we have done. Nothing on our landscaping for curb appeal. Until now.
Why did we wait so long?
- Because we are out of money.
- Because we had tons of other things to do that took priority.
But, finally, it was September and there was no more time to wait. Because in the Midwest, this silly little thing called WINTER comes at some point after October. And you cannot do things like plant grass and flowers during WINTER.
But, still very very little money.
So we had to get creative. I had saved about $250 in gift cards and rebates for this purpose. And we were able to make a big impact for not much money.

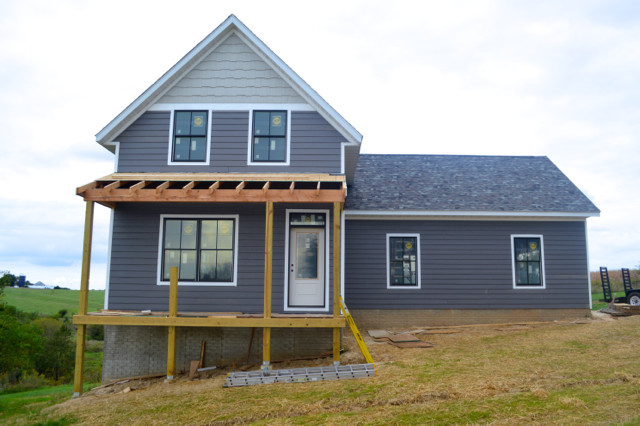
Wondering what it looked like before? Here’s a little progression – starting last September, before we even had the porch finished …
Fast forward to May …
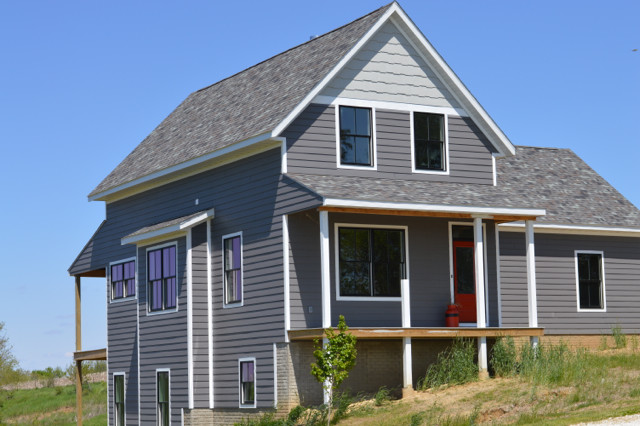
And August …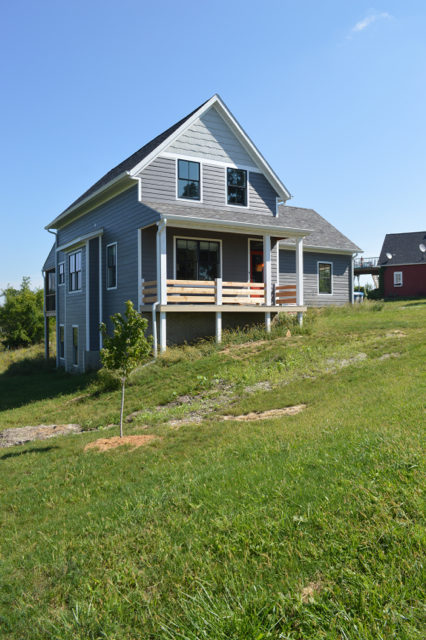
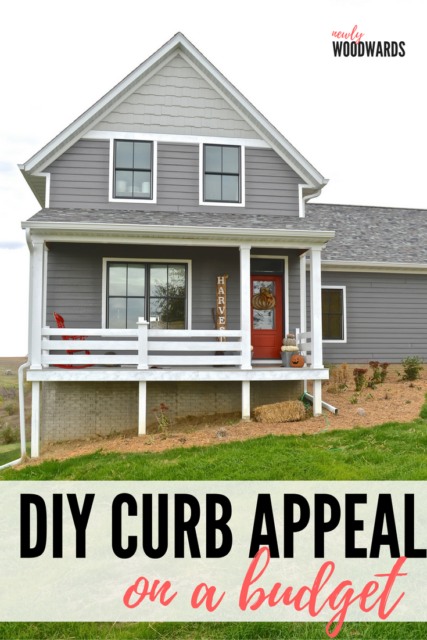
And September after we finished painting the railings …. The porch looked better, but the yard? Not so much. 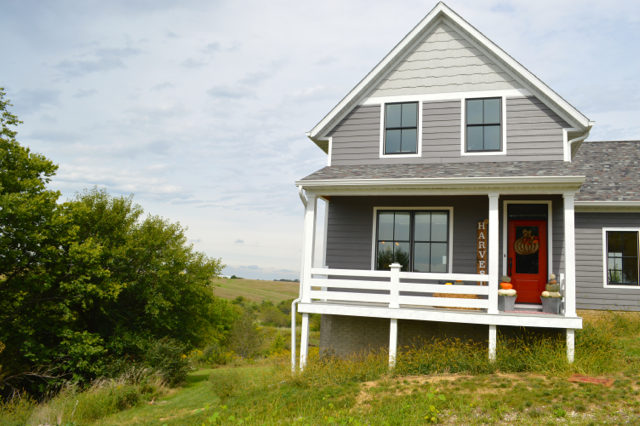
Most of the yard is actually cropped out … but you get the idea. Lots of weeds. No real grass to speak of.
But less than a month later, we’ve made some serious progress. I’m not embarrassed anymore. And I’m confident that it will look incredible next summer, once the plants begin to take off. (Landscaping is a long-game, which isn’t easy for impatient DIYers like me.)
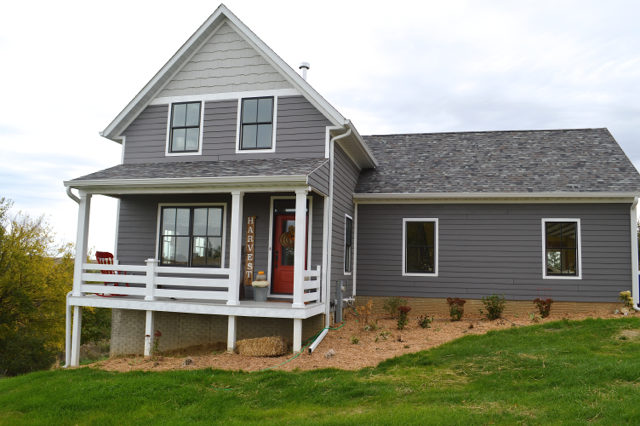
So, here what the major aspects of our inexpensive curb appeal plan:
Grass seed
A big part of curb appeal is the yard. And we had some challenges to deal with – a giant slope and lack of enough soil in some places.
To remedy this, Ryan borrowed a skid loader from my uncle, which got put to very good use. He used it to move dirt and level the yard. (He also used it to clean up some of our driveway, build a retaining wall, and create a bridge over the creek on our property. More for another day.)
After we had a more level yard with more dirt, we spent $50 on grass seed from Menards (using a gift card and rebates). Ryan lucked out and planted the seed at the perfect time. Fall is a great time to plant grass seed in our area anyhow, and we didn’t experience any major rains that washed the seed away before it could take.
It did take a few weeks of regular watering, but the grass took off in most spots and it’s coming in green and thick.
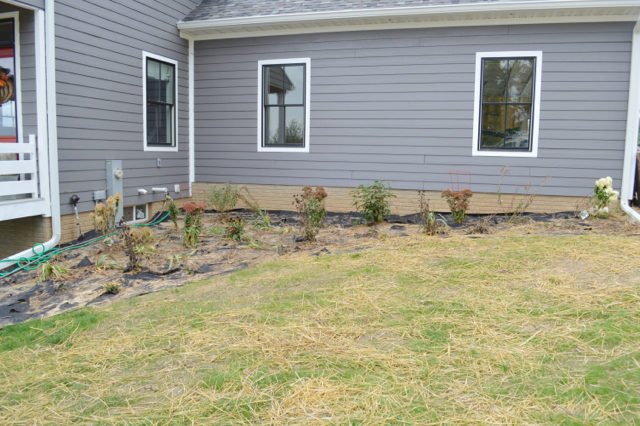
Perennials and bulbs
Phase two of the plan was to create a garden bed around the house. You can easily spend thousands of dollars buying plants and shrubs, but that wasn’t in our budget. But we also wanted a good size garden bed in front of the house, for added color and to make it easier to mow.
Luckily, my aunt is an incredible gardener and amazing person. She offered to split her perennials and help me plant them in the yard.
Moral of the story? Get an awesome aunt. (Sorry, you can’t have mine.)
But if that’s impossible, you could easily do the same thing by swapping plants with friends or hosting a perennial plant exchange. (It’s super fun!) Many perennials need to be split, and fall is often the perfect time to do it. So you can save hundreds or even thousands of dollars by collaborating with friends and neighbors each fall.
Plus, your garden will be the better for it.
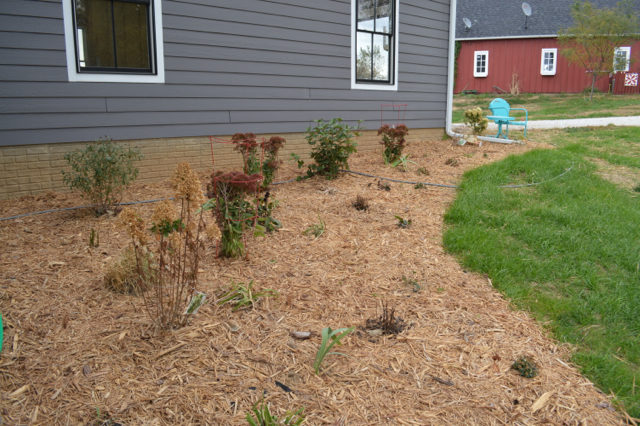
We focused on plants that would provide color all year, which happens to be my aunt’s specialty. In the end, we added:
- Iris
- Asiatic lilies
- Day lilies
- Sedum
- Coneflower
- Violets
- Black eyed susans
- Daisies
- Native grasses
After splitting plants, I loaded up the bed of the truck and we placed them in the garden bed, which we had prepped with weed barrier ($40). I hope that the weed barrier will help to keep my weeding to a minimum.
My aunt helped me plan the layout of the plants and then we put them in. We added some tomato cages to the sedum to help them stay vertical after transplanting.
There were a few plants that I wanted to add to the garden bed that weren’t transplanted. So, I grabbed four plants from Lowes when they were 40 percent off (about $40):
- 2 hydrangeas
- 1 butterfly bush
- 1 snowball bush
These all happen to be larger than the others, so I hope it will provide some focal points. And all should also attract butterflies, which is an added bonus. (Tip: Save your receipts. Lowes often offers a one-year growing guarantee.)
Finally, I picked up a few bags of bulbs (daffodils, alliums and tulips) and $1 mums to round out the plantings and add some early spring and later fall color ($15).
At my aunt’s suggestion, we left a 2 foot space behind the plants to the house. This keeps critters away from our foundation and also gives us a really practical place to walk and loop the hose to water. It’s been really handy.
Mulch
The final step for our fall curb appeal project was mulch. This ended up being a really large area, so we needed about $90 in mulch. (We got bags of cypress mulch on sale at Menards. I like cypress mulch because it hides leaves and other natural materials better than darker mulch, so it always looks fresh.)
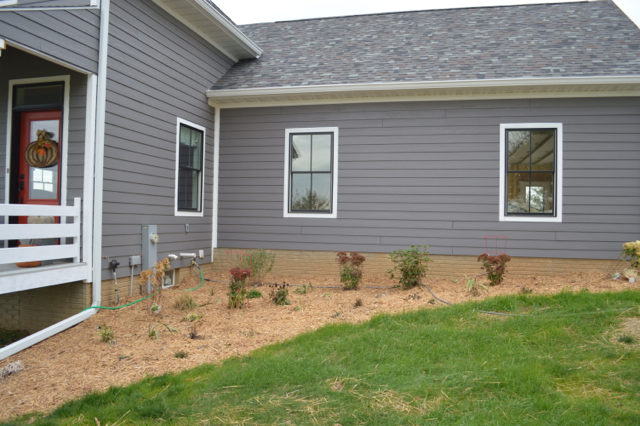
Not only does the mulch make the yard look a little more finished (which it does), but it also helps to protect the plants over the winter and give some extra help in the water department. I watered the plants every day for almost a month, which I hope helped them establish good roots to survive over the winter.
You may not be able to see the full “after” of this landscaping project yet, but I hope this is the first step to beautiful curb appeal for years to come. And for only a small initial investment.
What are your tips for low-cost landscaping?
And if you like it, then put a pin on it …
Did you like this post?
We'd love to send you more inspiration and encouragement for your home. When you sign up below, we'll send you our free guide to save thousands on your next home project. Because your home shouldn't own you.
Our dump will sell a huge trailer size load of mulch for around $30. Not sure if yours offers the same service, or is close by, but it saves us a ton of money each year for our extensive garden areas. We also had enough left over to share with our neighbor and to put in the flower beds of our two rental homes.
Kim,
Sometimes our state forest department (Oklahoma) gives away free small trees. It is nice to plant bigger ones, but maybe you could ask for a couple for Christmas. Ha. No kidding, one of the favorite presents I ever received was a gift card from a local plant , tree place.
Your home is just so nice and extra nice because you have managed to do it without debt.
Thanks for sharing.
Joyce Fowler
It looks lovely, Kim. Anxious to see how everything comes up to n the spring 🌻🌸🌷
Tips for inexpensive landscaping: repeat the same plants for a more cohesive look; buy plants that like to double on their own but be wary as some will take over – easiest way to fill gaps when plants double in size and you can split them at the roots; learn to propagate [can propagate just about any plant in large quantities]; participate in perennial exchanges during spring and fall; trade plants with neighbors and friends; pick up rejects on trash days [spoke to a lady once who landscaped her entire yard with rejects – she lived close to the nursery so whatever they threw out, she’d pick up and nurture the plants]; i’ve actually picked up just parts of plants like begonia and geranium from the ground at nurseries and big box stores and nurtured them into full bushy plants – am talking about broken “branches” only; buy from big box during late fall [october] when even knock-out roses which are $30 go for $5; go junking for old ladders, teapots, etc. to fill in spots of your garden. makes for a very creative, funky looking yard.
Wow! That’s a lot of tips. I’m not sure I”m quite up to all of them (a little more work than I’m up for), but I appreciate you sharing so many great tips.
It’s gonna be a spectacle of color come springtime!
We use natives and “Florida-friendly” landscaping. This saves lots of money, as these plants are drought tolerant, need no fertilizer and do well in a variety of conditions. They also attract wildlife, which, believe it or not, we want! Planting natives is the way to go because it makes sense, while saving you cents. ;0D
Such a great point. We like to use native plants here, too!
Looks lovely! 🙂 Are you able to use your front porch without steps in place (I can’t tell from the picture). Do you like hostas–they are so hearty!
Can’t really use the front porch. (We do have a ladder handy, but we are hoping to get the stairs in sometime in the next week.)
I love hostas but we have zero shade so we avoided them for now. I may try some next year to fill in, because they look so great all year. But I wanna see how everything fills in first and check out where we may get a little less direct sun.
Working with your yard is key. Don’t fight what your yard is. Work with the shade or sun areas you have and don’t be afraid of a little hard work. We moved to our property about 5 years ago and I’ve spent that many years repairing the neglect and odd landscaping decisions of the previous owners. We’ve hauled truck loads of rocks out from old landscape beds, made beds smaller and easier to maintain, pulled out numerous things. I even let the beds sit dormant while I tried to figure out what would work for us. For us, it was deciding on goals for each year so the yard wasn’t so daunting and then taking on those projects. An acreage/small farm is a lot of work and you can’t get it finished in one growing season. Each year we live here the yard is a little bit better.
Looking great! I totally understand about other things taking priority. That’s how I feel about our landscaping…we need to make some solid progress on the interior of the house first!
Totally – but it’s also hard when you see all the projects needed outside! It’s all about balance, right?
May I suggest saving more money by not using landscaping fabric. Recycle newspapers: it’s the way to go. The seeds of weeds often land on top so you still have weeds with fabric and if left for quite awhile the roots pull up the fabric when you do weed. If you are not using a edging of some sort the fabric can get caught up in the mower and cause issues as well. Newspapers cost nothing…neighbors will practically pay you for taking them off their hands. They of course break down but by then you need to replace the mulch which also has broken down. I’ve not had any negative results with newspapers for many years. The plants still can breath and there is much less hassle laying them in place. Spritz them down as you go with water and if you want the bed to last longer use full thickness. Your aunt is teaching you well. Plants do like to be separated. This can often lead to the original plant taking off again and producing more blooms. Which is what we all want.
Rhonda – the newspaper is a great tip! We could have spent even less if we had gone that route. But we chose landscaping fabric for this one, mostly because of laziness to roll it out and the fact that it will last a little longer before it breaks down. We also have struggled a little with newspaper in the country – it’s so windy that the smaller pages won’t stay put, even for a short period of time while we are laying them out. But we have used newspaper when we lived in town with good results. Thanks so much for the tips! Appreciate it.
i love seeing the progress- your home looks so pretty!!
Thanks, Cassie! Step by step, literally.