Today, it’s easier than ever to take photos.
You snap photos on your phone at any moment. You upload your favorites to Facebook, Instagram and any number of online hubs. But while it may be easy to take and share these photos, they often languish on your phone, social media sites and your computer. They are gathering “digital dust” – never to be seen again.
It’s time to take control of the photo backlog.
And it’s time to display photo books in your home that not only look beautiful but also allow you to relive all those moments in your photos?
This post may include affiliate links. That means if you click through and make a purchase I will get a commission (at no additional cost to you). Read my full disclosure policy for more details.
I did it, and it feels really, really good. (Thanks to Shutterfly for helping me make this possible.)
Just because we CAN leave those photos on hard drives and social media sites doesn’t mean we should. There’s something beautiful about a physical product that you can hold and enjoy. And there are plenty of tools to help you do it.
That’s why this year, I challenged myself to get my photo backlog under control. This was a pretty huge goal because I was approximately 6 years behind on sorting, organizing, backing up and printing photos in a way they could be remembered and relived by my family.
(I hadn’t done a single project since Henry’s baby books. And I was a few years behind by then.)
This wasn’t a quick and simple project. It took almost 7 months of work to sort, organize and back up all my images. (I just worked on it little by little when I could. I took breaks when I was burned out.) Then, I spent some more time building beautiful photo books in Shutterfly before ordering them.
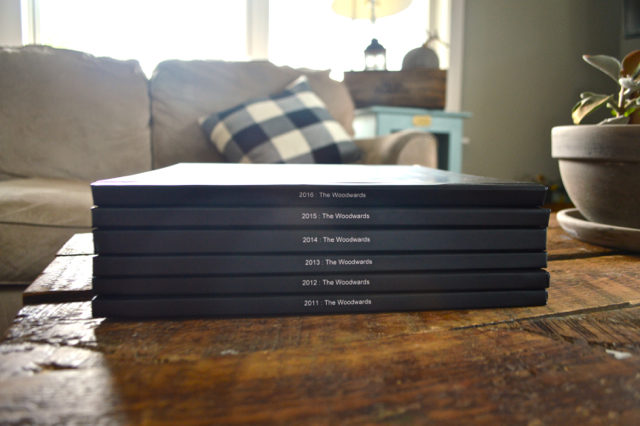
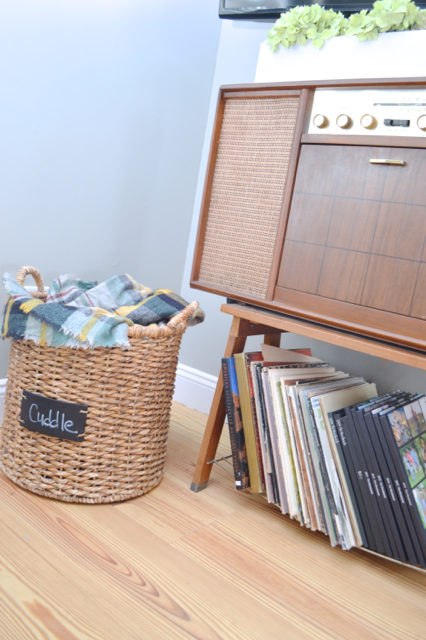
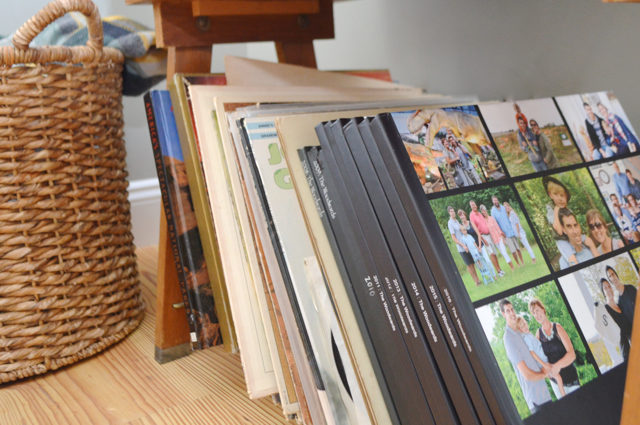
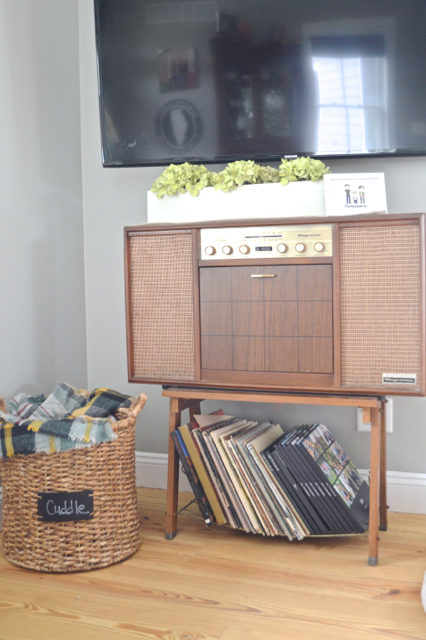
While this was definitely a labor of love, it was worth every single minute. Now, all our family photos are organized and backed up. The photo books make a beautiful addition to our home – and take up very little physical space. We keep them under the record player in our living room – and we’ve already found ourselves flipping through them together often.
Maybe you are in the same place I was. It can be overwhelming to think about the thousands of photos that are on phones, cloud storage and your computer.
Where do you even begin?
In my case, I thought about what my goals for this project were.
- To access my photos easily. This means that when I want a photo, I can find it in a short amount of time. (I’m lazy.)
- To have the ability to use my photo digitally (for the blog, in particular). (I’m needy.)
- To always have my photos. (This is the newest goal, after the loss of my hard drive two years ago.) (I’m scared.)
- To enjoy my photos. (I’m self-indulgent.)
With these goals in mind, it was important to have a really simple system to organize and back up photos.
Here’s how I did it:
Upload photos
Maybe you are good about uploading your photos to your computer often. I tend to upload them right away, which means all the photos are already on my computer.
However, I know that some people leave tons of photos on their camera and phones. The more frequently you can move all those photos onto your computer, the better.

A few tips to make this simpler:
- Get an EyeFi SD card that wirelessly transmits photos from your camera to your computer. (It’s not totally perfect, but I like it for something that’s really a no-brainer.)
- Automatically download your phone photos to Dropbox through your phone’s settings.
- Use a computer with an SD card reader, which means you don’t have to find cords and adaptors. (I have a MacBook Air.)
Whatever you do, get all the photos over to your computer – and do it often.
Sort and organize photos
Before you can even think about designing photo books, you have to be ruthless while sorting and organizing photos. In theory, this should be done regularly – I think doing this monthly would be amazing. But I don’t think it’s uncommon to put this off. (My new goal is to do this annually.)
In my case, I simply organize all photos by monthly photos in iPhoto. When I upload photos, I just drag and drop them into the monthly folder. When I take the time to go through the photos to sort and organize, I choose only the best photos and ditch the rest.
Deleting photos can be hard, but I find it is easier when you just make a gut decision. I delete any photos that are duplicates, unflattering, or out-of-focus. I only keep the best – or those that I love even if they are imperfect.
While you CAN save all the photos you’ve taken, I find it totally unnecessary. Why keep anything but your favorites? If I would never print or include a photo in a photo book, it goes. This ruthless purging also makes the process of building a photo book much easier down the line – because you’ve already chosen the best, and they are already in order.
Back up photos
A few months before Henry was born, my computer died and I lost a lot of photos. All of the photos of my pregnancy. Between the actual sadness and the hormones, I cried. A lot. But it was a learning experience for me – and I’m pretty adamant about backing up photos now. (And as a bonus, it happened before Henry was born and every single photo was so much more priceless.)
There are tons of services that help you back up your photos, so it’s a matter of choosing what works for you. Just do it. Please.
Because it was so devastating to lose photos, I like to have several backups, just in case.
My computer automatically backs up to an external hard-drive every night. This ensures that all photos will be backed up from the computer if something happened. But, after I sort and organize, I like to have another few backups in place of just the best photos I’ve kept:
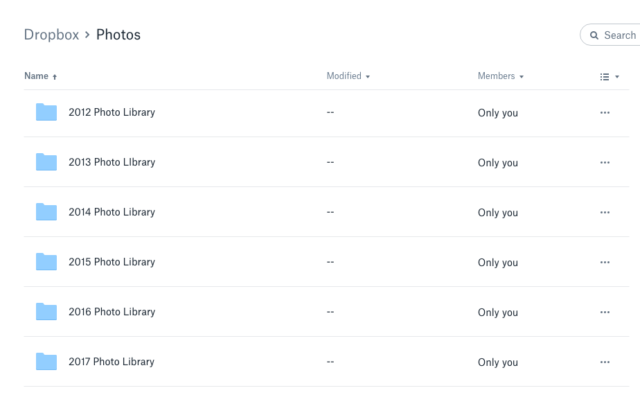
- First, I export all photos to Dropbox. Here, I organize them by year and month in folders. I love Dropbox because I can access my photos easily on my computer or my phone. I have a paid account to allow for the amount of space needed for photos and other files. There is also an option to automatically back up photos from your phone or computer on Dropbox, but I choose to do it manually so I’m only saving the photos that I’ve sorted.
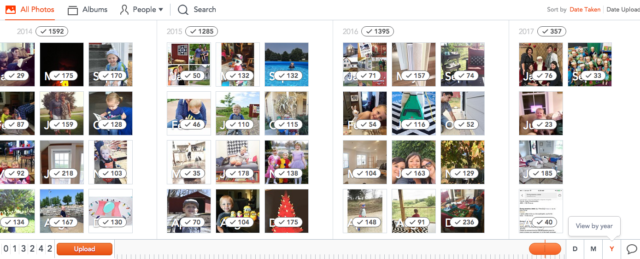
- Next, I export all photos to Shutterfly My Photos. This kills two birds with one stone. It backs up my photos in another place, and it makes them readily accessible when I want to create photo books or other projects. I also love that you can easily access all photos by year and month. There’s also an option to automatically save photos to Shutterfly via the app, but I choose to do it manually so I don’t have duplicates.
- Finally, I manually back up the folders by month and year to a physical backup hard drive.
Once I have these backups, I delete them from my computer to free up space.
This probably seems totally over-the-top to have so many backups. But I like to have my bases covered. And when I’m doing it, it goes pretty fast to do it all at once.
The best part is that I don’t have all my eggs in one basket. And all the photos are easily accessible.
A note on social media: I like Instagram and Facebook. Sometimes I share photos there, too. But I never consider this a backup, and you shouldn’t either. By all means, share your photos – but back them up somewhere else, too. Don’t trust your social media sites to be the only backup.
Create photo books
Now that your photos are sorted, organized and backed up, it’s time for the fun part – creating photo books. I’ve used many services in the past, but I always come back to Shutterfly for photo projects. And especially for photo books. They are the pros.
Shutterfly offers almost any custom photo product I can imagine. The products are great quality. And the price is always affordable.
For this project, I needed six years of photo books – which is a big undertaking! But I found a few workarounds to make it go more quickly.
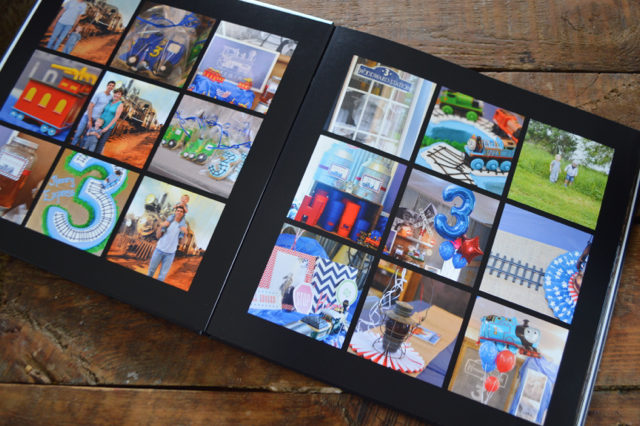
I started with the Make My Book service. I simply chose a design style and size, selected the photos I wanted for the book (from where they were already uploaded to My Photos), and gave some simple instructions. For example, I prefer photo spreads with more images, wanted photos in date order, and didn’t want areas for text to be inserted.
In just a day or two, I had a photo book started by a designer to my specifications. Then, I went through and adjusted layouts, moved photos, and created the cover and back exactly the way I wanted.
Once the first photo book was created and I was happy with the layout, I copied the book and saved it as the next year I was working on. This saves the size, design and layouts.
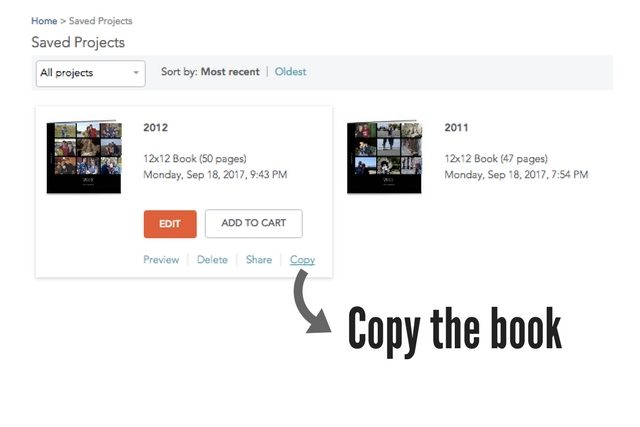
Once you get into the book, you’ll need to choose new photos and remove the photos from the prior year’s book.

This creates a blank book, which allows you to pull the next year’s photos and then place them into the book.
This meant I didn’t have to worry about the overall design or cover – I already chose something I liked and could just place the new year’s photos in the design. (I could also adjust the page layouts as needed.)
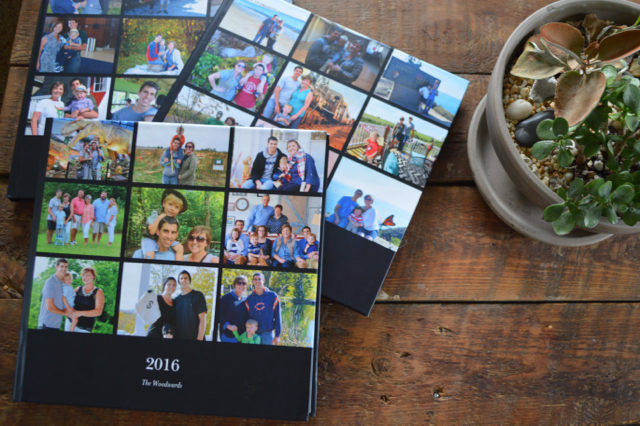
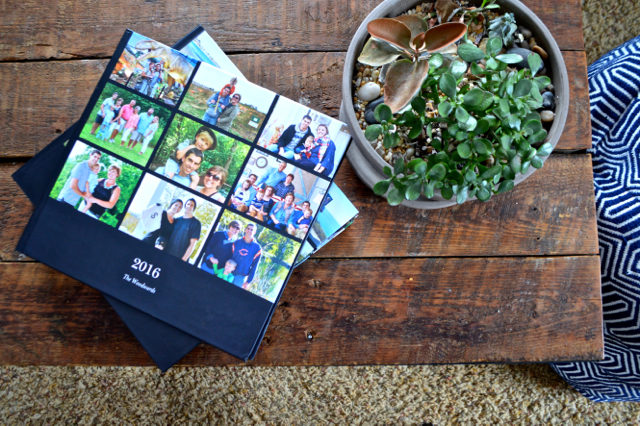
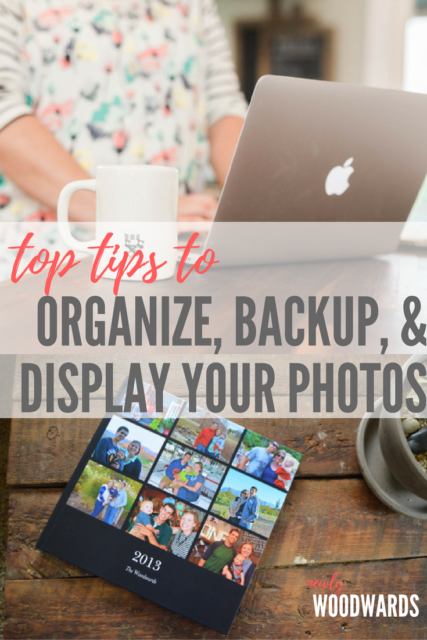
I like that all the photo books have a cohesive look. They feel more like beautiful coffee table books to me. They are pretty enough to be displayed. I chose favorite family photos for the front cover from that year.
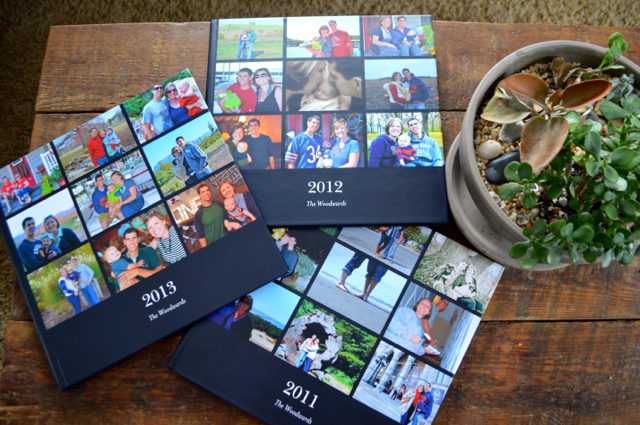
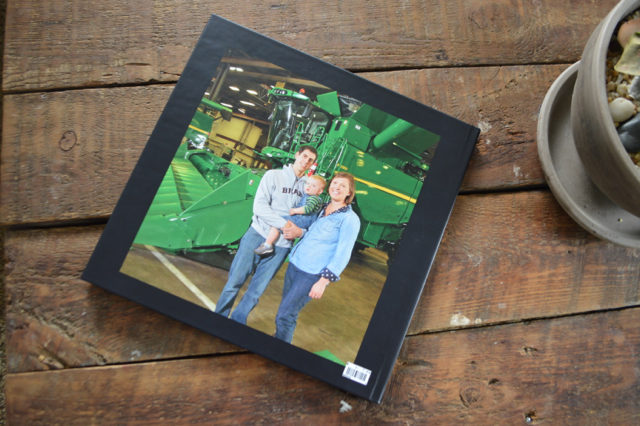
On the back, I chose a larger image of our family from that year.
As for features, my favorite add-on choices are the matte cover and the standard layflat pages.
Some of the yearbooks had more images and pages than others – but they all look similar despite the spine size differences. (The smaller books were created for prior years.)
In the end, this was a project that took a lot of time and effort. Organizing, sorting, backing up and creating photo books is a big job.
But is there anything more special than photos of your family? And now, we can truly enjoy them in our home every single day. Totally worth it.
Loving photo projects? Here are a few other things I’ve created in the past:
- A milestone birthday photo book
- A custom holiday gallery wall
- “Who loves baby” custom photo book
- An anniversary photo tablescape
- Holiday photo cards
- A holiday tablescape
- Photo anniversary gifts
Thanks to Shutterfly for sponsoring this post and helping us get up to date with photo books. As always, we don’t post about anything we don’t love. Thank you for supporting NewlyWoodwards sponsors to help make posts like this possible.
Like this post? Put a pin on it.
Did you like this post?
We'd love to send you more inspiration and encouragement for your home. When you sign up below, we'll send you our free guide to save thousands on your next home project. Because your home shouldn't own you.