Psssst: This is a project we created with our Black+Decker Lithium Drill/Driver. If you want to try it yourself, make sure to enter to win your own drill/driver AND a circular saw on our giveaway post – you only have a few more days.
I had a very clear vision for the mudroom. It was simple and practical and pretty and clean.
Okay, the clean part is clearly just in my dreams because we live in the country and have two dogs and two dudes who drag in a ridiculous amount of dirt and muck.
But the simple and practical and pretty can be achieved, I think.
And because, in my mind, a mudroom is something that needs to be functioning soon after moving in, we wasted no time. I needed a place to put our shoes and hang my purse.
Life-altering things, folks.
The biggest part of my vision were rows of Shaker peg rails. Are you familiar with peg rails?
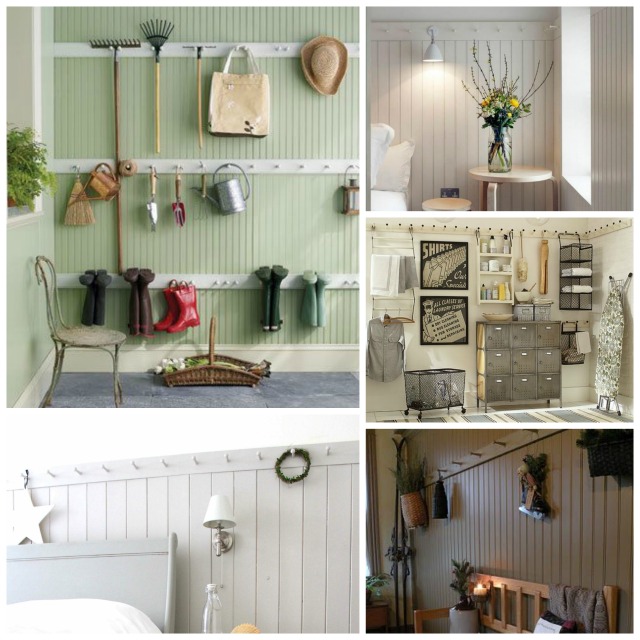
Sources, clockwise from top left: Martha Stewart, Remodelista, Helena – A Personal Organizer, The Primitive Country Bug, Modern Country Style,
In my opinion, there’s nothing more simple and beautiful than rows of Shaker peg rails. They are clean, functional and attractive. They go with almost every style of home – but particularly feel at home in a farmhouse.
These Shaker peg rails were popularized in Shaker dwellings – where they were installed at shoulder height throughout the home. The pegs held most all belongings – from brooms to baskets to coats to clothes. (Shakers typically didn’t have much.) This kept things neat and off the floor – and it kept things close-at-hand.
Those Shakers. They knew their stuff.
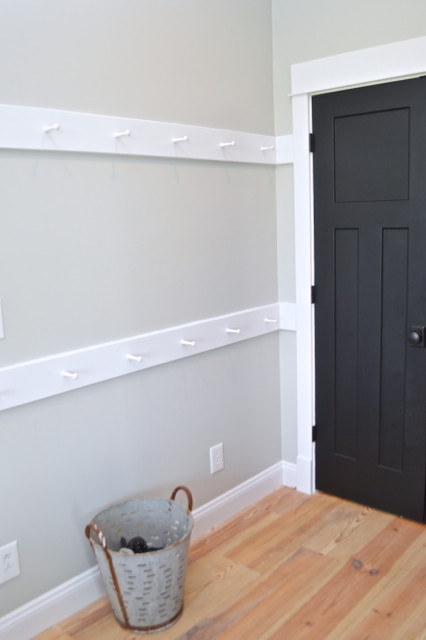
Here’s our take on the Shaker peg rails – DIY style.
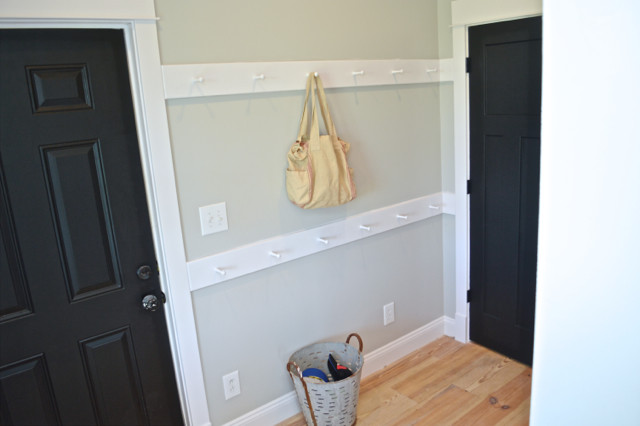
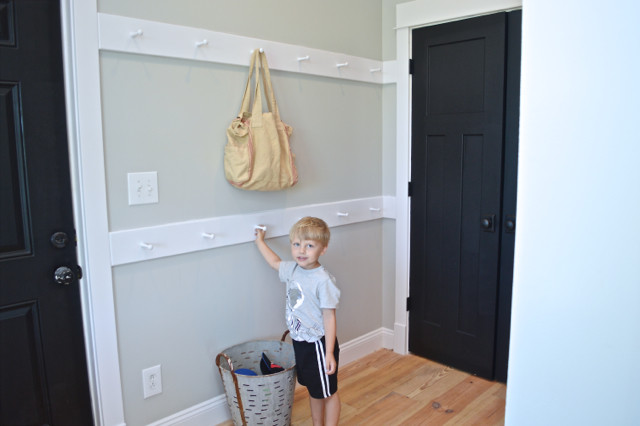
All my wildest dreams are coming true. And they are so pretty I almost don’t want to hang anything on them. But that’s just crazy, so we will.
These are really quite simple to create – I purchased the Shaker pegs from Home Depot (packs of 2). Ryan used a piece of trim we already had on hand. (Typically these rails would have been slimmer, but the heft looks nice amongst our existing trim work. And we didn’t have to buy any new lumber.)
I wanted two full rails – one at our height and one at Henry’s.
First, Ryan cut the boards to fit the entire wall and we measured out the spacing. We spaced the pegs approximately 12 inches apart and started at 6 inches from the door. Ryan measured and marked the location of each peg.
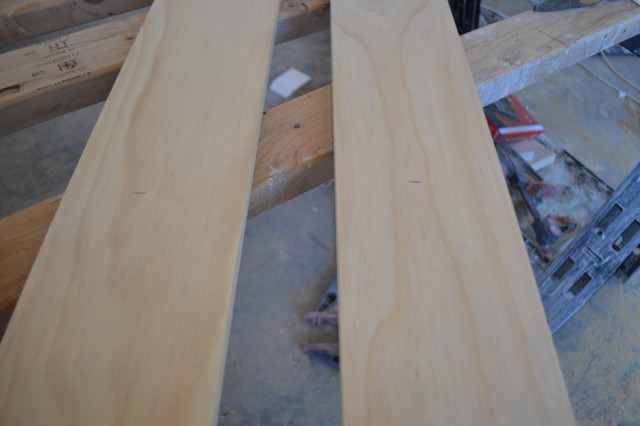
Using a drill bit slightly smaller than the pegs, he drilled holes through the board. 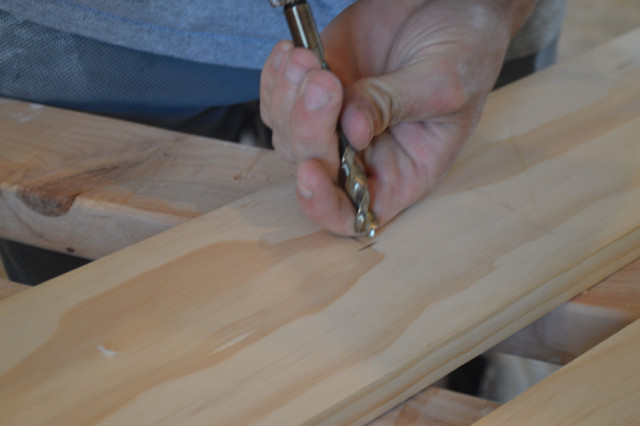
This left us with the perfect sized hole for our pegs – which he glued and slid into the hole.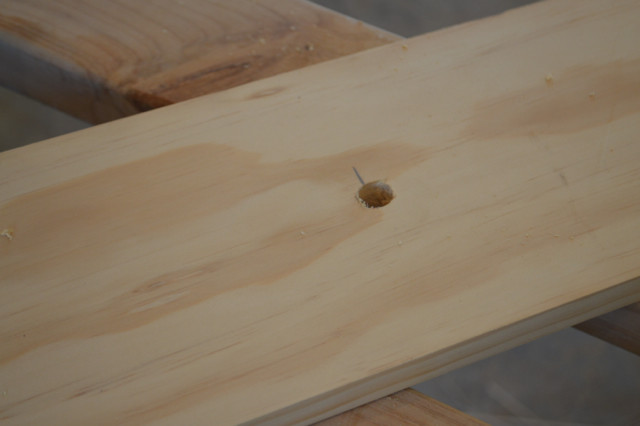
To finish, he sanded the rails, rounded the edges and installed with his air nailer. We filled and sanded the nail holes and I painted with two coats of Behr semi-gloss Alkyd paint in white. (Thanks to Behr for providing the paint for this project.)
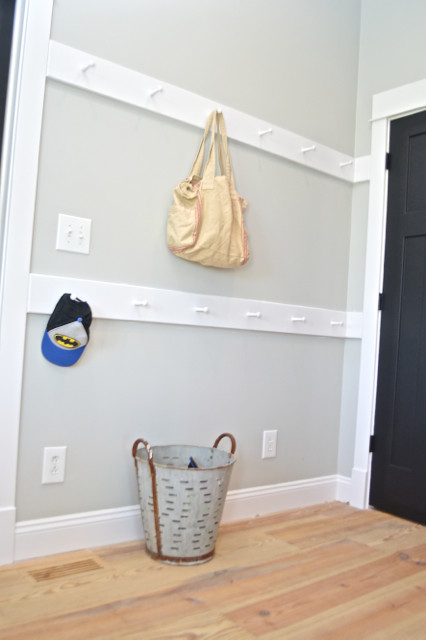
There are still some other elements we need to add – like a nice storage bench and our shoe cabinet to the opposite wall. But these pegs have already helped this space tremendously.
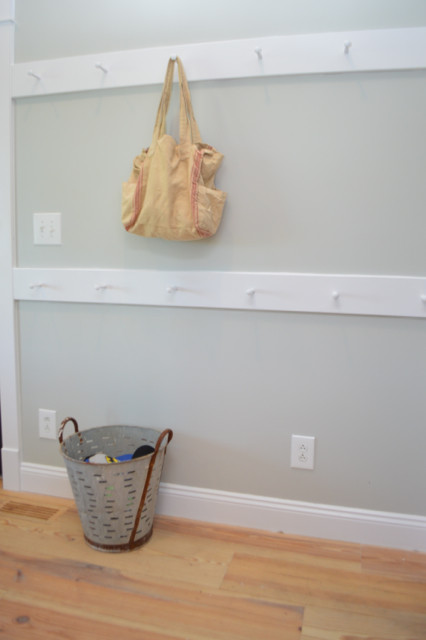
While coats aren’t a current issue – bags always are. It’s a great spot to store beach bags, backpacks and purses. And Henry loves them as much as I do. He’s been experimenting with what he can hang there. Capes work well, by the way.
I love it when functional is also pretty.
Did you like this post?
We'd love to send you more inspiration and encouragement for your home. When you sign up below, we'll send you our free guide to save thousands on your next home project. Because your home shouldn't own you.
oh, I love those! You can never have too many places to hang things (is what I’ve learned from being a human), and these look fabulous!
wow! that looks just so perfect in your home!
LOVE those Shaker pegs! Not only pretty to look at, but they also keep things organized! (Up and off the ground is the best — why is that things seem to just pile up on the floor?)