My Silhouette Portrait has been getting a workout. In fact, if it were human, it would be in much better shape than yours truly.
Like, fighting, marathon-running, Cross Fit Cindy shape.
One of my favorite tricks for using the Silhouette is the print and cut feature. It allows you to design something in the Silhouette software, print it on your home printer, and then cut it with the Silhouette.
CRAFTING. LIFE. CHANGER.
(This post is not sponsored, by the way. I just thought it may be helpful for others so I spent an embarrassingly long time going through all the steps to spell the process out in case it seems overwhelming. Because if you have a Silhouette, you simply must use the print and cut feature.)
Why is this a life changer?
If you have to ask this question, then we cannot be friends.
Not Kidding.
If you have ever stayed up until 1 a.m. cutting out pennants or favor tags or party decor or something else, you will understand. It basically takes all the hard work out of making anything cool.
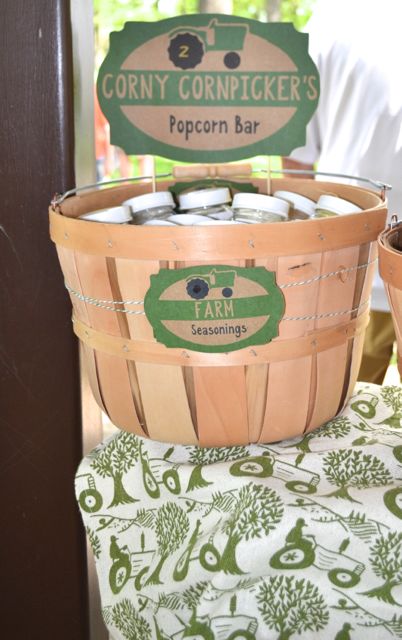
Yes. I’m being dramatic. But the first time I used it was when I was making tags out of Kraft paper for Henry’s tractor party. And angels started singing and the clouds parted. I was so impressed, I started making tags for everything. I couldn’t stop myself.

I am always so excited about how my projects turn out when using this feature, I thought I’d share a tutorial using it.
One project I’m currently working on with a friend is a fun fall themed baby shower. I found this “cutest pumpkin ever” shape in the Silhouette Store. I thought it would make a great addition to the decor.
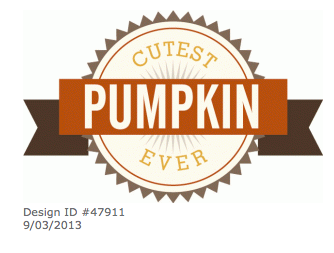
I purchased the shape and imported it into my Silhouette Studio Software.
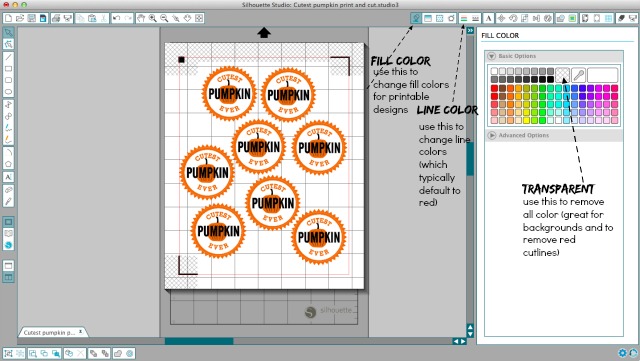
Designing/Adding Color
A few notes/tips:
- Ungroup the shape (by right clicking – ungroup) to use all the elements separately. (This is important because you’ll want to move/delete/color all the elements by themselves.)
- Move the shapes around until the design is the way you like it.
- To add colors, select each shape individually and choose to add fill color or line color (see above). You can play around until you like the look. (Also remember to right click the shapes to move to the front or back, just like in other programs.)
- Typically, my software defaults all lines to red (for cut lines). You’ll want to change those colors to another color or to transparent. Otherwise, you’ll end up with designs with red lines. Ask me how I know.
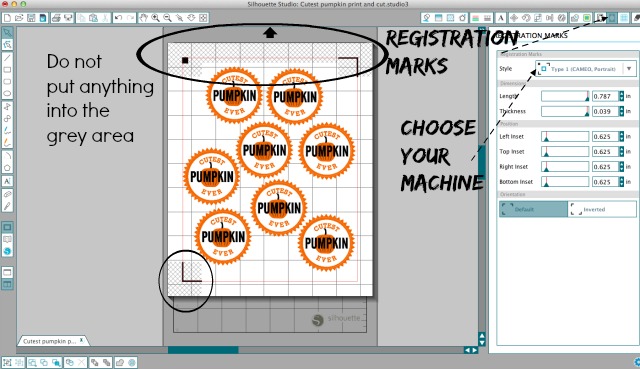
Adding registration marks
Before printing, you’ll need to add registration marks, which allow your Silhouette to read the design and cut correctly.
To do this, get into the registration marks window and choose your machine. This will add the little doohickies below. Now, you can copy and paste your design as many times as you want on your screen. (Just make sure not to put anything into the greyed out areas at the top and bottom.)
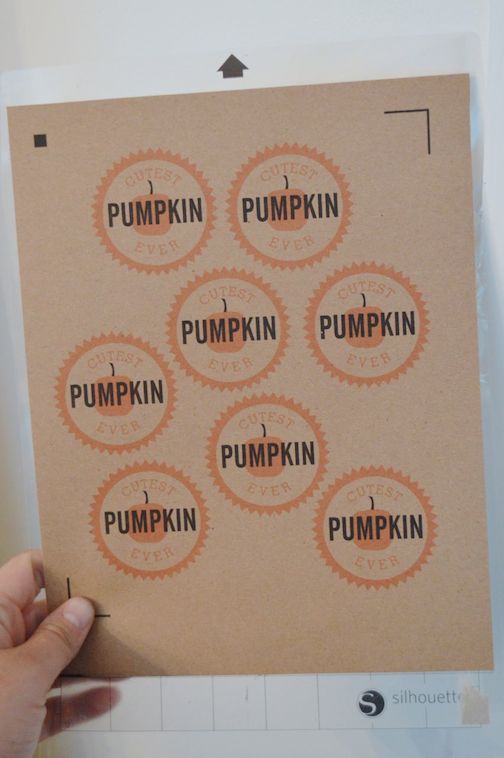
Printing
Now, just select “File – Print,” like you would with any other document. I printed on adhesive Kraft paper. Because everything is better with Kraft paper and it’s a bonus that it’s already sticky – perfect for favor tags.
Confirm that all of your designs printed correctly. And pay extra attention to the registration marks on the top and bottom left. (If they don’t print, you’ll need to print again. Pay attention to the size of the media you’ve chosen in the Silhouette software. The few times mine haven’t printed were because my paper size wasn’t set to size 8.5×11.)
Now, just put it on my Silhouette mat to cut like normal.
Cutting
Before cutting, you’ll want to check that your design is set to cut what you want it to cut. (You typically don’t want to cut every single letter of the shape, since you’ve already printed it.)
In general, I use the option for “cut edge,” which means that you’ll only cut around the total shape. (If you choose “cut,” you’ll cut every letter, line, etc., which defeats the purpose of printing. Ask me how I know.)

Now just choose your material and cut on your Silhouette. (You’ll need to change your blade, feed, etc., just like you always do.)
When you cut, the Silhouette will first scan those registration lines. So, make sure you line them up on your mat as straight as possible. If your software tells you that it cannot read the lines, re-align the page and try again.
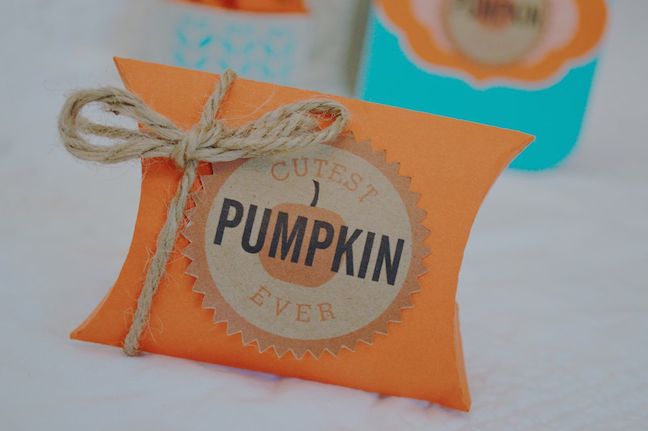
And just like that, you’ll have a perfect cut around your shape – with no late nights or painful Edward Scissor Hands. It’s such a great, custom look. And I love that after designing, I can go back in and change words and size of the shape to create coordinating elements – banners, food labels, favor labels, invites …
Here’s one of the boxes I made to affix the sticker onto.
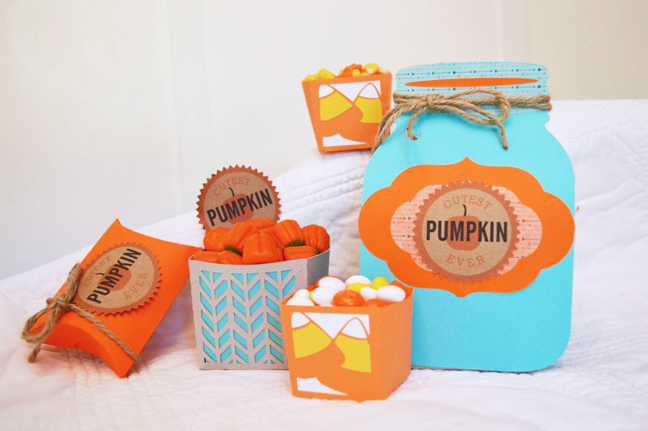
I also couldn’t stop making boxes. I’m sharing the whole lot of boxes for this party over at the Silhouette blog today, if you are interested in seeing them in detail.
What do you think? Will you use the print and cut feature?
Did you like this post?
We'd love to send you more inspiration and encouragement for your home. When you sign up below, we'll send you our free guide to save thousands on your next home project. Because your home shouldn't own you.
I don’t know what I am doing wrong. I followed all the steps and keep getting the “registration failed” message.
Try adjusting the light around the machine – low light can cause issues. Otherwise, you can manually find the registration marks, too.
This may be a silly question but did you print to a computer printer or did your print using a sketch pen with your silhouette machine?
You use your computer printer.
On the picture that shows your registration marks, how do you see your print margins? I can’t find that option and just have to guess where my print margins are….!!!
There’s an entire tab for registration marks. (It’s one of the buttons at the top and if you scroll over them you’ll see it says “Registration Marks.” You’ll just add registration marks. You will have to do it before printing or it won’t work.
Good luck!
Thank you. I recently bought the Cameo and finally perfected the vinyl. I’ve been a little scared to try the print and cut. This was very helpful and probably saved me some tears and headaches :).
I wish I was a Silhouette master like you! I have one, but Nick was the one who used it for Ramona’s party last year. We didn’t even get real creative with it just the basic stuff. So when you plan your vacations down here (that’s happening right?), you need to work in some time to teach me how to use the Silhouette and become a craft goddess like yourself.
I couldn’t agree with you more Kim! Print and cut is a crafting game changer! I haven’t used the kraft paper yet, but it looks awesome on the tractor and pumpkin decor. Have you tried using the tattoo paper? It will blow your mind! Off to share this great tutorial…
Oh my gosh, I LOVE THE TATTOO PAPER. I seriously cannot stop making tattoos. (But I mess up so much I haven’t tackled sharing any of them here yet. I’m constantly printing them backwards or cutting everything instead of just around the shape.)
But seriously so fun! I haven’t experimented with tattoo paper anywhere but on Henry. I’d love to try it on wood utensils or even other stuff. Have you used them anywhere but on skin?
So much fun! Except for that time I spent forever waiting for my tattoos to finish cutting and kept thinking “That’s weird why is it taking so long” only to realize I was cutting all the lines. You are so not alone Kim. I’m gonna go out on a limb here and guess that most of your tattoos have been of trains too? Our boys would be fast friends 🙂 I haven’t tried them on anything else either. From what I’ve seen it looks amazing on wood.
Bahahah…. we are soul sisters. I have done that TOO MANY TIMES. I get in too much of a hurry.
Oh my goodness, I SOOOOO want a Silhouette machine. Every time you show me something, I just want one.
Can you design your own shapes and cut lines, or do you have to buy ready made ones? Oh the things I could make …
You can use any shape or fonts you have on your computer, it can just take a little more time and patience to manually do the cut lines. I don’t do that hardly at all (because I’m lazy) but a ton of people do. And sometimes you gotta do it.
Can you come over and plan my daughter’s birthday party with your silhouette?
I have one too but I’m not as good as you are 😉 I want to learn from you!
=) I’d love that!
Uhm, me too 😉
Holy Crow. I seriously wish I had a Silhouette. I need to get my hands on one!
You seriously do. It’s life-changing, and I’m not saying that to be overdramatic.
see, i don’t have patience for projects like this- i need you to live closer though so you can help me with all my parties, ok?
I wish I did live closer. You’d never get rid of me.