From ceilings to base trim and from siding to front doors – when it comes to painting, I’ve tackled it all, and I’m ready to share house painting tips for beginners. I’ve sprayed and rolled and brushed and sponged. (Seriously – sponge painting used to be COOL, guys.)
I’ve had success and I’ve had plenty of mess-ups. But painting is good for the soul – you take something ugly or outdated and make it new again. And it takes very little skill, money or time to do it.
Which means painting is the ultimate gateway drug to other giant renovation projects. And this is a good drug. So, you can consider me your dealer. Or enabler. Or whatever.
Over the years, I’ve come up with plenty of time, money and sanity-saving techniques for painting. Some were covered in my post The Lazy Girl’s Painting Tips.
This was so popular that I’m back with my favorite painting hacks. These are tricks and tools that save me time and energy when I’m working on painting projects. Some of the links included below are affiliate links, meaning, if you click through and make a purchase I will get a commission (at no additional cost to you).
HOUSE PAINTING TIPS FOR BEGINNERS
Add aluminum foil to your painting toolbox.
It’s rare that I’ll finish a project in a day. But if you are like me, you dread washing your brushes or rollers between coats.
Luckily for you, you don’t have to.
My mother-in-law (and my paint guru) is the one who turned me on to the power of a roll of tin foil. Now, I always have a roll of foil when I’m painting. And since I’ve mentioned this before, I know several of you have also become tin foil converts.
Use it for lining your paint trays if you don’t want to “splurge” for a tray liner. It works well and is easy to toss in the trash following your paint job.
This is also the perfect way to keep your brush or rollers wet between coats. I just wrap the roller cover or brush completely in aluminum foil and then store in a Ziploc bag. The paint will stay wet for AGES. (Like, I’ve been able to pick up a roller after 2 weeks and get right to work.)
This saves you time (no cleanup) and money (no new brushes or roller covers) when working on projects. And it’s particularly helpful when you are working on multiple paint projects at once. I just label the bag with the room I’m working on. (Don’t skip this, or you’ll risk painting the wrong room with the wrong color. Ask me how I know.)
Bonus tip: If you are working on bigger projects (like trim), it can take weeks. I keep my paint brush in foil for weeks and just work on the project when I have a few minutes. Having a brush and paint ready to go makes it easy to work on small sections at a time.
Paint in a W.
When rolling your walls, make sure you are painting in a W, instead of directly up and down.
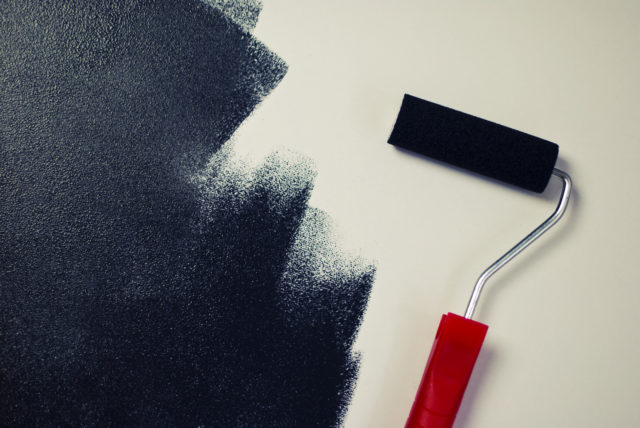
Doing this ensures a smoother finish, and keeps you from seeing “lines” in your paint from excess.
Load your paint roller properly.
For years, I wasn’t properly loading my roller before I painted. This meant that my paint could be uneven and even gloppy. There were times I didn’t get good coverage. And there were plenty of times that I had dried paint ridges (known as lap marks). This happens when your roller has too much paint and squeezes out the sides.
But I learned a great tip to avoid this when I had the opportunity to visit Behr in California.
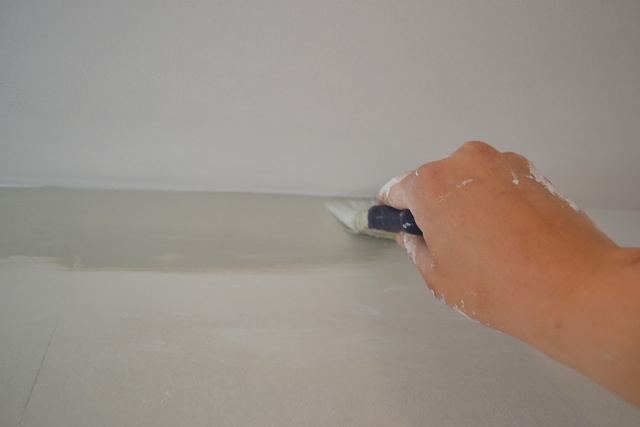
It’s all about properly loading your paint roller in your tray. Instead of dunking the whole roller in paint, you want to roll it gradually on the roller tray, which means it builds up a base level of paint on your roller instead of being overfilled.
This will take a little longer – but you’ll just roll the paint roller on the tray, back and forth, gradually adding more paint until your roller has a base level of coverage.
(This will also help you get more coverage from your paint in one coat.)
Store paint in squeeze bottles.
Cans of paint aren’t the most practical way to store paint for quick projects. They can be a pain to open and close, require a lot of space to store, and can make a mess.
That’s why I store most of my paint in squeeze bottles. (I use these 32 ounce bottles.)
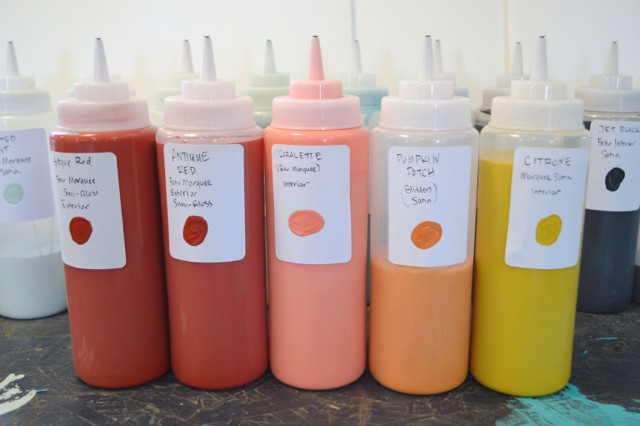
I’ve used these for about a year and they work great for small projects, touch ups and crafts. It looks better than the big cans. You can actually see the colors you want to use. And they take up less space on the shelves, too.
Skip the tape.
If you are working on basic painting projects – it’s not always necessary to tape off the ceiling or trim. In fact, for most projects, I think it’s time to drop the tape like it’s hot.
It’s just so much faster and less tedious to cut in with a good, short, angled brush. (This is the one I use and love.)
I’m not much of a perfectionist, so this works for me. The angle brush helps make the line straight, and it’s easy to touch up any mistakes. It just takes a little practice and a steady hand.
But a big caveat: if you are painting stripes or extravagant patterns or spaces where it will be difficult to cut in, painter’s tape is still a necessity. So carry on. (And make sure it to get it adhered very well so you’ll get a crisp line.)
Keep a record of all paint colors.
There’s nothing worse than realizing you don’t know the paint color or sheen you need for touch up in a certain room. In our first home, I touched up all the paint in the house when we moved. With the wrong paint sheen. That meant I had to do it all over and had to buy more paint for a house we sold.
(Face. Palm.)
I’ve also learned that some paint brands have two colors with the same name. (Don’t even begin to ask me how that happens, but it’s totally true. For proof, I have two words for you: Washed Khaki.)
There are apps and tools out there that could help you with this. But I keep it simple – I have a simple note on my phone called PAINT COLORS. I just add the paint name, room and date in a list. Then, I take a photo of the top of the can and the front of the can and insert those photos below the pictures.
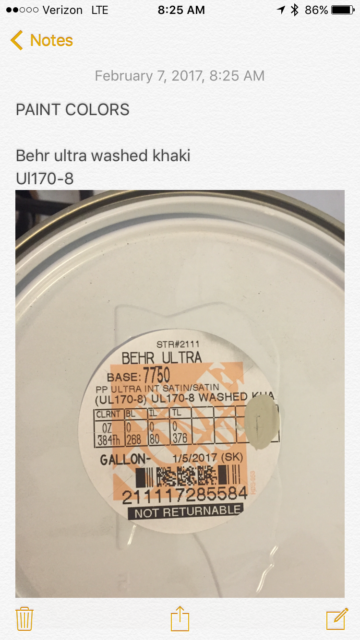
This makes it super simple to find the colors when you are at the paint counter.
And the best time to add these colors? When you are working on your project. As you put your paint away, take a few quick photos and you are done.
Skip the paint samples.
Everyone will tell you that the best way to choose a color is by purchasing the paint samples for a few bucks. This will help you find the best color for your space and light.
But, if you are like me, you don’t want to drive all the way to and from the paint store for a sample. And then have to drive back to the paint store to get your gallon. We live almost 30 miles from Home Depot, so this isn’t a small trip.
So I typically skip the small samples.
Instead, I start by narrowing down the colors through paint swatches. I have a few paint decks I use for swatches. Then, I turn to Google Image Searches and Pinterest.
I type in the name of the paint color and scroll for rooms in that color. This is a good way to find actual rooms using the colors you like.
However, this works best for popular paint colors. If I don’t find anything this way, I upload my own image. Almost all of the major paint brands offer this option.
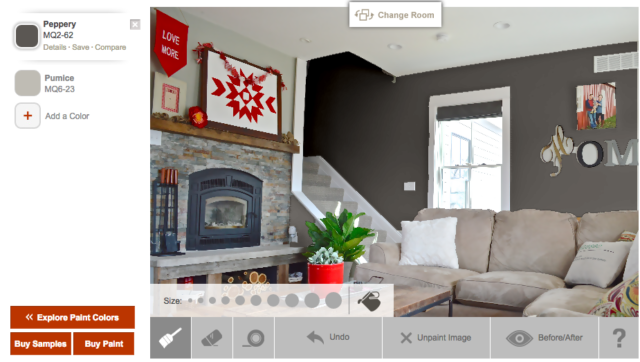
I’ve always used the Color Smart app from Behr. It’s available as an app on your phone, and it’s also available online. (This is not a sponsored post in any way. I’ve just been a Behr paint lover for many years. I’ve often whipped out my phone in the paint aisle to help my new besties pick paint colors. I’m sure the folks at the store love me.)
Using an app is a good way to see how a color could look in your space. I just spent two minutes playing around and painted our living room in Behr Marquee Peppery. I’m loving this drama. (The walls are currently Pumice.)
There’s certainly still a risk that the color may look different in your home, but I think that these are easy ways to confirm your paint choice, without leaving your home.
Don’t pay too much for paint.
While paint is probably the least expensive way to change a space, there are still some easy ways to save money on your paint purchases. And because you want to save for those more expensive upgrades, don’t just fork over your credit card before you try these tips:
- Save your purchases for sale and rebate times. I like to save my paint purchases for when Home Depot is offering rebates. (This happens during almost every holiday.) Sherwin-Williams also offer 20 and 30 percent off fairly regularly. And Menards also offers 11 percent rebates. Sign up for email updates from your favorite paint brands to ensure you know when sales are happening.
- Buy gift cards on a discount. We’ve become big fans of using Raise to purchase gift cards at a discount. This is basically an online marketplace for gift cards. You can buy them at a discount for stores you are already frequenting. I like to watch Raise for gift cards to Home Depot, and then use the gift cards to buy paint and other home improvement products. (Right now, Home Depot gift cards are 7 percent off.) The best part is that purchases on Raise are guaranteed, so no risk. (Sign up for Raise with this link and we’ll both receive $5 toward our next purchase.)
Most of these tips are simple – the way a good hack should be. But they can make a huge difference – in your paint job, your sanity and your budget. Go forth and paint, my friends.
But before you do, riddle me this:
What’s your best paint hack?
If you like it, put a pin on it.
Did you like this post?
We'd love to send you more inspiration and encouragement for your home. When you sign up below, we'll send you our free guide to save thousands on your next home project. Because your home shouldn't own you.
I’m a little late but I’ll add this anyway. I use aluminum foil to cover the rim of the paint can. No more crusty rim! Also, I wet the brush before beginning to paint. It keeps the paint from getting deep into the bristles. Just be sure to shake it out well after wetting it.
Great ideas! Thanks so much for sharing!
If you catch a sale or have a coupon, and know the base (white, light, dark) of your paint, you can buy cans without having them tinted. Buy in bulk and then go back to get them tinted when you know what color you want to use. HD also will honor a competitors coupon (like Sherwin Williams).
Great tips! Thanks!
I use a large tray for my paint can & lid (catches drips!) and if painting trim in less than full sunshine, I wear a headtorch to help me see (I try and remember to take it off if the doorbell rings!).
Love the idea of the head light! We have one of those I’m going to find for my closet painting. Thanks for the tip!
I am in love with those Wooster brushes. I have like 5 of them… Kurt likes to “organize” my supplies and I can’t find anything, then I locate the originals after I have purchased two more… lol
I signed up for Raise. I’m not great at planning ahead, so I probably won’t ever think to use it, but happy unbirthday to you.
I’ve used the foil trick for a long time but if I’m going to paint again in the next few days, I use a small trash bag to cover my paint tray. I squeeze out most of the air and tie it closed with the twist tie.
Also, I never paint without having a damp rag at the ready, especially for things like cutting in at the ceiling, as I don’t have a very steady hand and it’s so much easier to wipe off the mistakes before they dry.
Cheri – great idea! I’ve also grown to love using baby wipes for paint jobs. It works to clean off mistakes and my own hands/face/wherever I get paint. Thanks for sharing your tips!
You are such an enabler 🙂 such great tips. I love the squeeze bootle idea and had no idea that you could buy gift cards at a discount.
Oops *backroll
I bankroll. Also a tip from Behr. Work your W pattern in a 4ft space. Then go back and roll top to bottom over the section you just painted. This keeps your nap going in the same direction and helps you to catch any spots that were missed on the first pass. The key is to only lightly reload or not at all before you do this! Once you’re in the groove it takes no time at all!
Great tip!
Cling Wrap over the paint tray to use the paint the next day. I also put the used brushes/rollers in a baggie ($1/box at the Dollar Store), twist tightly around the handle and lay the brush/small roller down so that the baggie doesn’t come loose. Brush is ready for use again the next day.
Great tips!
Yay! I’d like to think I had a small part in inspiring you to write this post 😉 besides of course loving the foil trick, I’m a big fan of the shorty angle brush and no tape. Makes you feel like you’re as good as a pro!
Aluminum foil is too shiny for me. Lol. I use Press-and-Seal wrap. Tighter seal on the brush/roller
Lol! Whatever works! Same idea!